

Table of Contents
Did you lose your Pages document by deleting it, replacing it, or exiting the Pages app without saving your work? Good news! In any of these scenarios, your document isn’t permanently gone (yet). In fact, there are different methods to restore your document depending on your scenario.
How to Recover Unsaved Pages Documents on Mac
In case you were unable to save your document before closing the Pages app, it crashed or Pages quit unexpectedly, or your computer suddenly lost power, macOS’ built-in autosave features may have captured a version of your document. We can recover an unsaved Pages document by restoring that captured file version.
This is implemented on multiple levels and gives us a total of 3 ways to check for a save file. We’ll cover each of them in the guide sections below.
Method 1: Find Unsaved Pages Document In Recent
The Open Recent feature in macOS Pages allows users to view (and load) the last 10 documents opened. Even if you didn’t actively save the document, Pages might still find an autosaved version (or you may have saved an unnamed version). In the Pages menu bar, click File > Open Recent.

Method 2: Search For Unsaved Pages Document Using Finder
If your document isn’t in Pages’ recent items, it may still be somewhere in Finder – in some cases, without a file name. Fortunately, Finder provides a powerful search tool that helps users locate any file not only by name, but also by last opened/modified date, content, and other parameters.
- Open Finder.
- On the menu bar, click File > Find.

- For the Kind parameter, select Document. Then, click the + button to add more parameters. Keep adding parameters until you find the document you’re looking for.


Method 3: Check For Previous Versions in Temporary Folder
You may also be able to retrieve unsaved Pages documents on your Mac from the system’s temporary folder. Mac’s temp folder is meant to temporarily store files when an app process requires it (for ex. the Undo function in many apps).
First, launch Terminal app (Finder > Applications > Utilities). Then, type the following command and hit Return:
open $TMPDIR

This command will open the Temporary Folder in Finder, where you can attempt to locate your unsaved Pages document.
How to Recover Deleted Pages Document on Mac
Even if you deleted your Pages document in Finder and from the Trash folder, it’s still possible to restore it. In fact, there are 3 ways to do it – 2 of them do require that you’ve enabled iCloud or Time Machine. However, you can recover deleted Pages documents on your Mac with Method #1 even if you don’t have any backups.
Method 1: Retrieve Deleted Pages Document With Recovery Tool
The easiest and most reliable way to retrieve a deleted Pages document on your Mac is by using data recovery software. Data recovery software can restore deleted files from your Mac as long as the data hasn’t been overwritten.
For this guide, we’ll be using a tool called Disk Drill. Disk Drill provides excellent support for macOS, natively recognizing HFS+ and APFS file systems. More importantly, it supports all macOS file types – like Pages documents.
- Download and install Disk Drill for Mac.
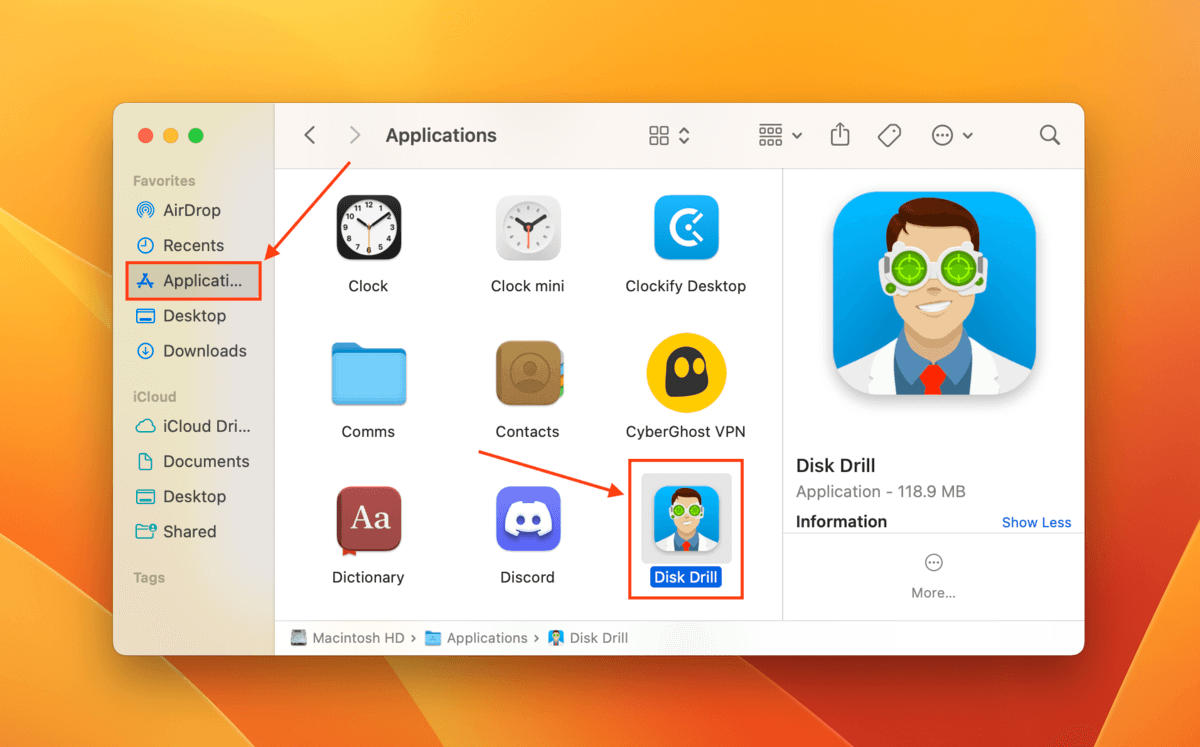
- Open Finder > Applications and double-click the Disk Drill app.
- Select the drive where your Pages document was deleted from. By default, that would be your system drive (a.k.a. APPLE SSD). If you saved it on a flash drive before it was deleted, select that instead. Then, click Search for lost data.

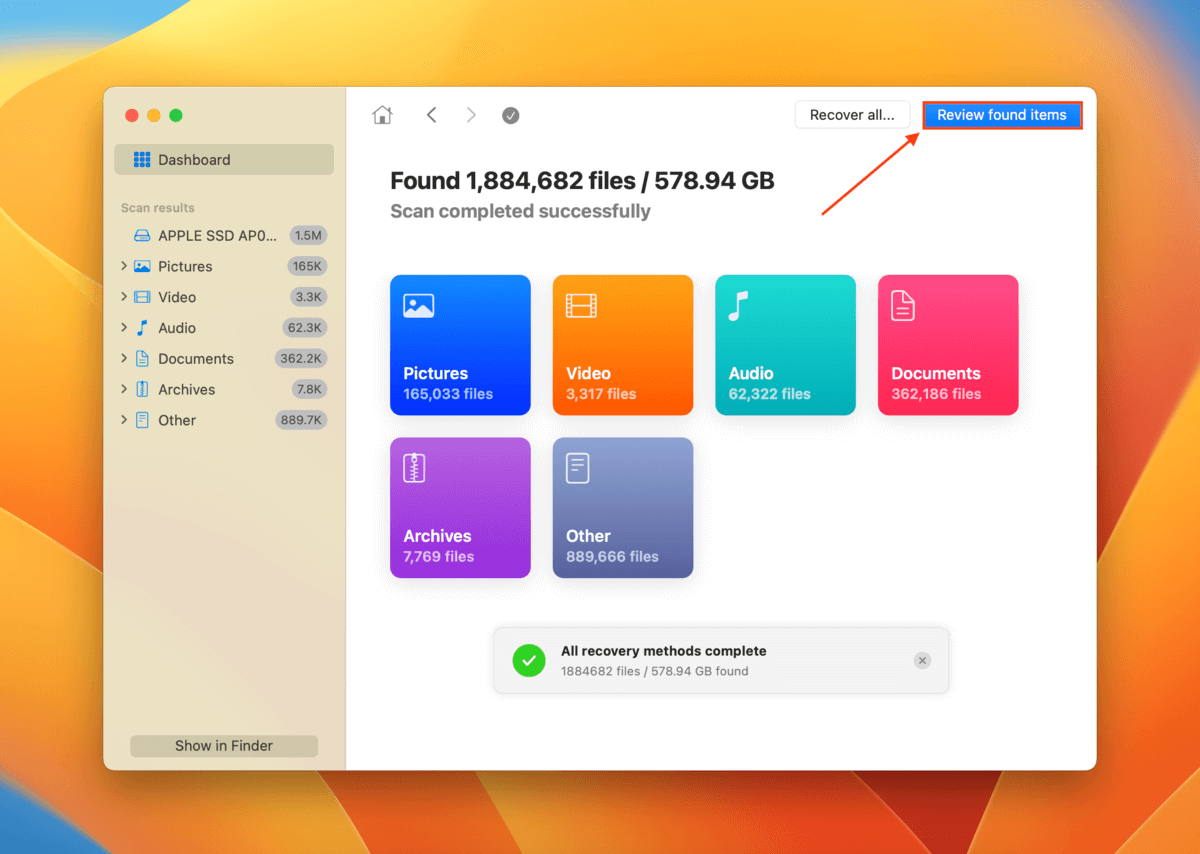
- Once Disk Drill completes its scan, click Review found items.
- If your Pages document disappeared or your want to recover a replaced Pages document, expand the Deleted or lost tab (you may also try expanding the Reconstructed tab, as Disk Drill fully supports and can reconstruct Pages documents). On the left sidebar, select Documents to filter the scan results – expanding the file type categories will give you more options. If you remember the file name, you can type in the search tool or simply type “.pages” to show only Pages documents. Preview your document by hovering your mouse pointer beside its file name and clicking the eye button that appears.

- Tick the box beside the document you want to restore. Then, click Recover.

- Specify a location where Disk Drill will save the recovered Pages document and click Next to proceed with recovery. We always recommend saving recovered files to external storage devices (like USB drives) to avoid overwriting data during recovery.


Method 2: Restore Pages Document From Time Machine Backup
The Time Machine app backs up multiple past versions of your files and folders, which it calls “snapshots.” If you enabled Time Machine before deleting your Pages document, you can access a snapshot of the folder that stored your document before it was deleted.
- Click the Apple button > System Settings.

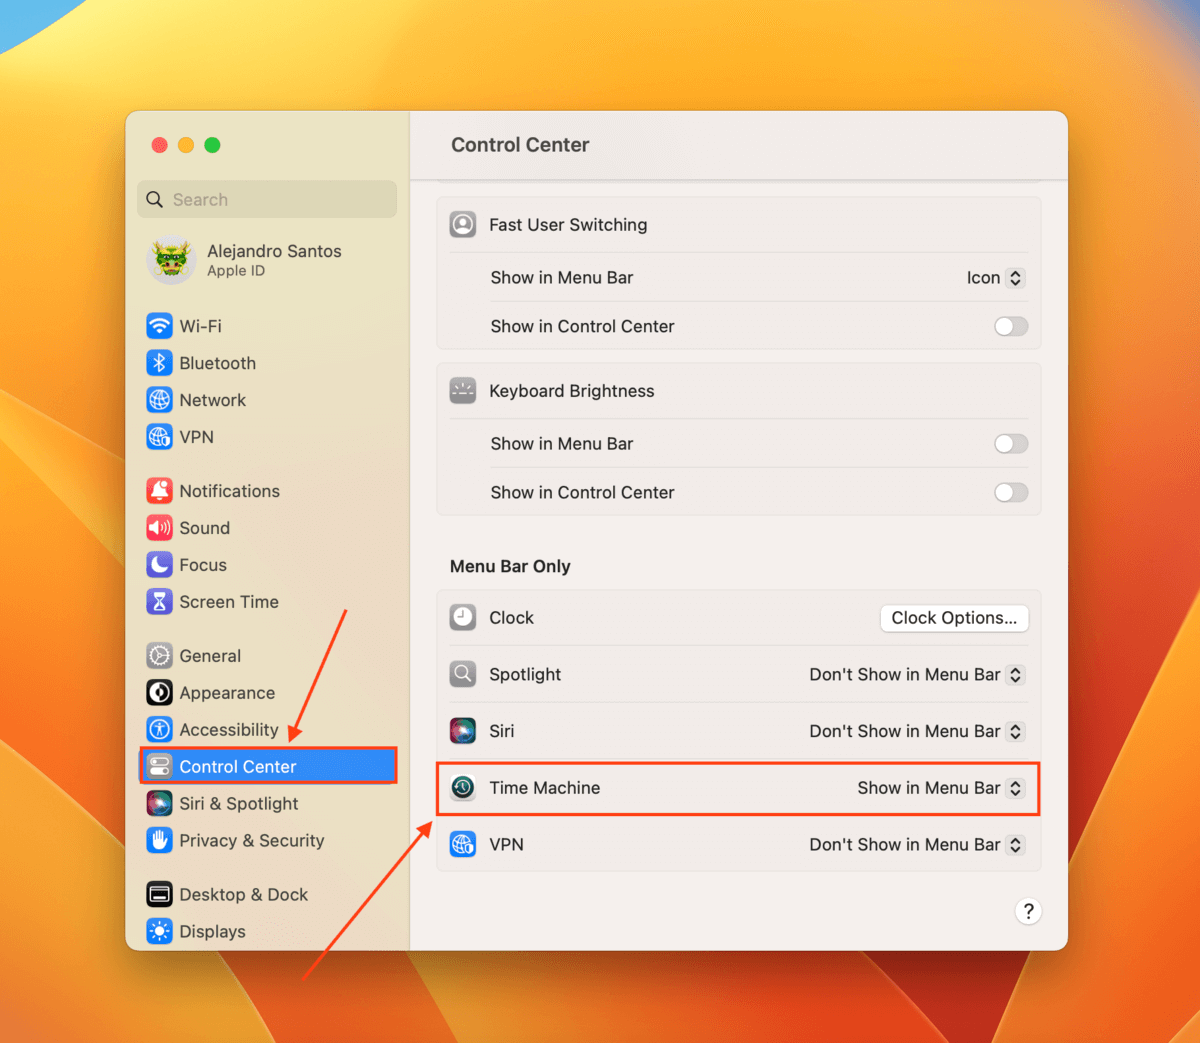
- On the left sidebar, select Control Center. On the right half of the screen, scroll down to the Menu Bar Only section and set Time Machine to Show in Menu Bar.
- Open Finder and navigate to the location where your Pages document was last stored. On the Apple menu bar, click the Time Machine button > Browse Time Machine Backups…

- Use the arrow buttons on the right side of the window to locate a version of that folder where your document hasn’t been deleted yet. Then, select your document and click Restore.


You should find your Paged document in the folder you restored from in Time Machine.
Method 3: Recover Lost Pages Document from iCloud
If you enabled iCloud on your Mac, you should have a copy of your Pages document backed up to the cloud. In fact, iCloud saves Pages documents in their own folder, making it easy for users to find their files.
- Log into iCloud.com.
- In the apps section, click the Pages icon.

- Select the Recently Deleted folder in the left sidebar. Then, select your document and click Recover at the top of the window. After a few seconds, it should appear in the Browse section.


How to Recover a Replaced Pages Document
The Pages app has an automatic “backup” feature that operates similar to Time Machine. New document saves are saved as new “versions” of a file, allowing users to access earlier versions. If you replaced the old content of your Pages document and saved it, you can restore the file to the last save.
With your Pages document open, click File > Revert To > Browse All Versions…

Use the arrow buttons on the right to browse through past versions of your document, including the date and time of backup. Once you find the version you want, click Restore.

The current document will be “updated” to display Save #1’s content, this time overwriting Save #2. Just make sure you don’t overwrite the actual document by saving a new document with the same file name, as the Revert feature will no longer have access to the old document’s versions.
FAQ
To recover accidentally deleted Pages document on your Mac using data recovery software:
- Download, install, and launch Disk Drill.
- Scan your Mac’s system drive and click Review found items.
- Choose Documents on the left sidebar to filter results and locate your file.
- Select the Pages file you want to restore and click Recover.
- Save to a USB.
To recover deleted Pages document on iPhone, open iCloud:
- Open Safari and log into iCloud.com.
- Tap Drive.
- On the top-left corner of the screen, tap Recents to expand the dropdown menu and tap Recently Deleted.
- Tap Select in the top-right corner of the screen and tap on your document.
- Finally, tap Recover.