

Table of Contents
Most data is recoverable if you simply delete the file. But all it takes is some new data – maybe you saved a new document or downloaded a program from the internet – for the deleted file’s data to get overwritten. And when data is overwritten, recovery chances drastically fall. But recovery ISN’T impossible… yet.
Why It’s Difficult to Retrieve Overwritten Data and What are the Consequences
Why is it so hard to recover overwritten data? Whenever a file is deleted, it’s not actually permanently destroyed or erased from the drive. Its data still exists, which is what data recovery software uses to reconstruct the file. However, it’s already “marked” to be overwritten when a new file needs to be saved.
When a new file is saved, its data is written all over the existing data in the block (the data of the “old” file). At that point, no remnants of the old data are left that can be retrieved or reconstructed.
- 💽 Availability of the backups – Backups, such as those created with Time Machine and iCloud, are the best defense against permanent data loss. Even if the original copies of data get overwritten, you’ll get your files back if the backup was created before overwriting.
- 📛 Potential permanent loss – When you download or save a new file, it gets written to a location where an old file was saved. The old file becomes irretrievable because its data is overwritten by the new file’s data.
- 🗃️ Limited storage space – Storage devices have a finite capacity. Whenever new data is saved, it’s stored in any storage blocks it deems as “available for writing.” This includes blocks that store the remnant data of previously deleted files.
- ⌛ Time sensitivity – Aside from the increased likelihood of multiple overwrites, overwritten data becomes harder to retrieve over time due to its magnetic patterns fading, wear and tear to the device, and fewer data remnants left available. Overwriting is also done in order, so the “oldest” data is overwritten first.
- 💾 Storage medium type – The type of storage devices you use affects your chances of successful data recovery due to their unique attributes. The most significant example is solid-state drives (SSDs), which have the TRIM feature. TRIM actively clears blocks of deleted data instead of waiting for it to be overwritten.
How to Recover an Overwritten Files on Mac
Let’s talk about the methods that can be used to recover accidentally replaced files on Mac systems. We will also talk about when data recovery software can work and why it is not always a viable way to recover an overwritten file.
To come up with these methods, we considered every scenario related to file deletion and overwriting as well as the nuances of drive behavior. We then evaluated different solutions for their efficacy – we chose the best ones and scored them according to the following parameters:
- Ease of use
- Data loss prevention
- The integrity of recovered data
Below, we discuss each method and what you can expect from the results (based on the scores of the above parameters), and we provided detailed guides that you can follow step-by-step.
Method 1: Recovering Using Local Backups Made with Time Machine
| Ease of use | Data loss prevention | The integrity of recovered data |
| 5 | 5 | 5 |
Time Machine is the built-in Mac backup and recovery tool that should be used by virtually all owners of Apple computers. All it takes is a removable hard drive connected to your Mac’s USB port to store the backup data. If you have backed up the file or files that you have overwritten, the following procedure can be used to attempt a recovery.
- Connect the storage media containing the Time Machine backup to your Mac or MacBook.
- Open a Finder window in the folder that previously stored the file that has been overwritten or replaced.
- Open the Time Machine application by clicking the clock icon located on the Menu bar.

- Navigate through the backups using Time Machine’s features to locate the version of the file you want to recover.
- Select the file or files for recovery. You can preview the file by pressing the Space Bar to ensure you are recovering the correct data.
- Click Restore to complete the recovery. It will be recovered to its original location.


Alternatively: Recover Snapshots from Local Drive
If you deleted (and overwrote) your files less than 24 hours ago, you may be able to restore backups from your LOCAL drive (the one running macOS) if your backup drive is unavailable or does not contain the data you need.
This is because Time Machine takes hourly snapshots and copies files that have been modified. These copies are stored locally for up to 24 hours.
- Open the folder where your deleted file was last stored. On the Apple menu bar, click the Time Machine button > Browse Time Machine Backups.
- Just like restoring a backup from your Time Machine drive, use the arrows on the right to browse through snapshots of the folder and the files it contains. Select the file you want to recover and click Restore.


Method 2: Recover Replaced Files on Mac with iCloud or Other Online Backups
| Ease of use | Data loss prevention | The integrity of recovered data |
| 4 | 5 | 5 |
You can use iCloud to back up your data files automatically which gives you another method of potentially recovering replaced items. iCloud stores deleted files for 30 days before removing them permanently, giving you a window during which you can try to undo the replace file activity you performed on your Mac.
- Go to iCloud.com and sign in with your account credentials.
- Click on button with many dots on the top right.
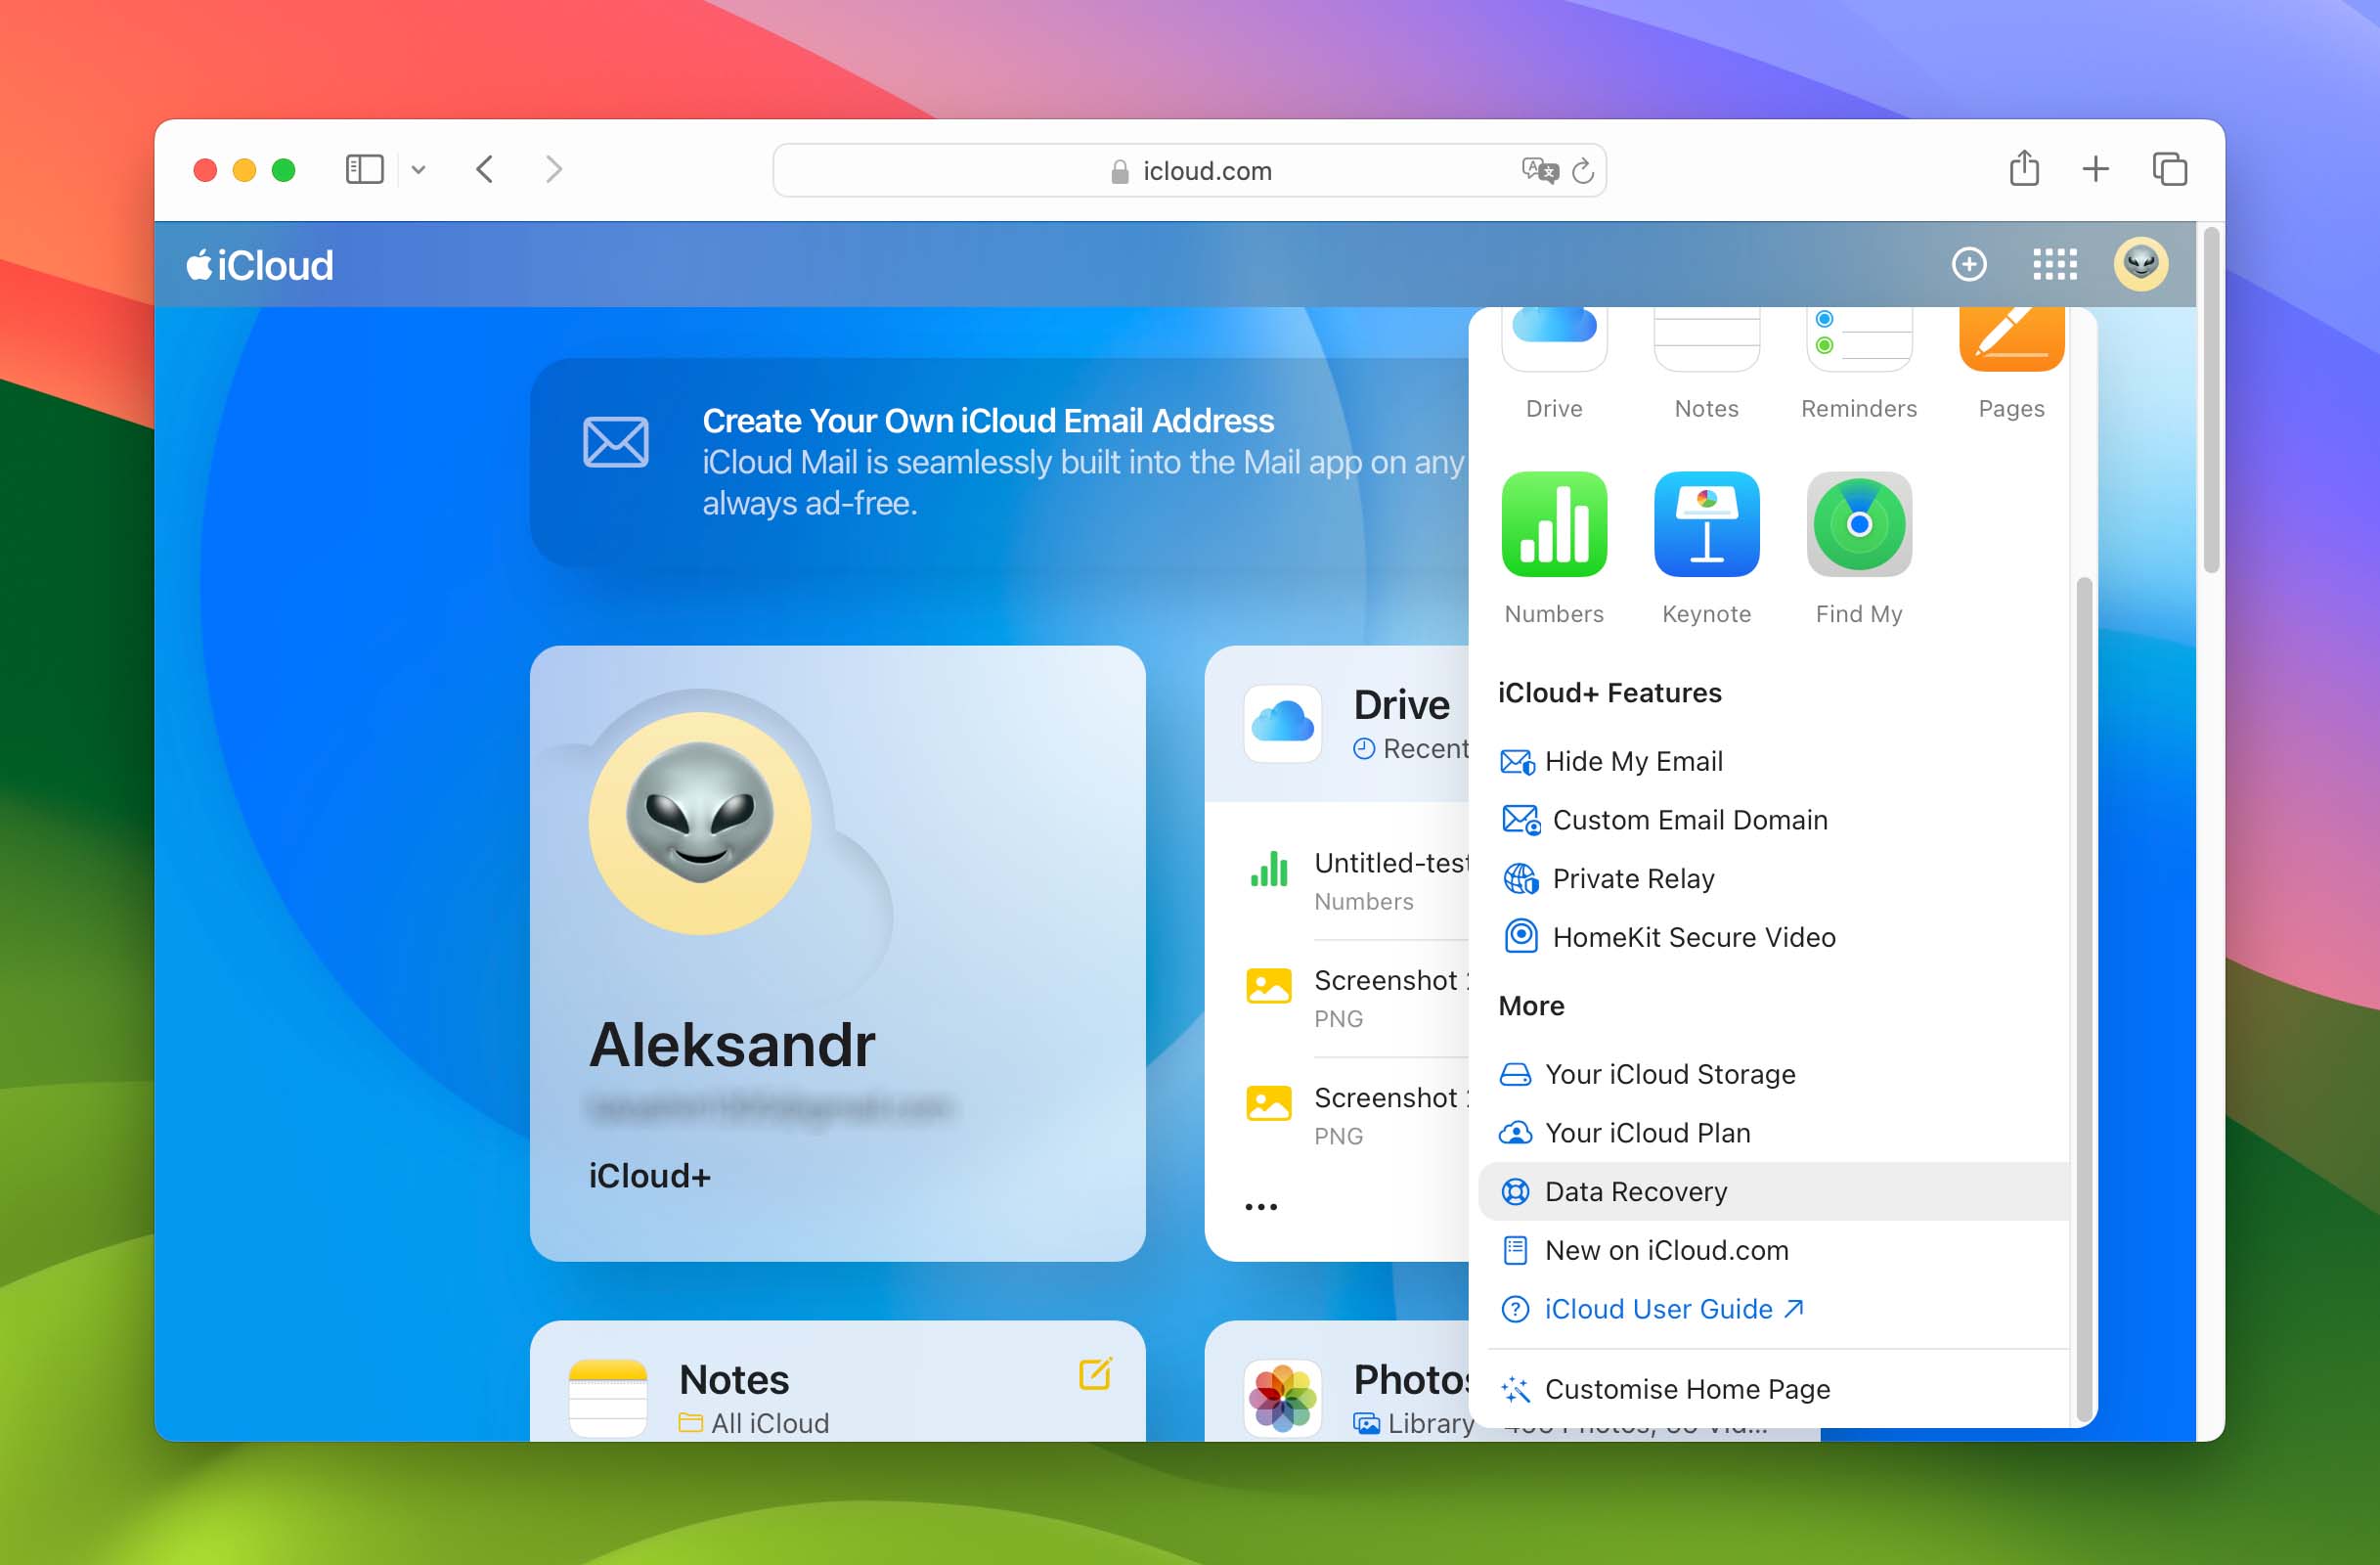
- Then select Data Recovery from the drop-down menu.
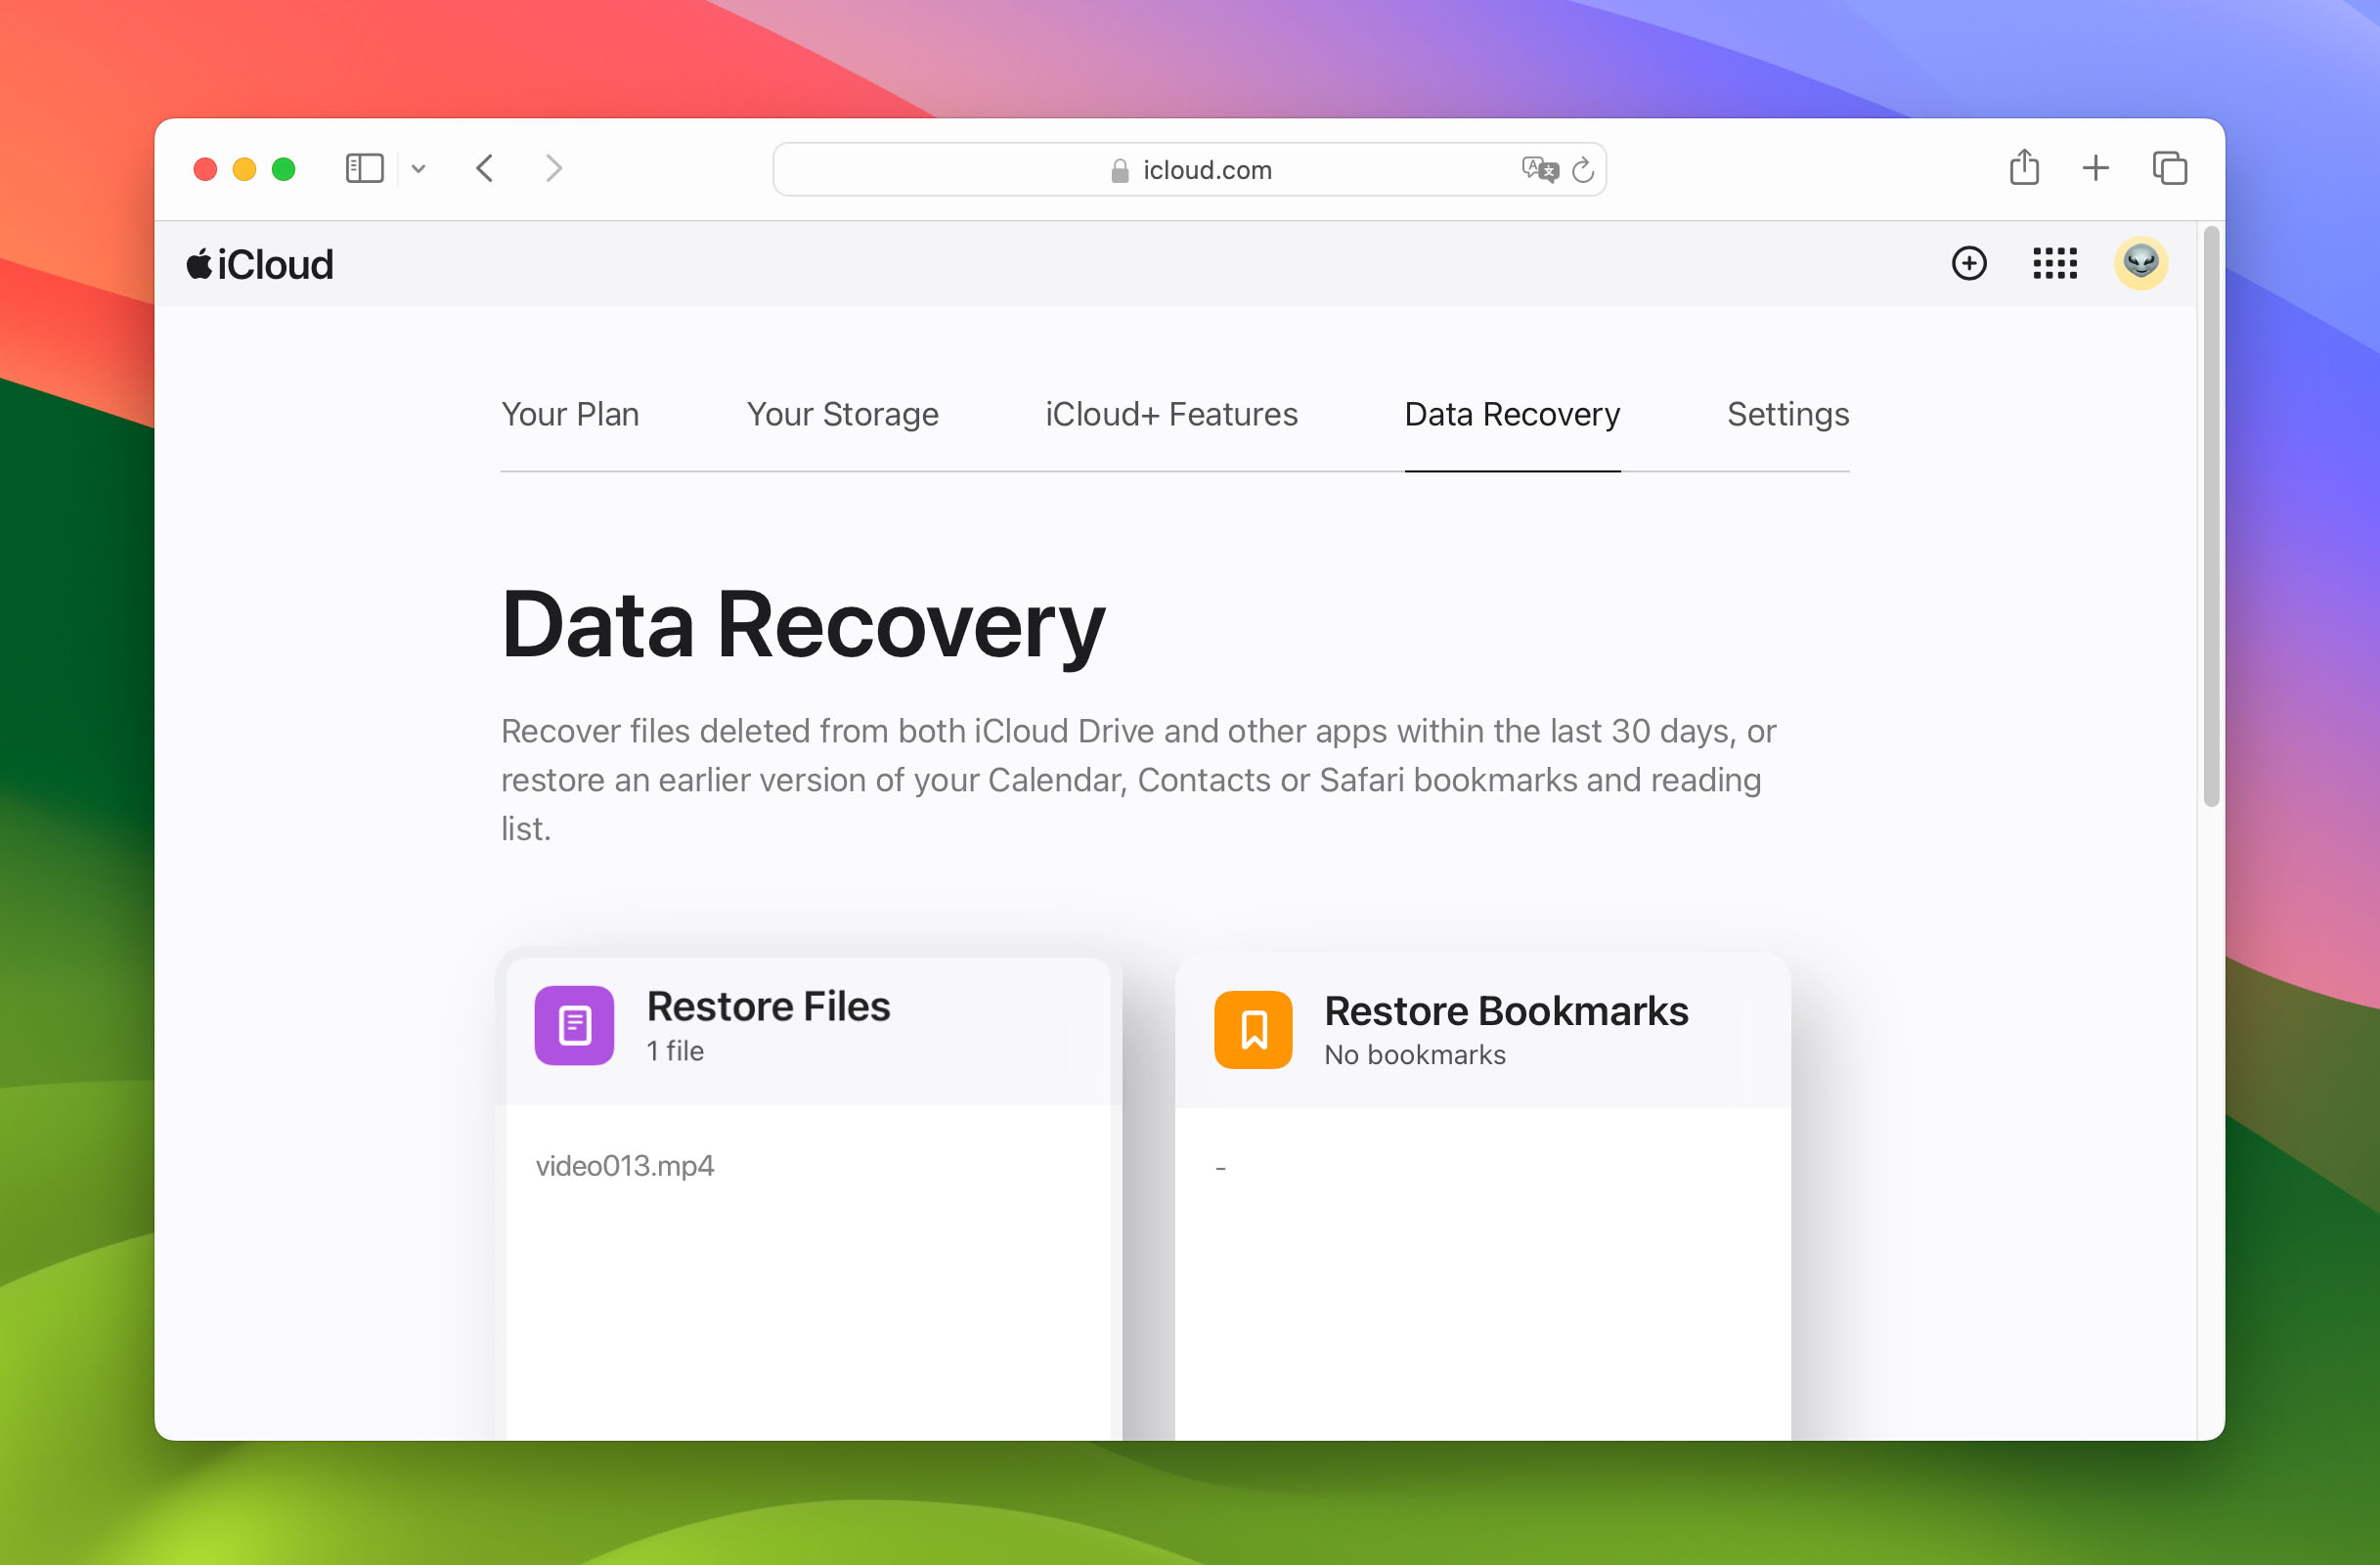
- Find the files you want to recover and check the boxes to the left of their name or Select All to restore everything available.
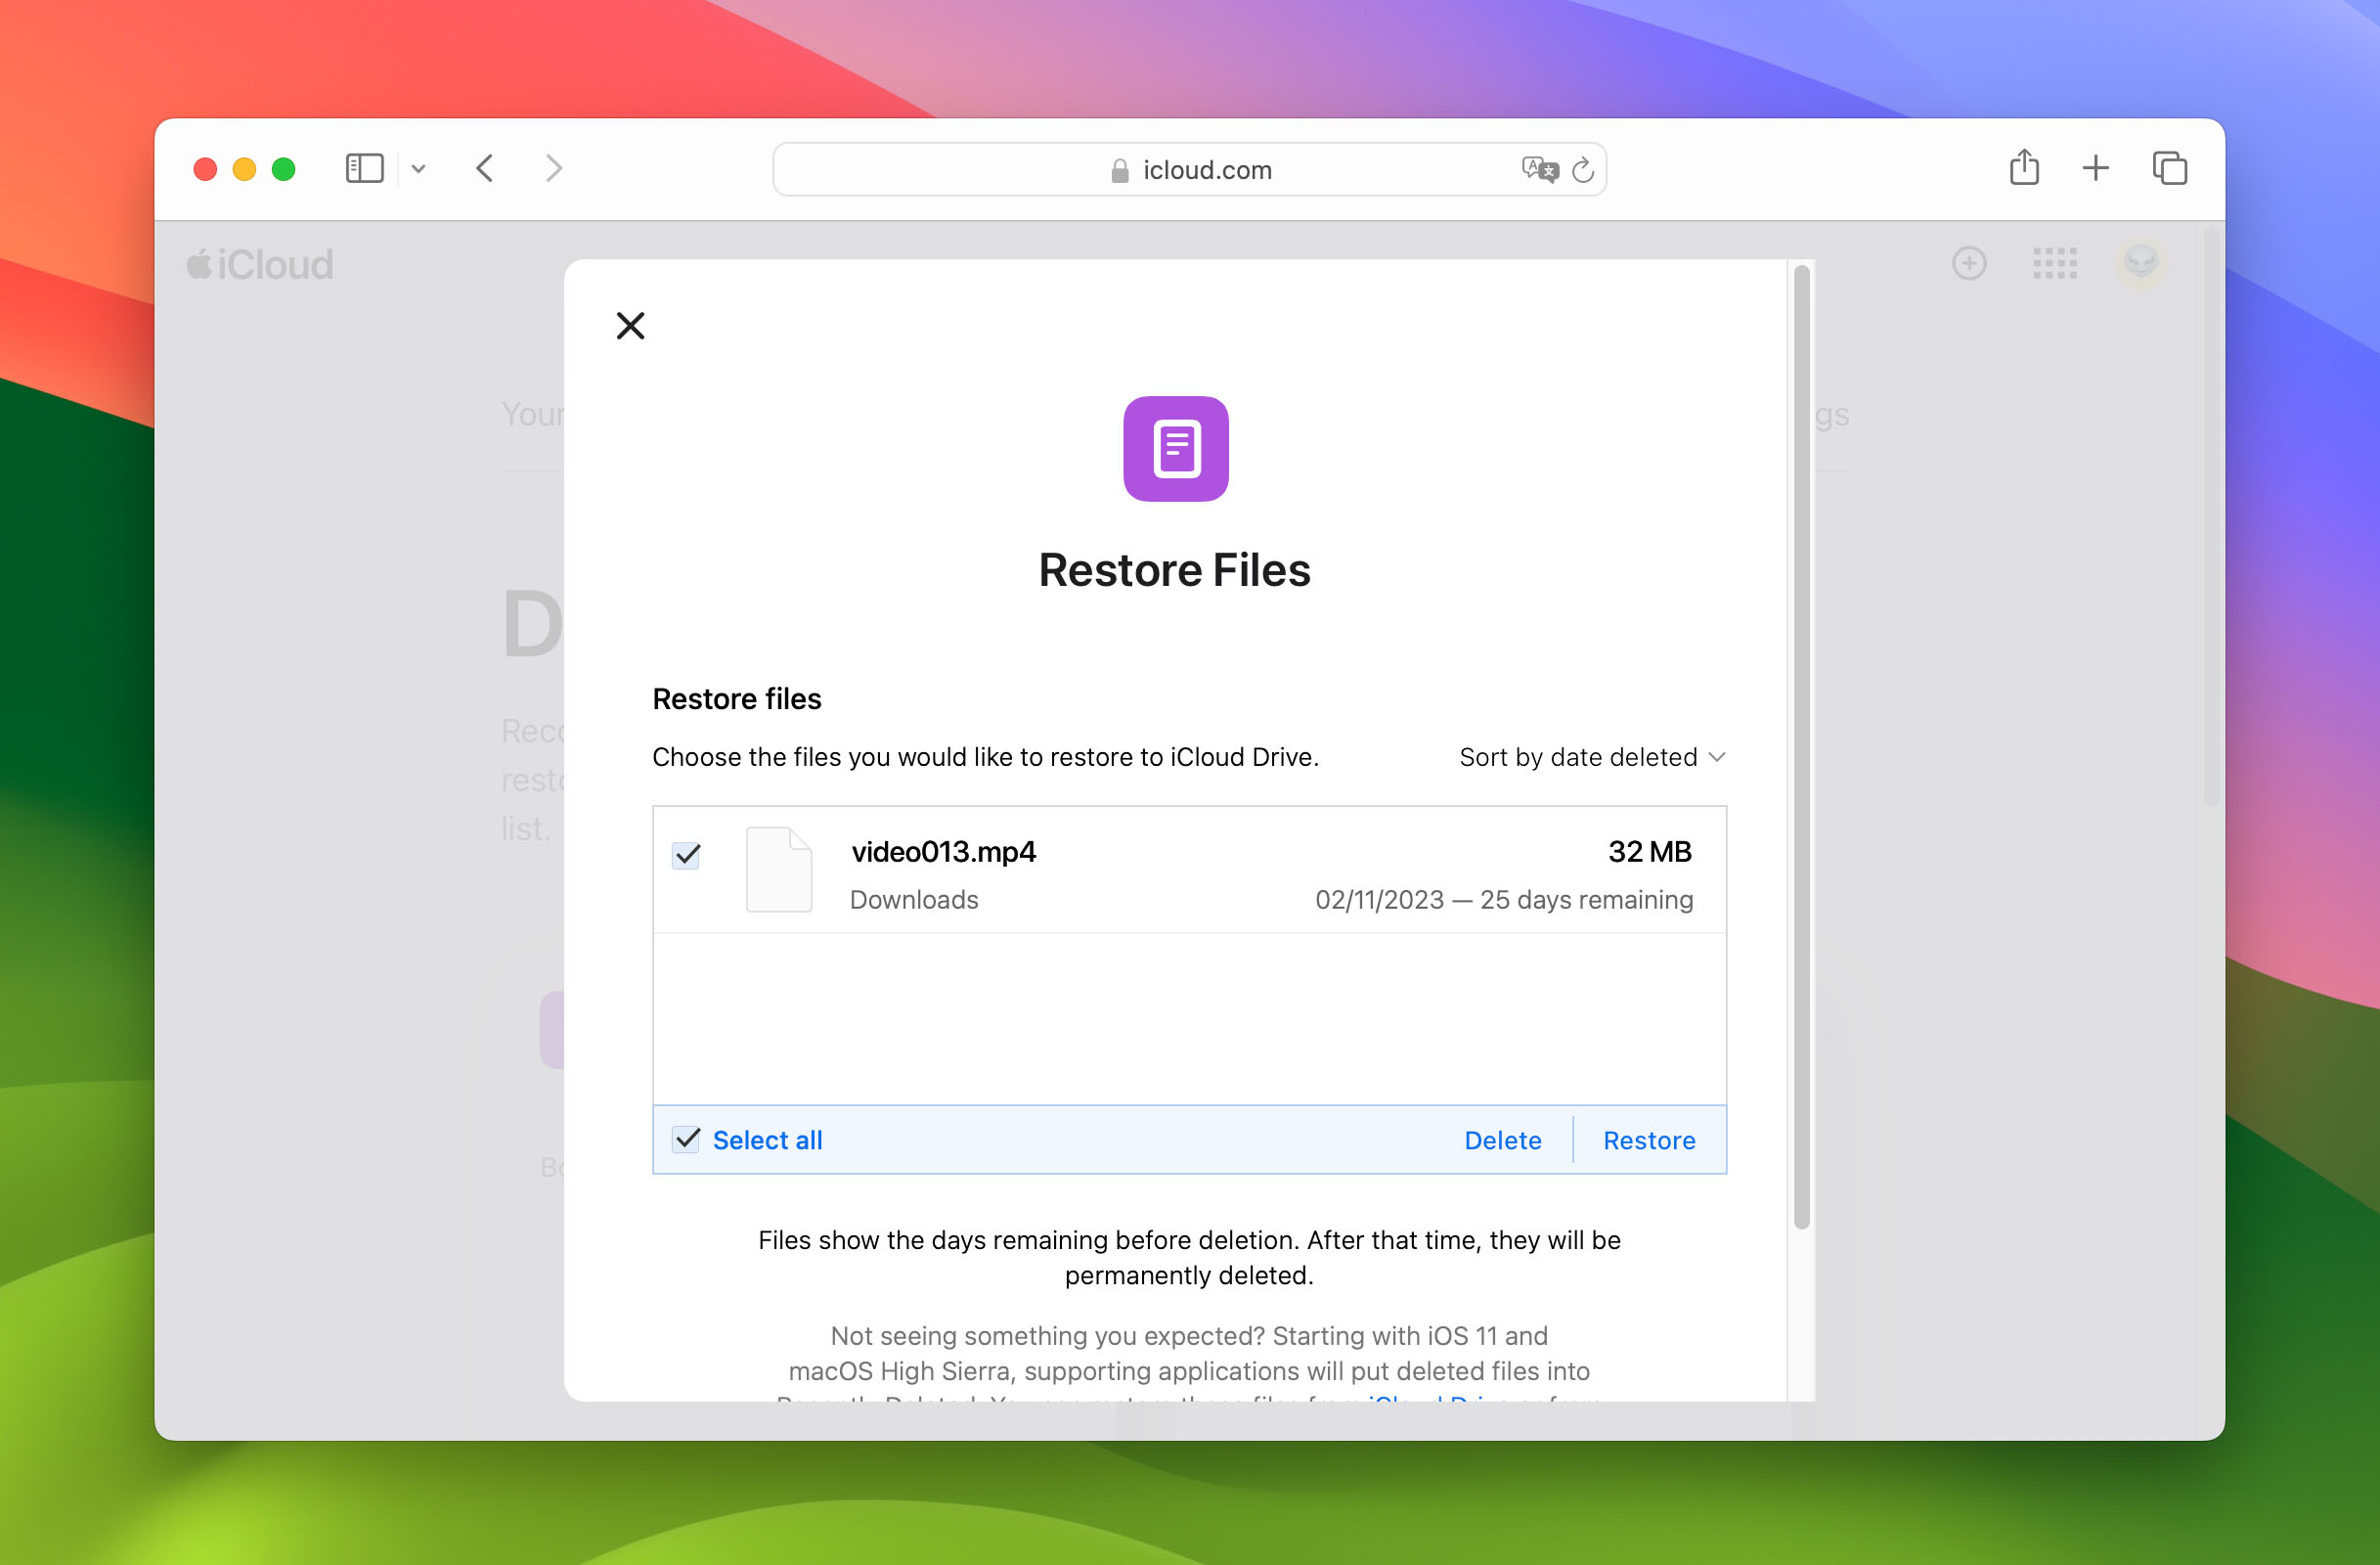
- Click on Restore.


It’s possible that when you overwrite an original file, it is still in the iCloud backups. It’s certainly worth a look.
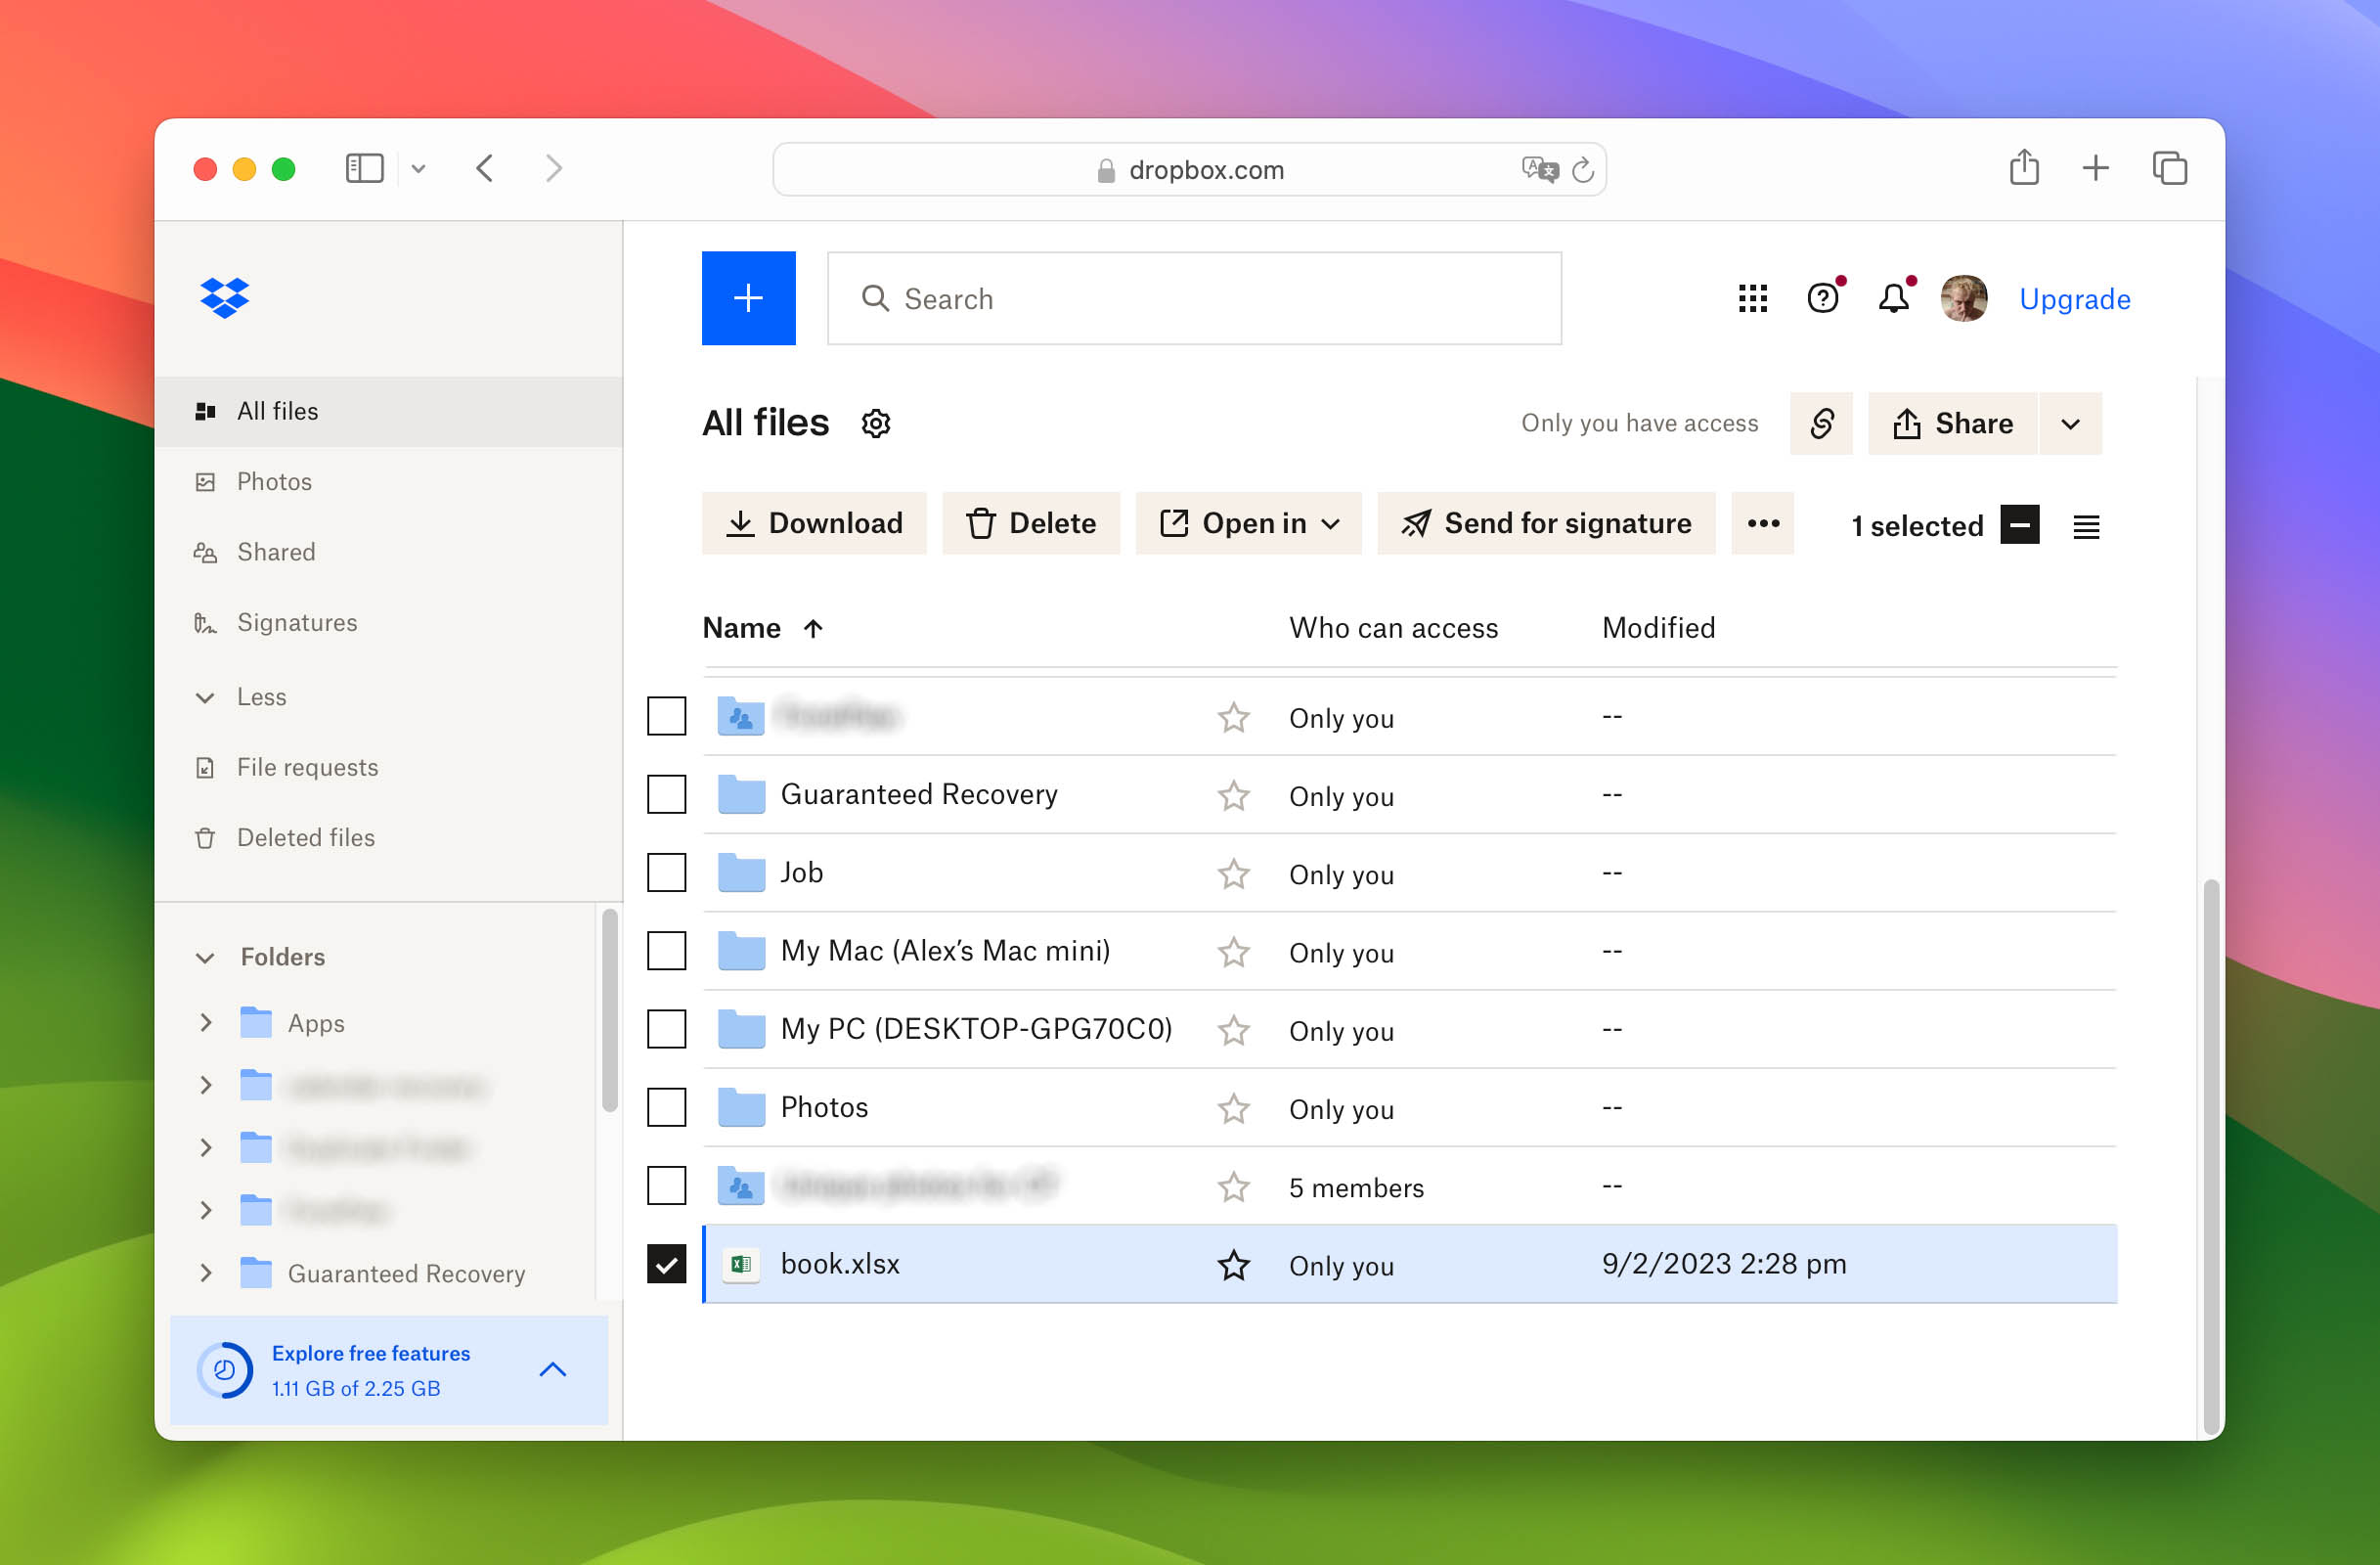
Other online solutions that can be used for backups like Dropbox and Google Drive have unique characteristics that influence your recovery method. In general, the following steps are needed to recover data from these backups.
- Connect to the cloud storage service or device that holds your backup.
- Use the tool’s search facility to identify the files you want to retrieve.
- Select the files you want to recover. You should choose a new storage location for the recovery if possible to avoid more unwanted file overwrites.
- Use the tool’s interface to complete the recovery.

Method 3: Recovering Overwritten Files with Application Features
| Ease of use | Data loss prevention | The integrity of recovered data |
| 3 | 3 | 3 |
Some of the applications you use to create files have features built into them that assist in recovering an overwritten file. We are going to look at how to get this done using popular spreadsheet and word processing applications that run on your Mac.
Apple Pages and Numbers both have an easily accessible feature that allows you to go back to a previous version of a document. This enables you to restore a file that you have inadvertently overwritten. Just use the following simple steps.
- Open the File Menu selection in Pages or Numbers.
- Click on the Revert To option.

- You will be presented with options to browse for the version of a file you want to restore.
- Select the version and click on the Restore button to perform the recovery.


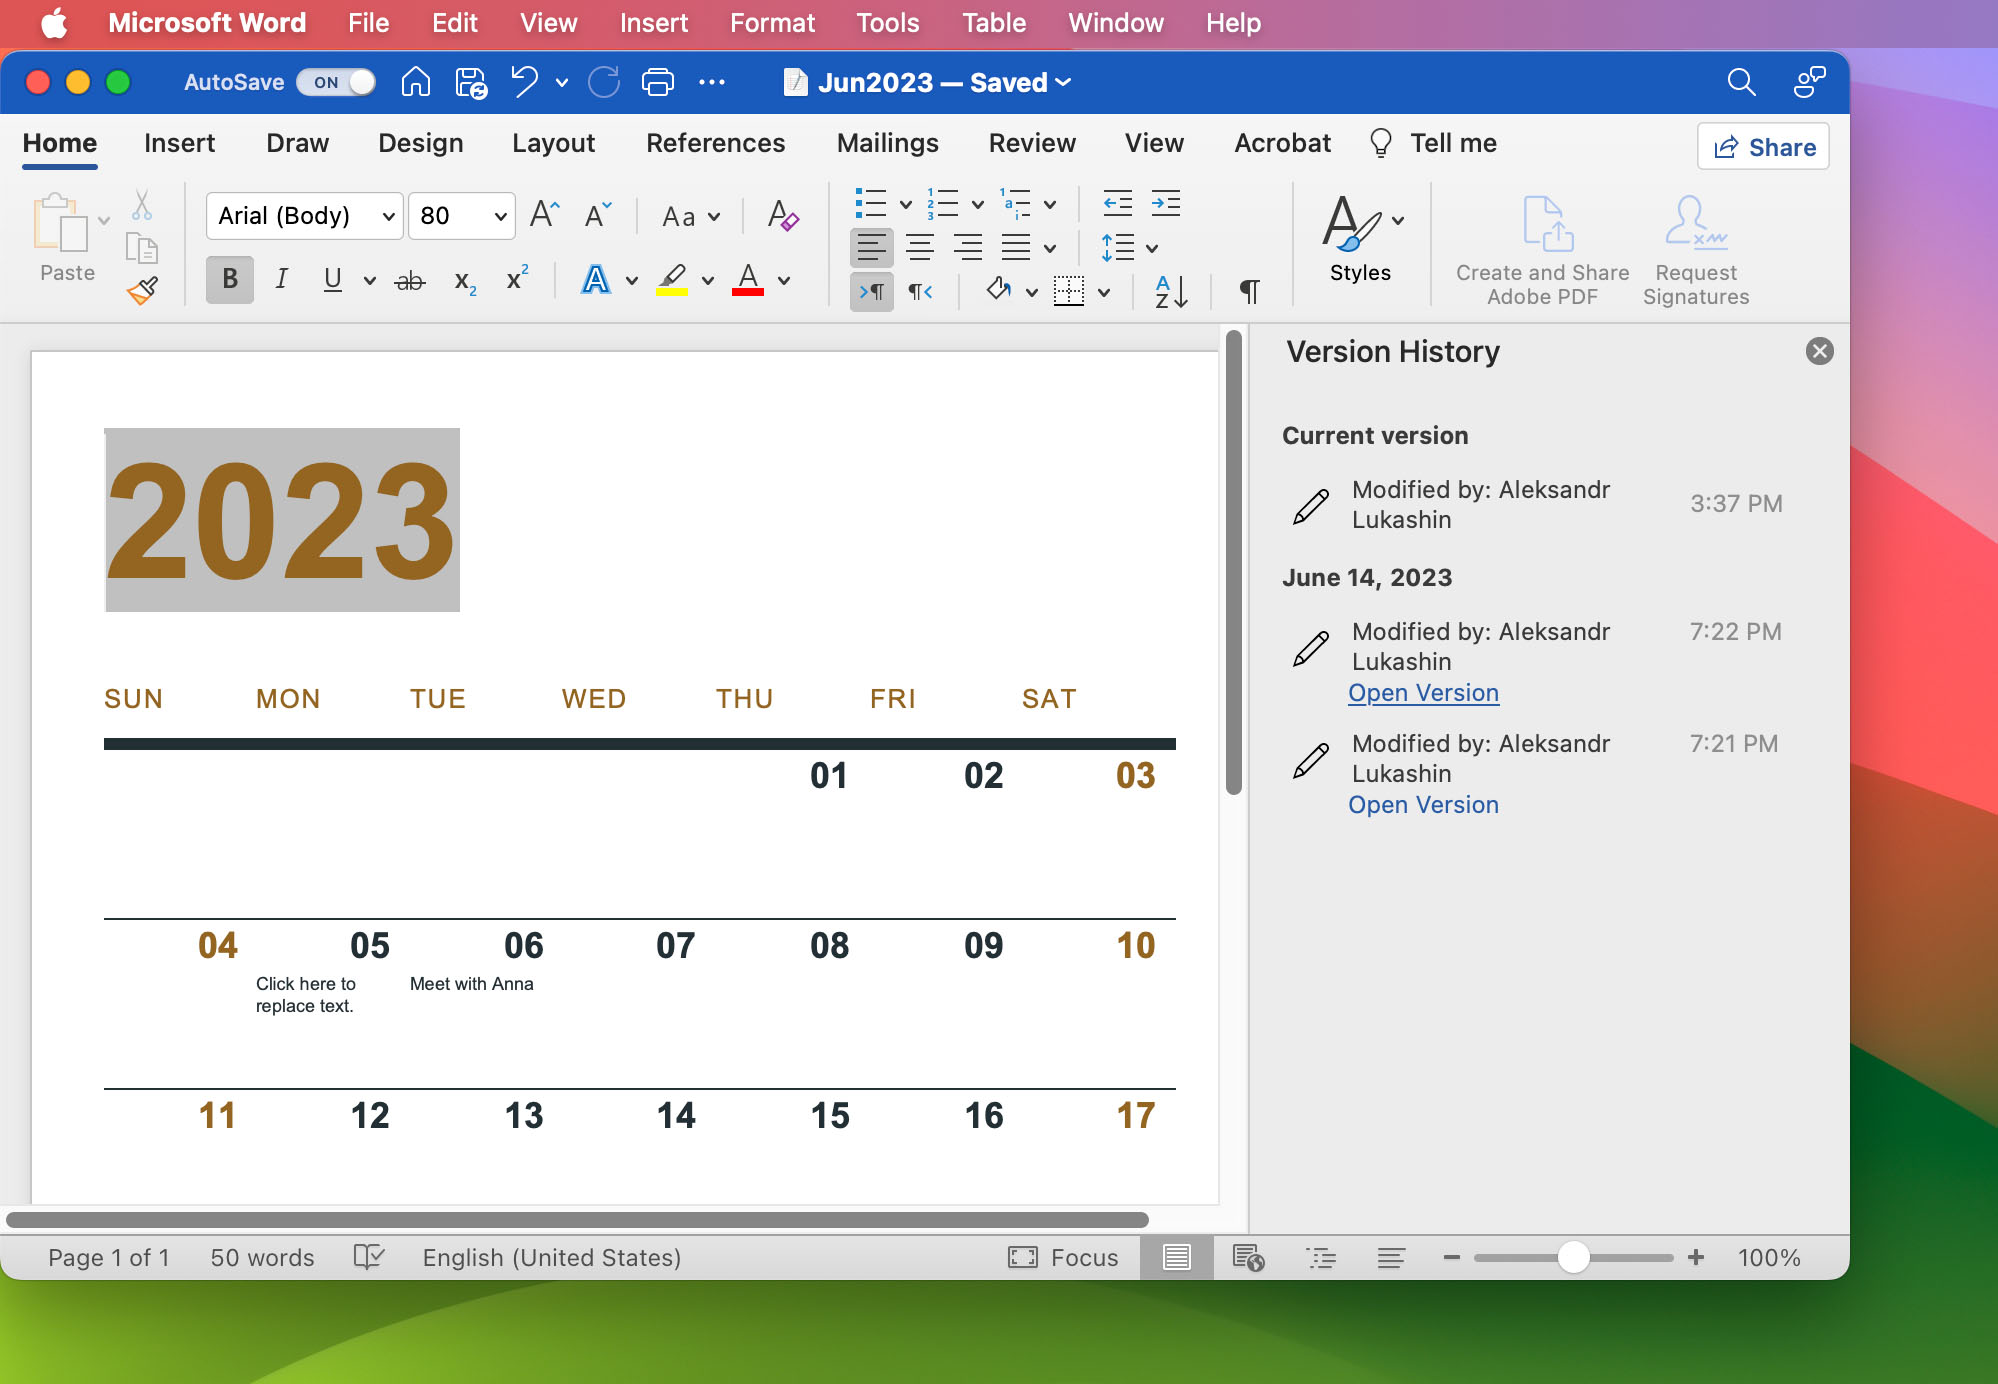
If you are using Microsoft Office, you can use the following procedure to recover an overwritten file on your Mac.
- Open the file that has a previous version you may want to recover.
- If you’re using Microsoft 365 for Mac, select the name of the document on the title bar of the application, then select the Browse Version History option.
- If you’re using Office 2016 or 2019 for Mac, select File > Browse Version History.

- Select a version to open it in a separate window. You can now save it to another name and have both the original and new versions of the file available.


Method 4: Using Data Recovery Software to Recover Overwritten Files on Mac
| Ease of use | Data loss prevention | The integrity of recovered data |
| 5 | 3 | 3 |
Data recovery software may be able to help you if the file has not been physically overwritten by new data. The original file may still be physically present on the storage device but is logically inaccessible by the operating system. If that is the case, a reliable data recovery software may be able to recover it for you.
However, note that data recovery software is basically the “last resort” among the 4 methods. It can’t prevent data loss – it can only salvage your files from the data fragments that remain. And the success of recovery (how many files are recovered AND whether or not those files are still usable) hinges on various factors… Especially the extent of overwriting. But it’s still worth a shot!
For this method, we’ll demonstrate this process using 2 different applications that we tested with our own data. They each have their own strengths and weaknesses but they performed really well during our tests – in fact, we were able to restore a document that was replaced by another one with the same file name.
Option A: Disk Drill
Disk Drill is a well-known data recovery software that’s easy to use and very powerful. It’s constantly updated and works nicely with macOS Sonoma (and earlier) and it recognizes most (if not all) native macOS files.
It also fully supports both HFS+ and APFS file systems as well as ExFAT and FAT32 – the most common formats for local and external drives. And in the case of an overwritten file, it’s possible that its data was written in a different disk space and still exists on the drive – Disk Drill can find and recover it.
- Download and install Disk Drill for Mac. Don’t perform the download and installation on the device that contained the data you want to recover as this risks further overwriting or corrupting the files.

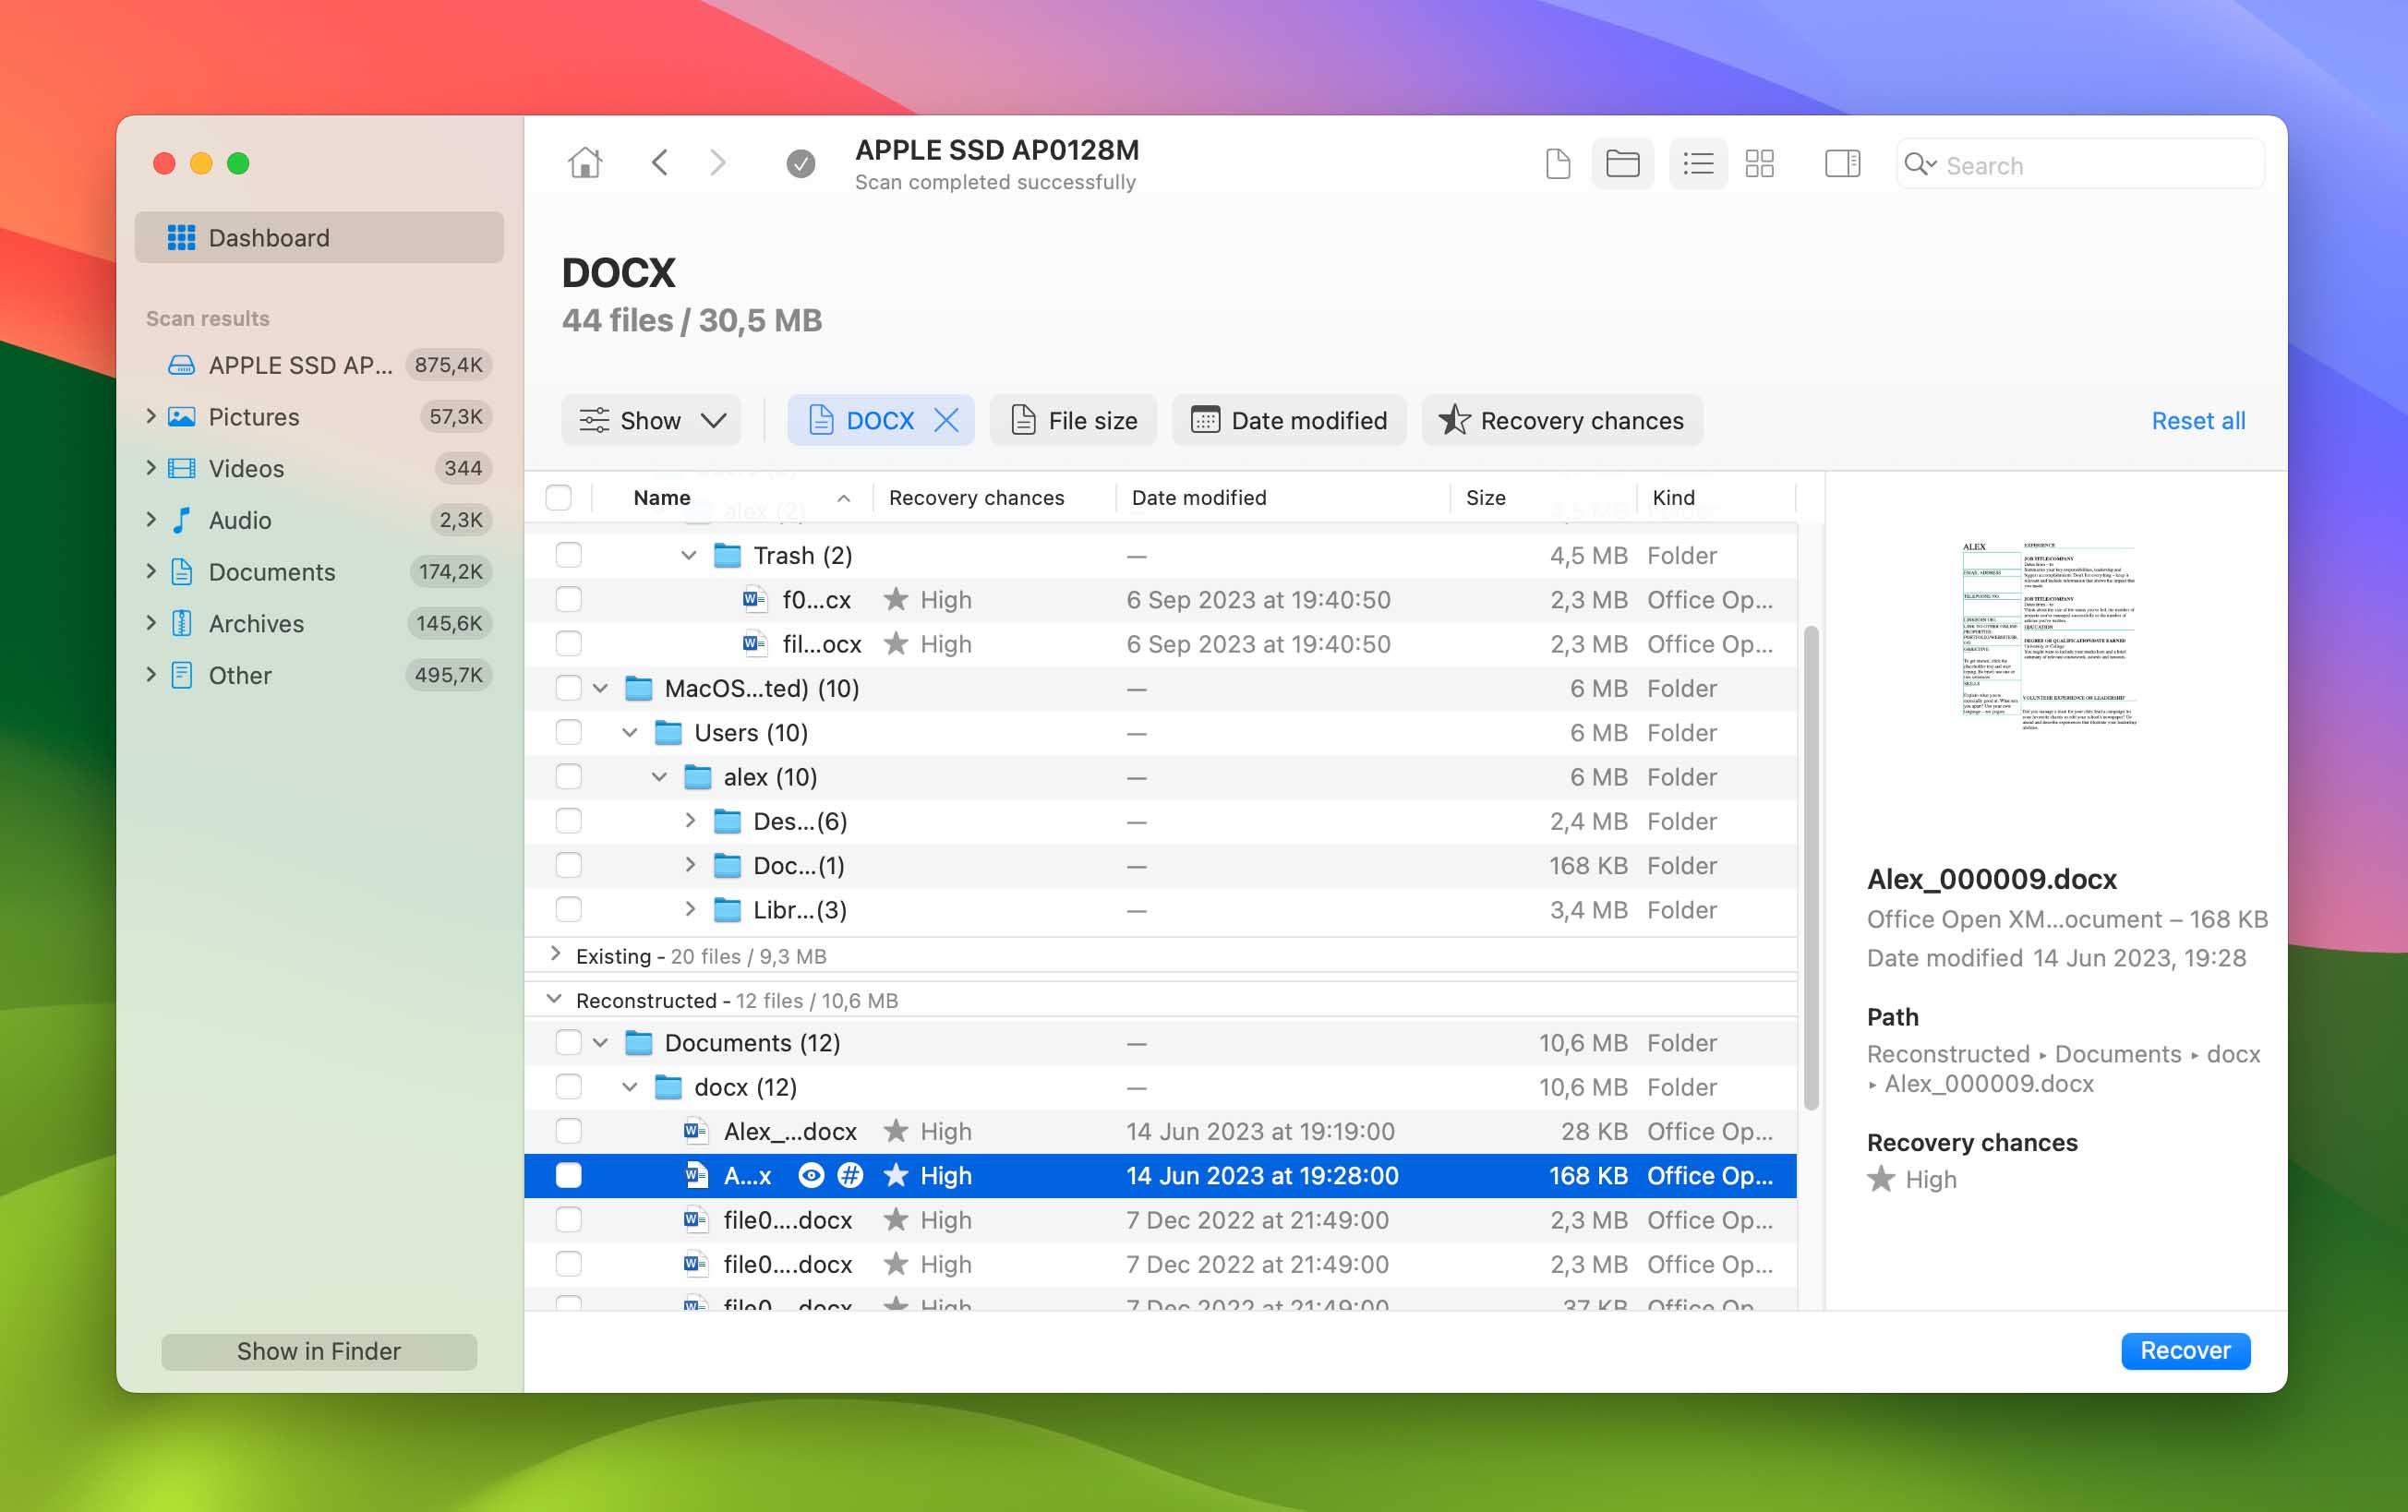
- Launch the app and select the disk or partition with the lost files.
- Review the list of recoverable items and preview them to be certain they are what you want to restore. Select the files you want to recover.
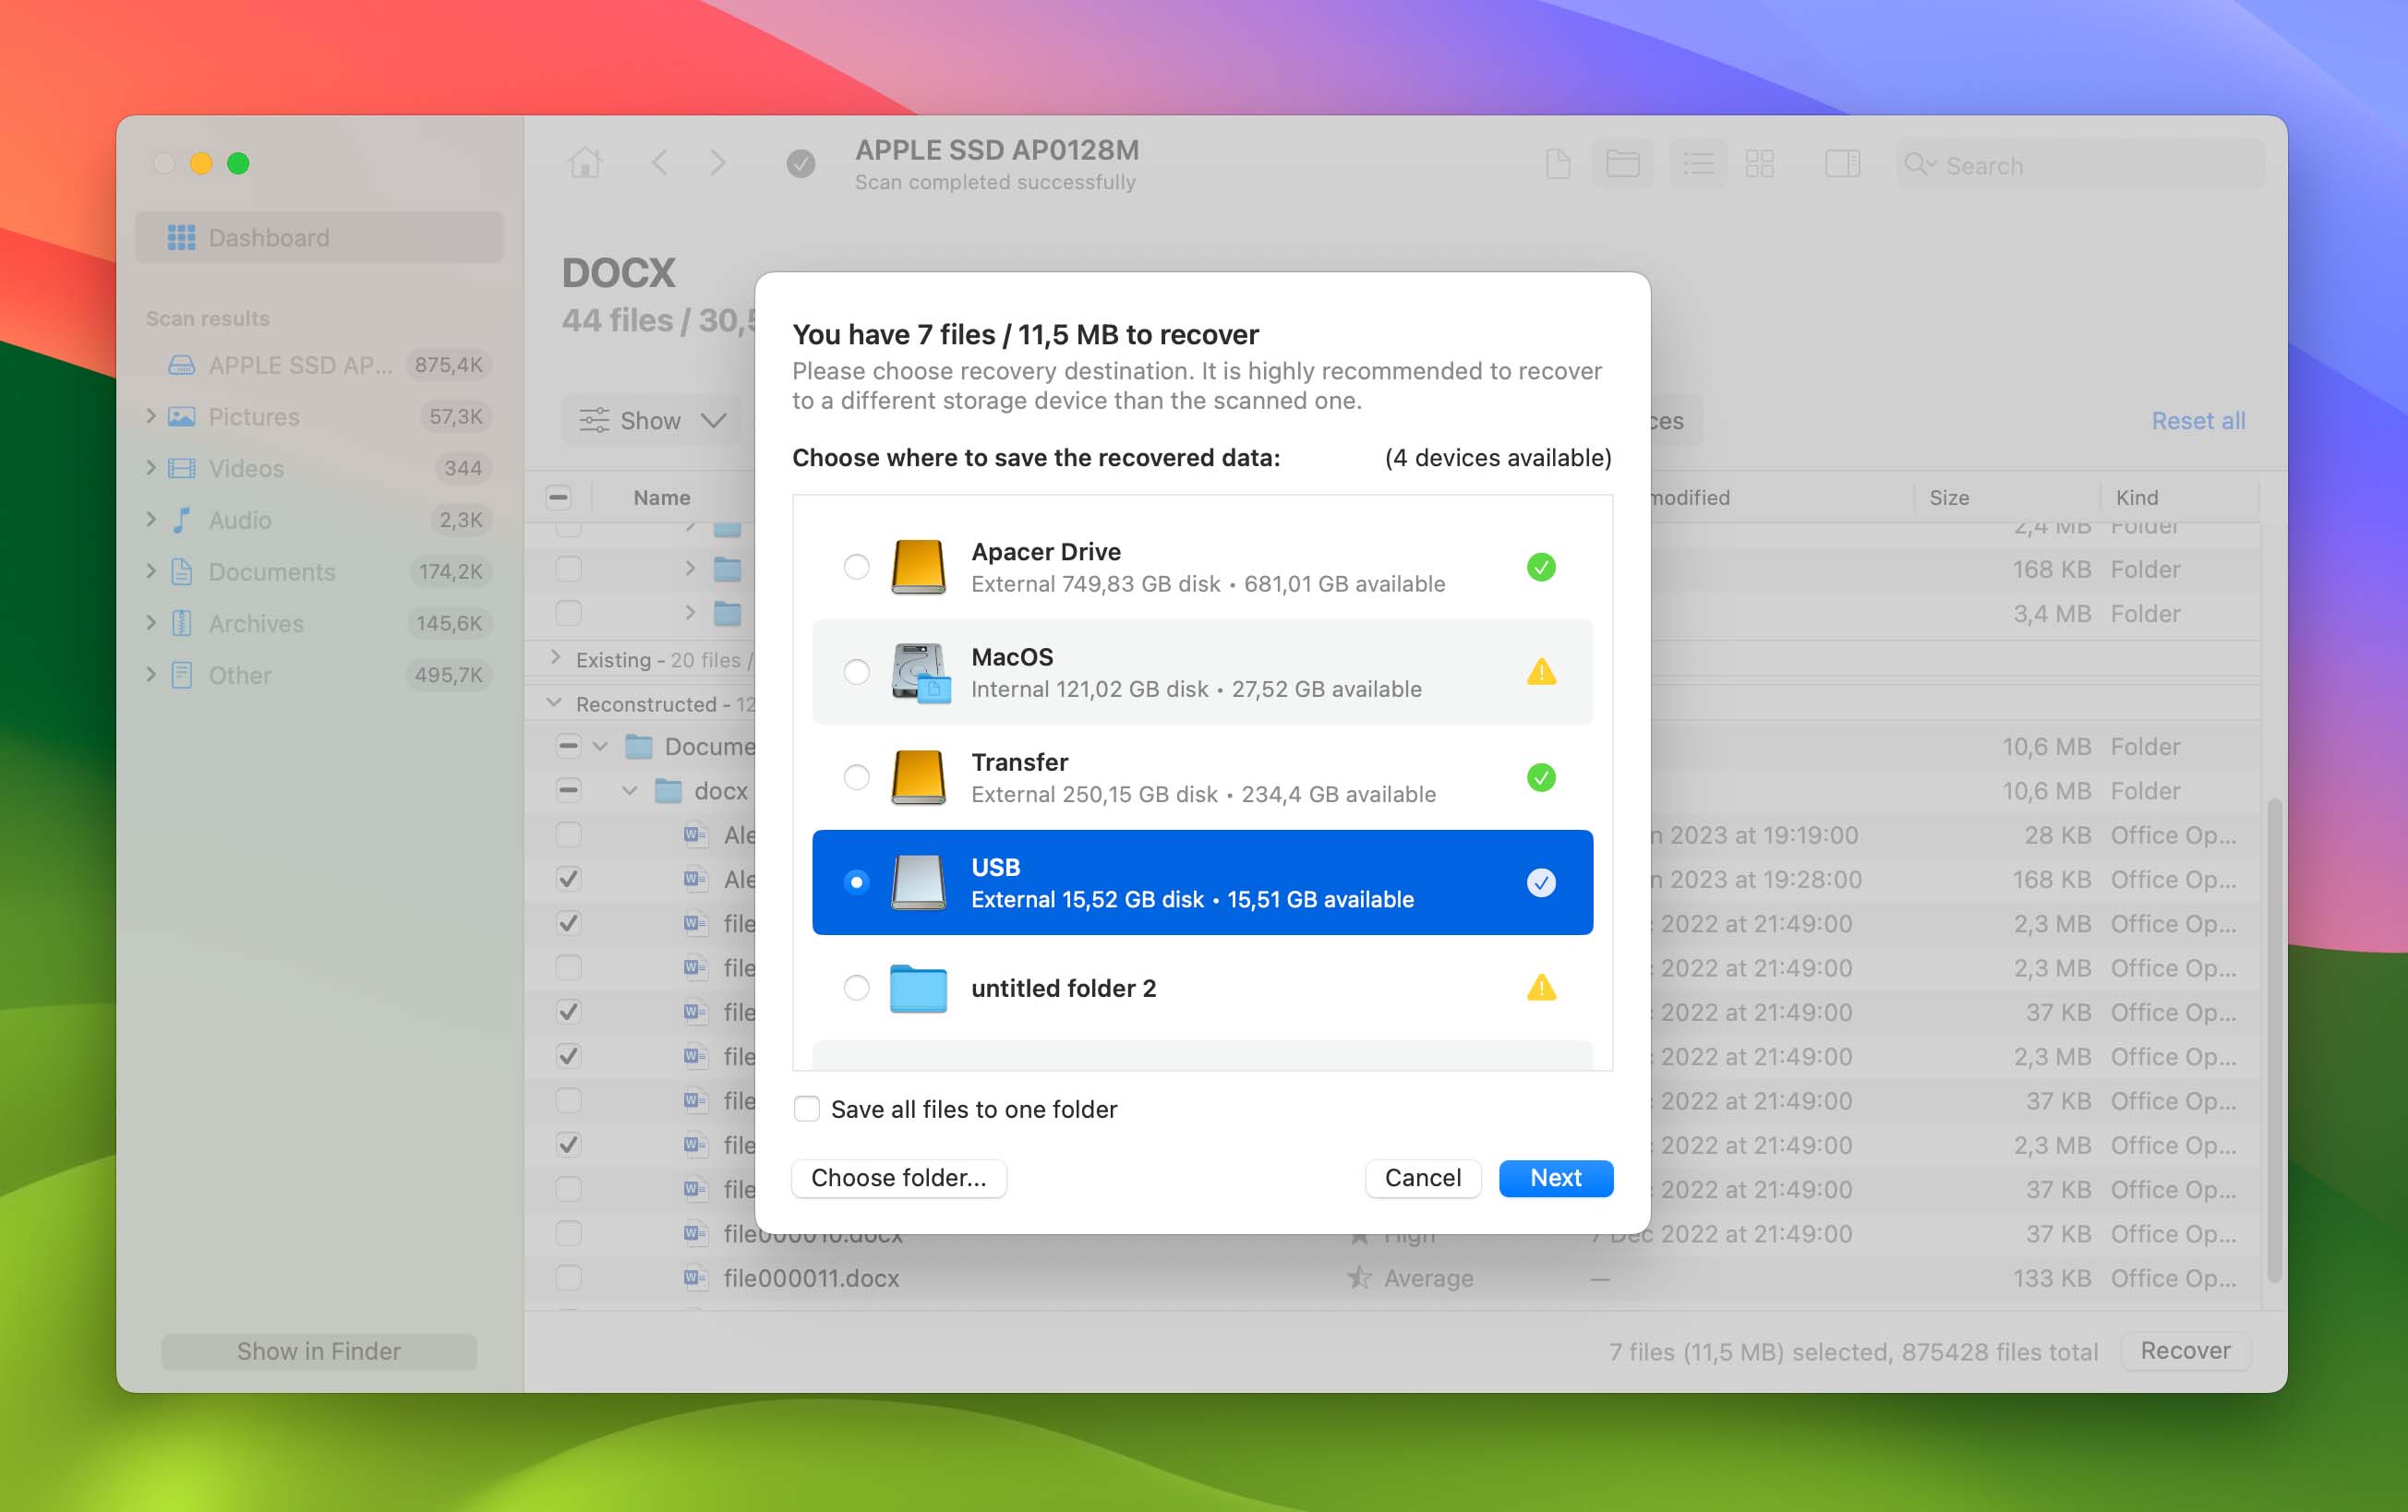
- Click the Recover button to initiate the recovery. You will be prompted to select a safe storage location that is not on the same disk or partition as the data you are recovering.

- Click OK after selecting the storage location to complete the recovery.


Option B: PhotoRec
PhotoRec is another data recovery software that can restore deleted files from your drive. But unlike Disk Drill, it doesn’t have a GUI (graphical user interface) and you’ll have to navigate around an interface that looks like the Terminal app.
However, it’s 100% free and well-respected by the tech community. And while it hasn’t received a significant update in years, it still supports a lot of file formats.
- Download and install TestDisk (PhotoRec is included).
- Open the Terminal app (Finder > Applications). Then, type the following command and hit Return:
sudo photorec

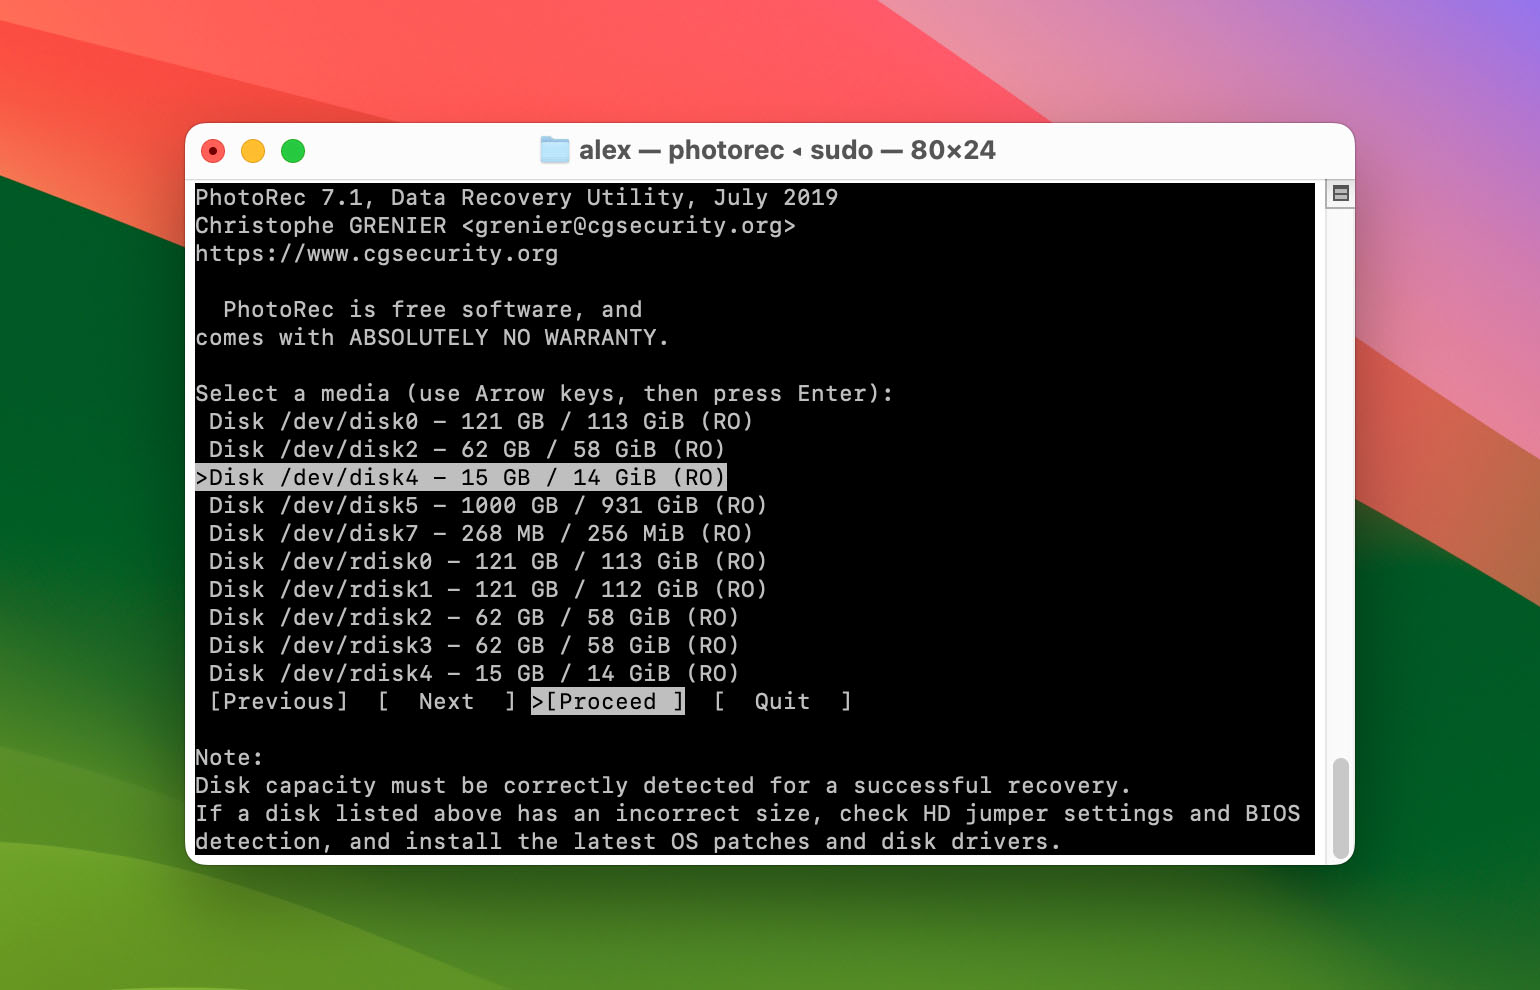
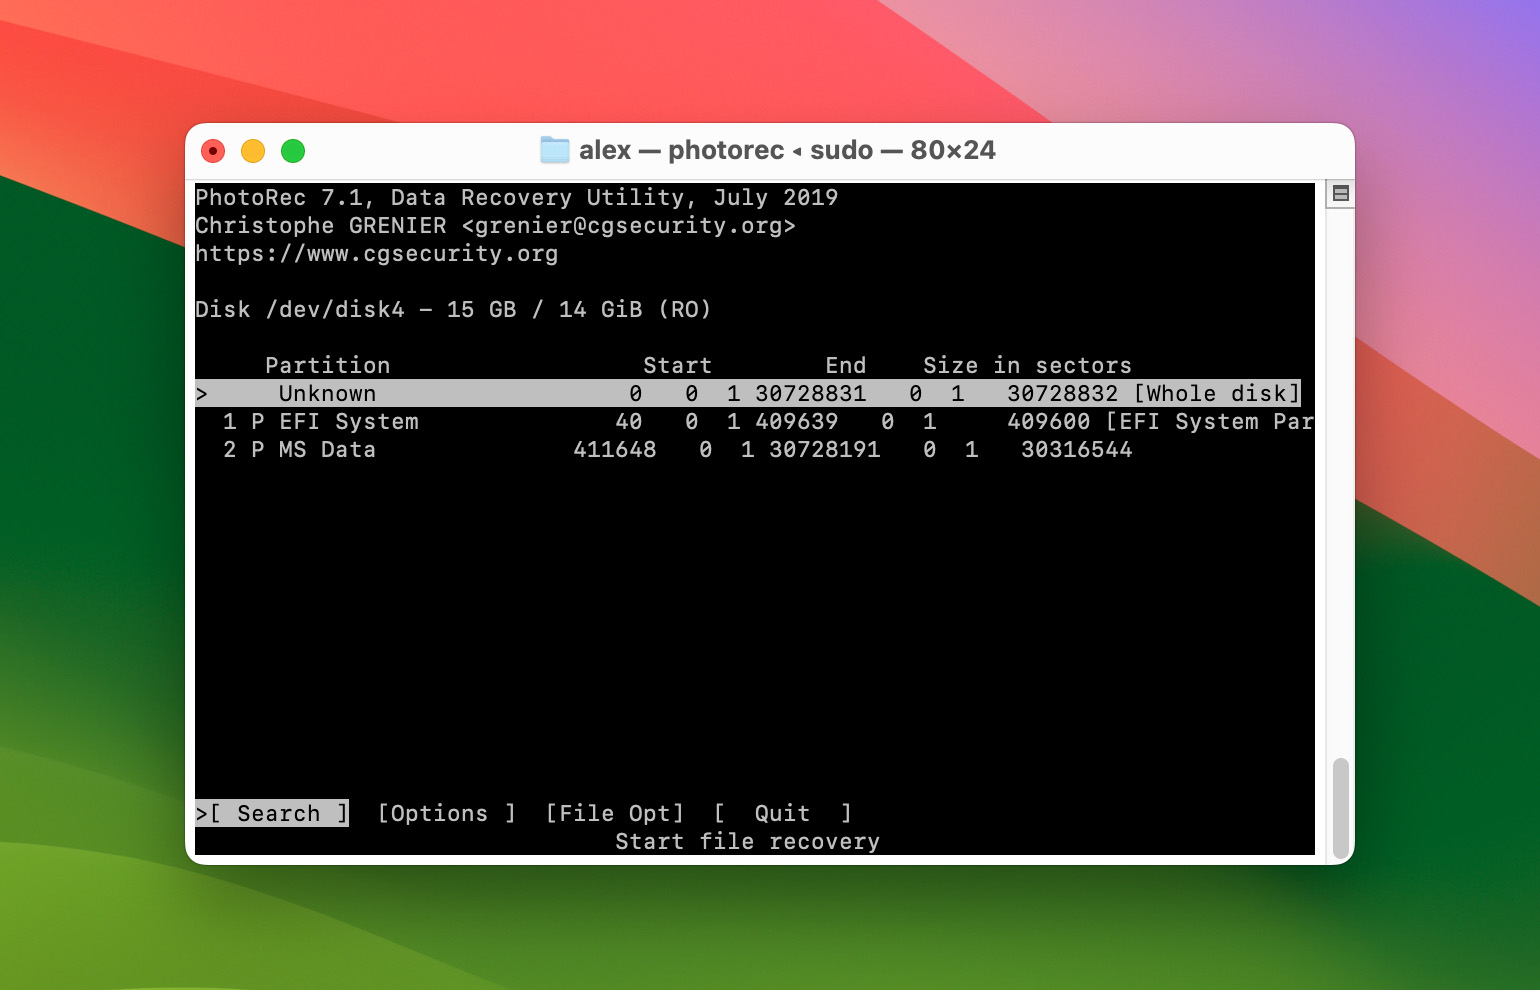
- Use the up and down arrow keys to select the drive that stored your deleted files. Then, use the left and right arrow keys to select the Proceed action and hit Return.
- Select No partition or Unknown (which allows you to scan your entire drive instead of just partitions) and hit Return on the Search action. Note: You can specify one or more file types you want PhotoRec to scan for.
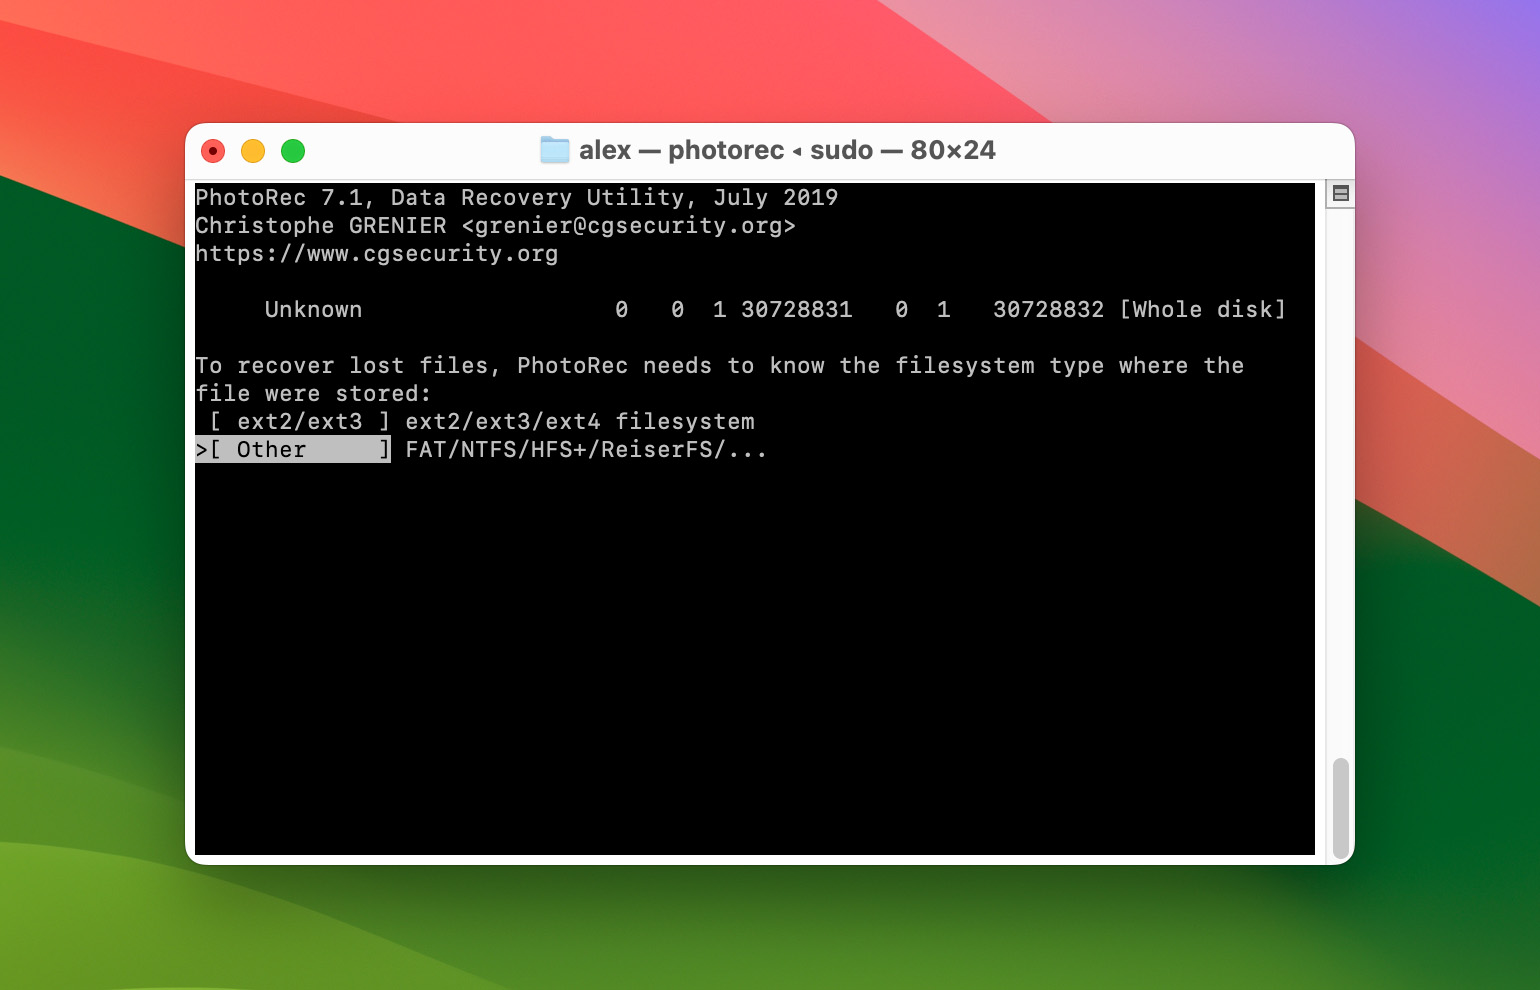
- Select your drive’s file system and hit Return. By default, PhotoRec will try to identify and select the correct file system automatically.
- Select a save destination for the recovered files. Make sure to choose a location on a different drive than where your files were saved. Use the up and down arrow keys to select a folder and the right and left arrow keys to enter and exit specific folders. Once you’ve chosen a location, hit C.
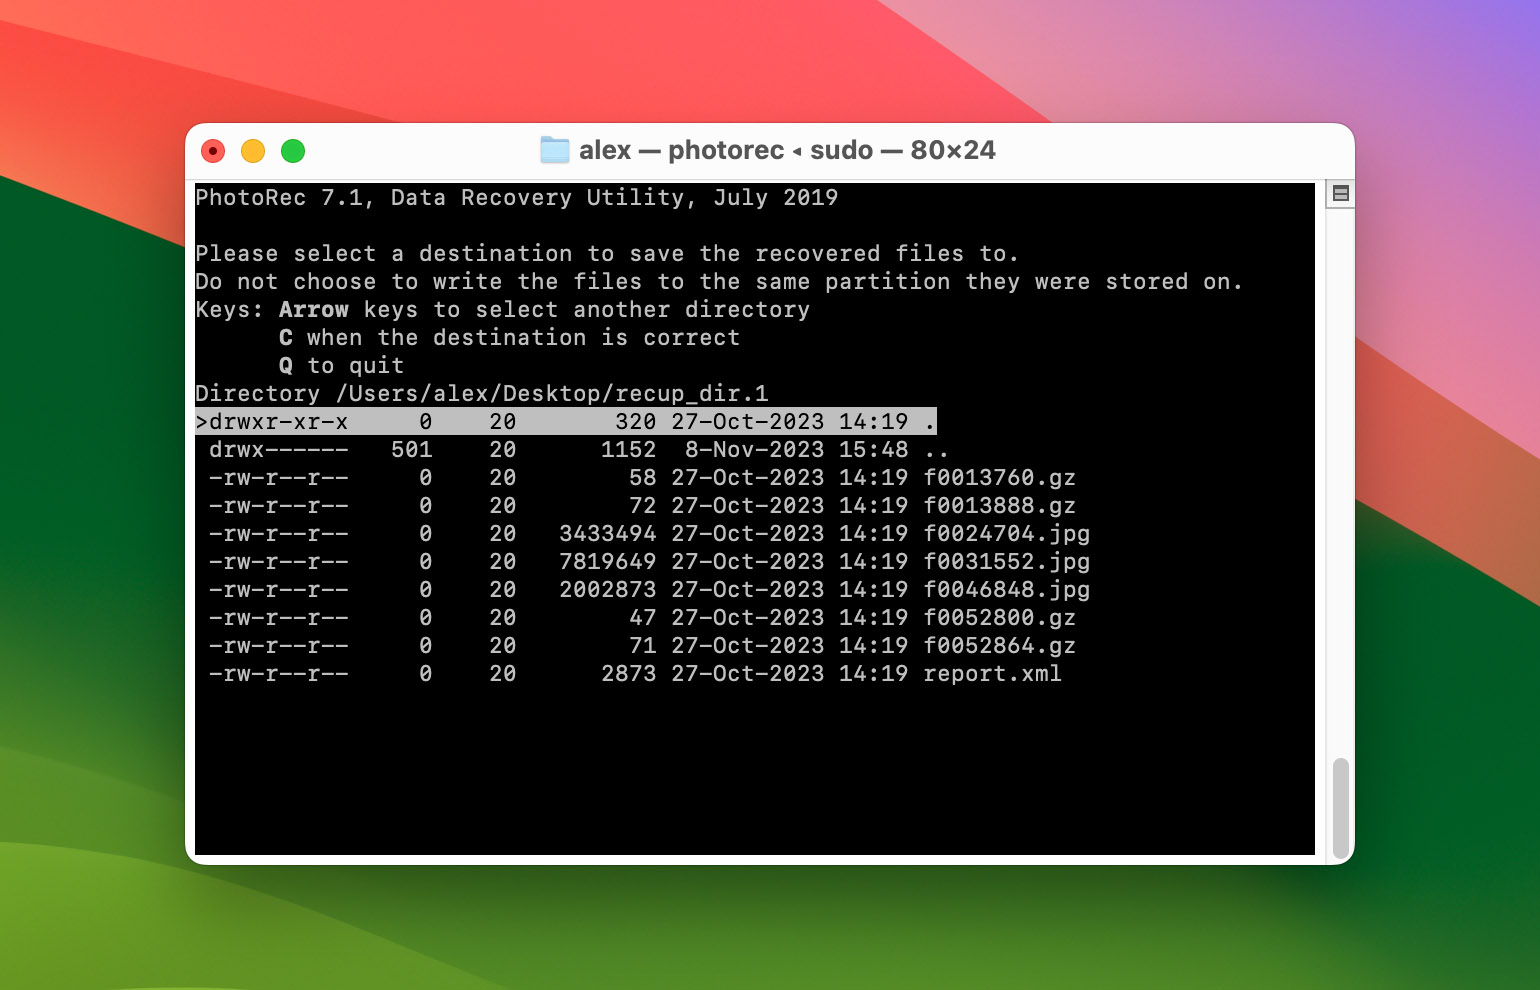
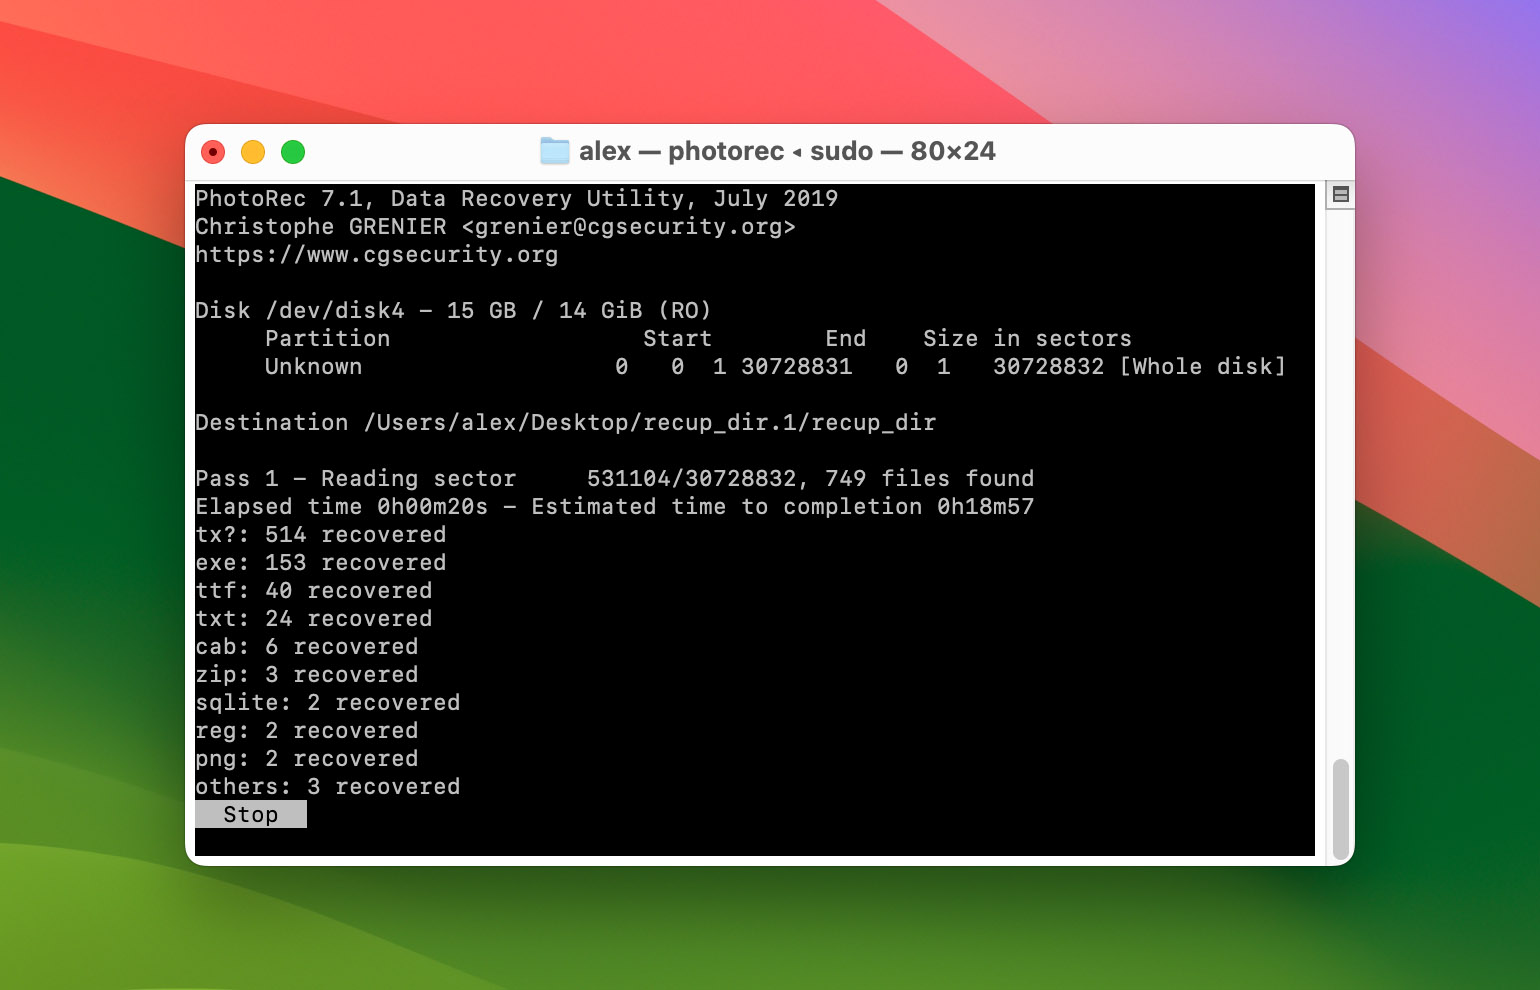
- Once you’ve selected the destination for your recovered file/s, PhotoRec will begin the recovery process. Once it’s done, you’ll find your data inside the recup_dir folder in the location you selected in step 6.


Conclusion
The most important point you should take from this article is that an overwritten file can be recovered. The best way to protect yourself is with a robust backup strategy, but if that fails, data recovery software may be able to help. Good luck getting those files back!
FAQ
Yes, overwritten files can be recovered. However, a successful recovery depends on the following factors:
- Whether or not you have a backup
- How much new data you’ve written to the drive (more new data = lower chances)
- The size of your storage device (the less its storage capacity, the more likely the data has been overwritten beyond recovery)
- How much time has passed
- The type of storage device you’re trying to recover the file from