
Table of Contents
It’s not a pleasant experience to realize you just formatted the wrong hard drive or partition on your Mac. It may appear as if you’ve just wiped out a lot of valuable data, but things might not be as bad as you think. Depending on how you formatted the device, the data can still be recovered with specialized recovery software. The default formatting mode only logically erases the files and folders, making it possible to get the lost data back.
Is Data Recovery Possible After Formatting a Mac Hard Drive?
Yes you can recover data from a formatted hard drive on macOS.
We have analyzed the most common problems users face when recovering data from a formatted hard drive on Mac and identified the main factors affecting the chances of successful recovery.
Type of Formatting Applied
Let’s look at the different ways you can format a drive on a Mac and how that influences your chances of accomplishing a successful recovery. You use the macOS Disk Utility application to format disks on a Mac. During the formatting process, you can choose to use various security options to protect any sensitive data that resided on the device.
- 🚀 Fast formatting. The default setting when formatting a disk with Disk Utility is the Fastest option. When using this option, data is only logically deleted from the device, allowing the data to be recovered with software. No overwriting is performed during the formatting process, only the logical links used to access the data are destroyed. Drives formatted with the Fastest option can be recovered, and if you have accidentally formatted your device it is probably with this setting.
- 🔒 Secure formatting. Disk Utility offers secure formatting settings for cases where you want to render the information unrecoverable. You can choose to overwrite data up to seven times via Security Options under Disk Utility. Additional options let you overwrite the data two or three times. Each overwrite procedure provides further protection against the data being recovered. Using anything but the Fastest setting makes it virtually impossible to recover the data even with commercial recovery software.
Type Of Your Drive
The type of drive that you have formatted can also have an impact on your ability to recover its data with software. Mechanical drives can be recovered if the data has not been overwritten. Solid state drive (SSDs) can be recovered if TRIM has not been enabled on the device.
The newer the model of your Mac PC or MacBook laptop, the more likely it is to have an SSD. To confirm which media is intalled on your device, click the Apple logo in your desktop’s top left corner, click About this Mac > Storage. You’ll see a description of your storage medium under the hard drive icon, e.g., Flash Storage which implies an SSD is installed.
For the late version (Sonoma), click on the Apple logo > About this Mac > More info. Scroll down and tap System Report > Storage. Choose the drive you want to view, and you’ll see details about it. If it’s an SSD, you’ll see something like “Apple SSD AP1024.”
- 💽 Formatted internal/system drives. Your ability to recover formatted internal drives depends on how they were formatted as described above, and the type of drive in your computer. Mechanical drives can be recovered as can SSDs that don’t have TRIM enabled. One problem you may face is that internal drives are often formatted as part of an operating system installation, such as to address serious errors with your file system start to occur or to perform a clean install to refresh your machine. When you reinstall your OS, some files will be overwritten, reducing the chances for a full recovery of the device’s data.
- 🔌
Formatted external drives. External mechanical drives that have been logically formatted can be recovered with software. If they are SSDs, they need to have been formatted with TRIM disabled if you want to recover their data. With TRIM disabled, if you act quickly and don’t use the device much after formatting it, chances are good that you can recover the majority of your data. Once again, the key is to avoid overwriting the information so is can be recovered by software. - ⚙️ Formatted SSD drives. Solid-state drives (SSDs) can also have data recovered after formatting by recovery software if the device does not have TRIM enabled. You should take an additional step before attempting this type of recovery. Make a byte-level backup of the SSD and use the backup media to perform the recovery. This saves additional wear and tear on the SSD as the recovery software scans and recovers data and is a valid step to take with a hard drive recovery as well.
Reason for Formatting
The reason for formatting your drive plays a significant role in its chances of recovery because it might indicate the integrity of the data. Let’s examine the most common reasons and their recoverability chances.
- 💥 Accidental formatting: This happens when you mistakenly format a drive, thinking it was a different drive or partition. In this case, the data can easily be recovered if security options haven’t changed.
- 👾 Virus or malware attack: It’s recommended to reformat hard drives infected with virus or malware. In this case, the virus itself can affect the data recovery chances. You can be lucky if it wasn’t a virus designed to overwrite files.
- ❌ Corrupted file system: You may have reformatted your hard drive because its file system got corrupted. In that case, the data’s integrity might have been affected by the file system corruption, reducing the recoverability chances.
How to Recover Files From a Hard Drive That Has Been Formatted
Data recovery software is your best bet if there are no available backups of the formatted drives. We tested and chose the best data recovery software that gave us excellent results. Each tool has its pros and cons, which we’ve summarized in the table below.
| Criteria | Disk Drill | PhotoRec |
| 🤗 User-Friendliness | User-friendly, with a graphical interface and a step-by-step recovery process. | Command-line interface makes it less user-friendly for some users. Requires some technical knowledge. |
| 🦾 File recovery efficiency | Recovers a wide range of file types, including specific formats of documents, photos, videos, and more. | Recovers a wide range of file types, including documents, photos, videos, and more. But not as extensive as Disk Drill. |
| 🔎 Deep Scan Capabilities | Offers deep scanning for in-depth data recovery. | Capable in file recovery however it is worth noting that PhotoRec utilizes signature scanning and is not capable of recovering original file names. |
| 🗃️ Supported File Systems | Supports various file systems including APFS, HFS+, NTFS, ExFAT, FAT32, and more. | Can recover data from a wide range of file systems, including NTFS, exFAT, FAT, EXT, HFS, and more. |
| 🚀 Scanning Speed | Faster scanning process | Slower scanning process |
| 🖼️ Preview and filtering functionality | Provides preview and filtering options to help users find specific files quickly. | Limited file preview and filtering capabilities. |
| 💸 Cost | Offers the ability to scan hard drives for free and preview recoverable files. Recovery requires obtaining the license. | Completely free and open-source software. |
Option A: Disk Drill
![]() Disk Drill provides a user-friendly and secure method of recovering data from an accidentally formatted hard drive on a Mac. With just a few clicks you can start scanning and recovering data you thought was lost. The tool supports the recovery of virtually any type of disk-based storage device including internal and external hard drives. It has a faster scanning process than PhotoRec. This tool allows you to preview and recover specific files, unlike PhotoRec which recovers everything at a go. The tool can successfully recover hundreds of file formats including the image and video files often stored on external hard drives.
Disk Drill provides a user-friendly and secure method of recovering data from an accidentally formatted hard drive on a Mac. With just a few clicks you can start scanning and recovering data you thought was lost. The tool supports the recovery of virtually any type of disk-based storage device including internal and external hard drives. It has a faster scanning process than PhotoRec. This tool allows you to preview and recover specific files, unlike PhotoRec which recovers everything at a go. The tool can successfully recover hundreds of file formats including the image and video files often stored on external hard drives.
In addition to its excellent data recovery performance, Disk Drill includes free tools that help you protect and manage your valuable data. The app enables you to make byte-level backups, find duplicate files, erase free space, and securely shred data so it cannot be recovered.
The following procedure demonstrates how to use Disk Drill data recovery software to restore files from a formatted hard drive.
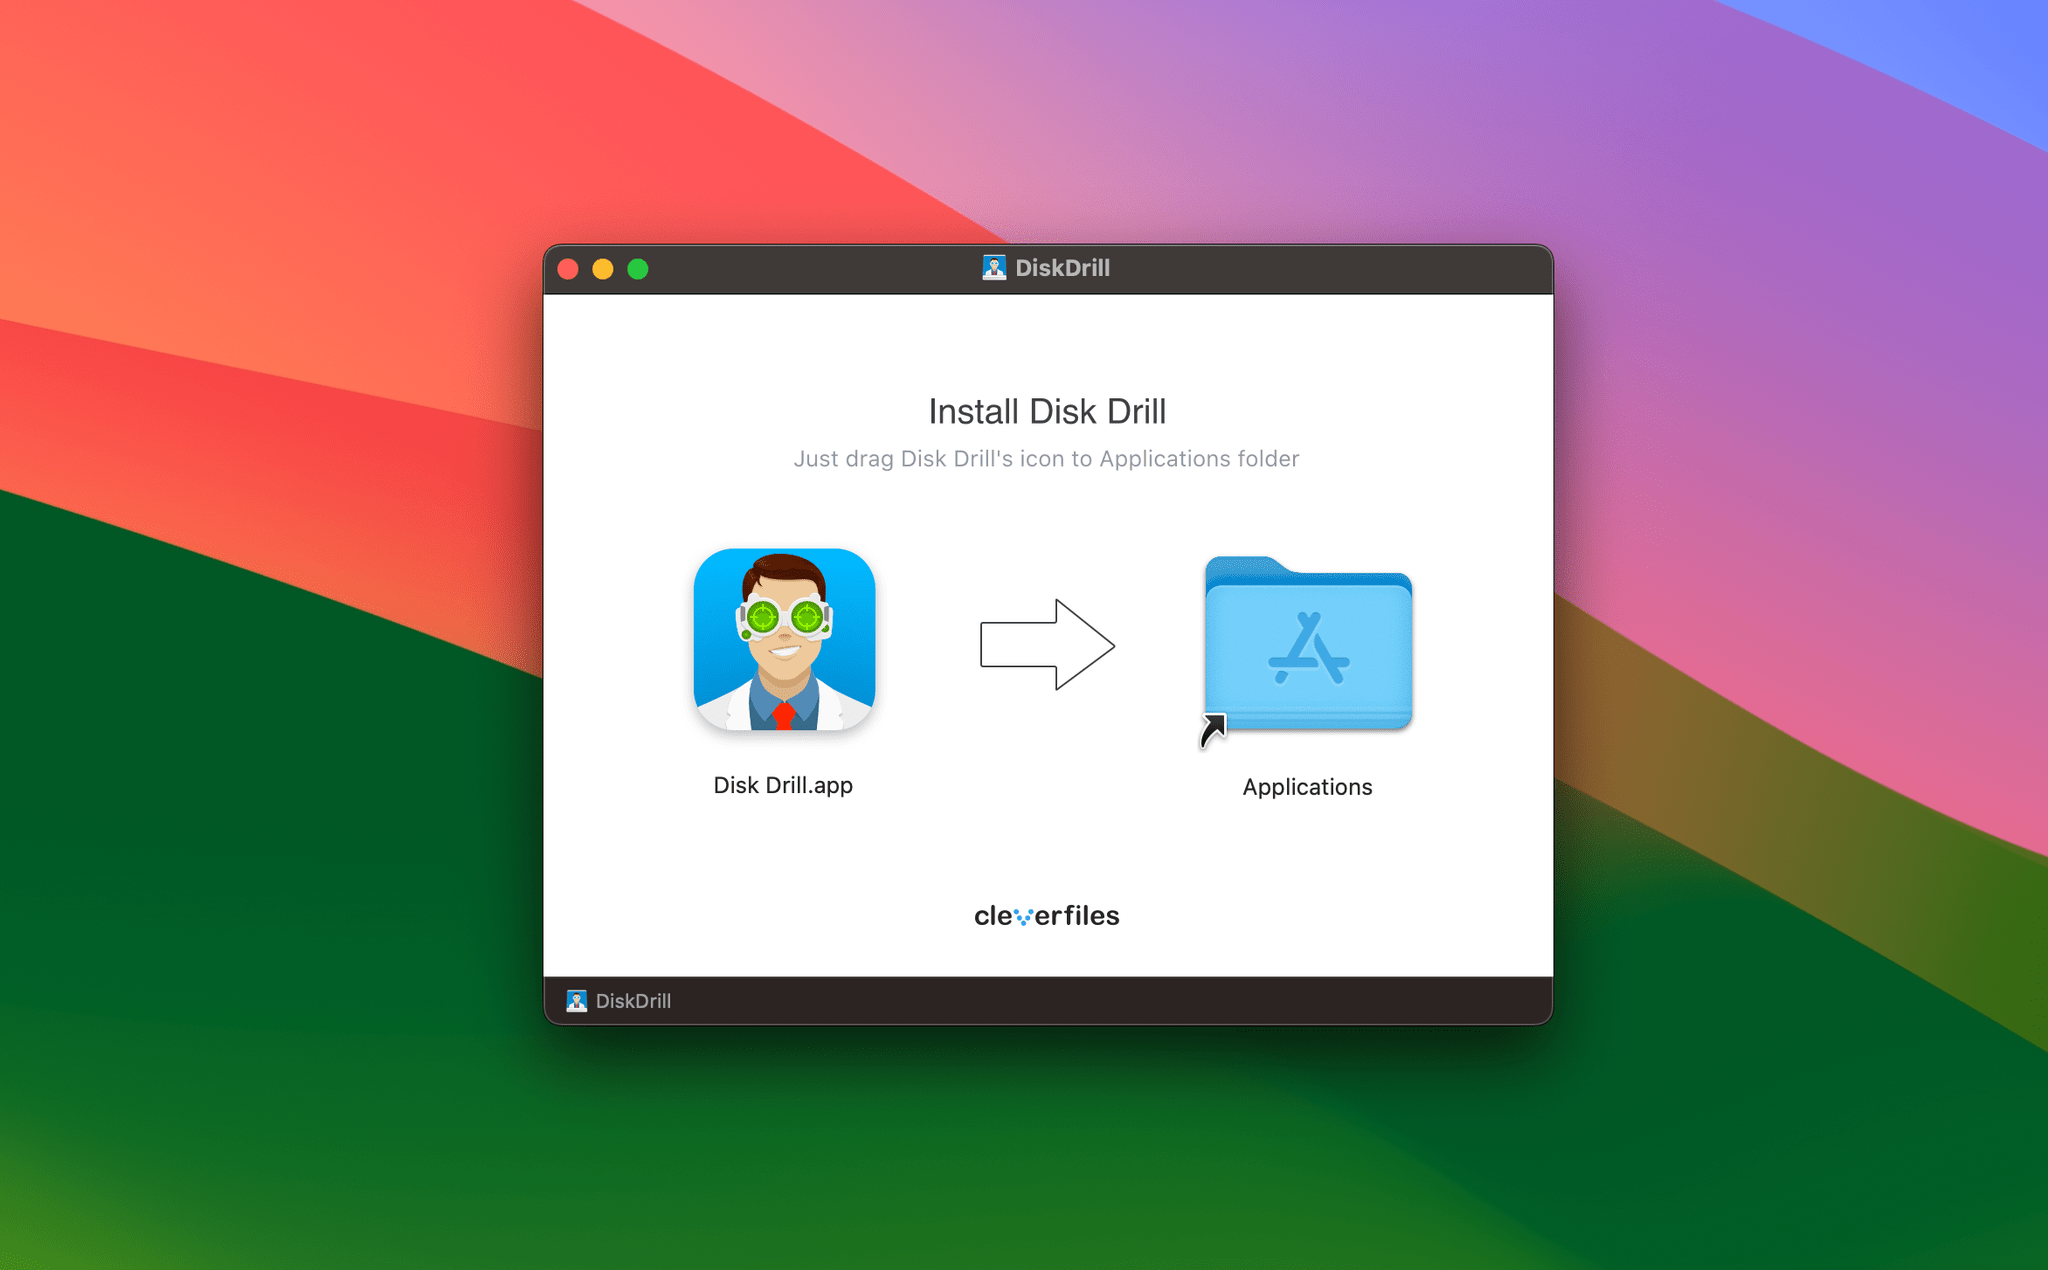
- Download and install Disk Drill for Mac You can start with the free trial version of the tool which lets you scan your hard drive to determine which files the tool can recover.
- Connect the device to your Mac if attempting recovery on an external hard drive.
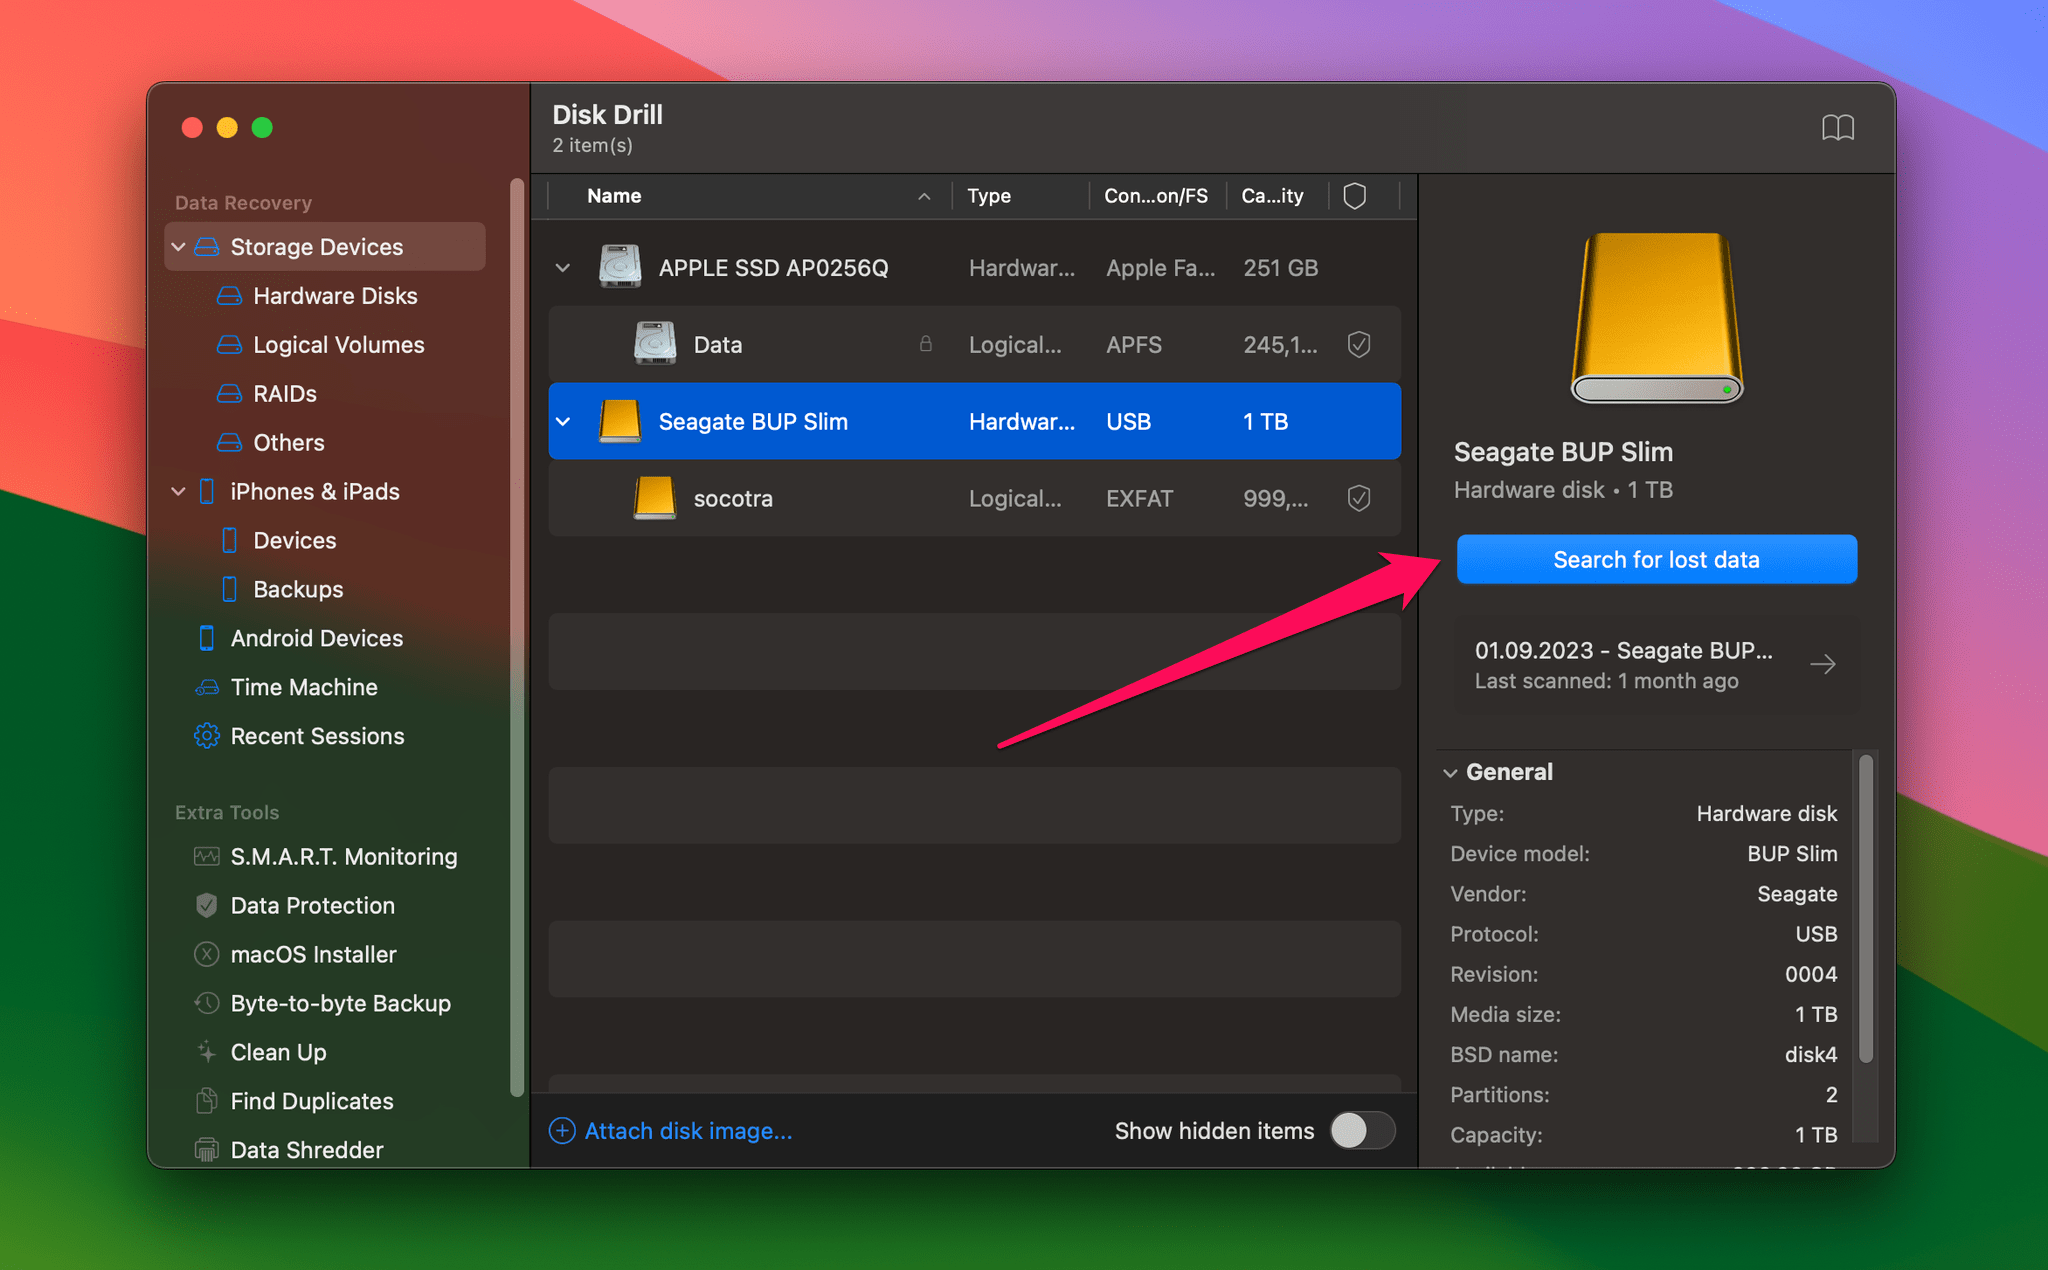
- Launch Disk Drill and select the formatted hard drive or partition from the app’s main window.
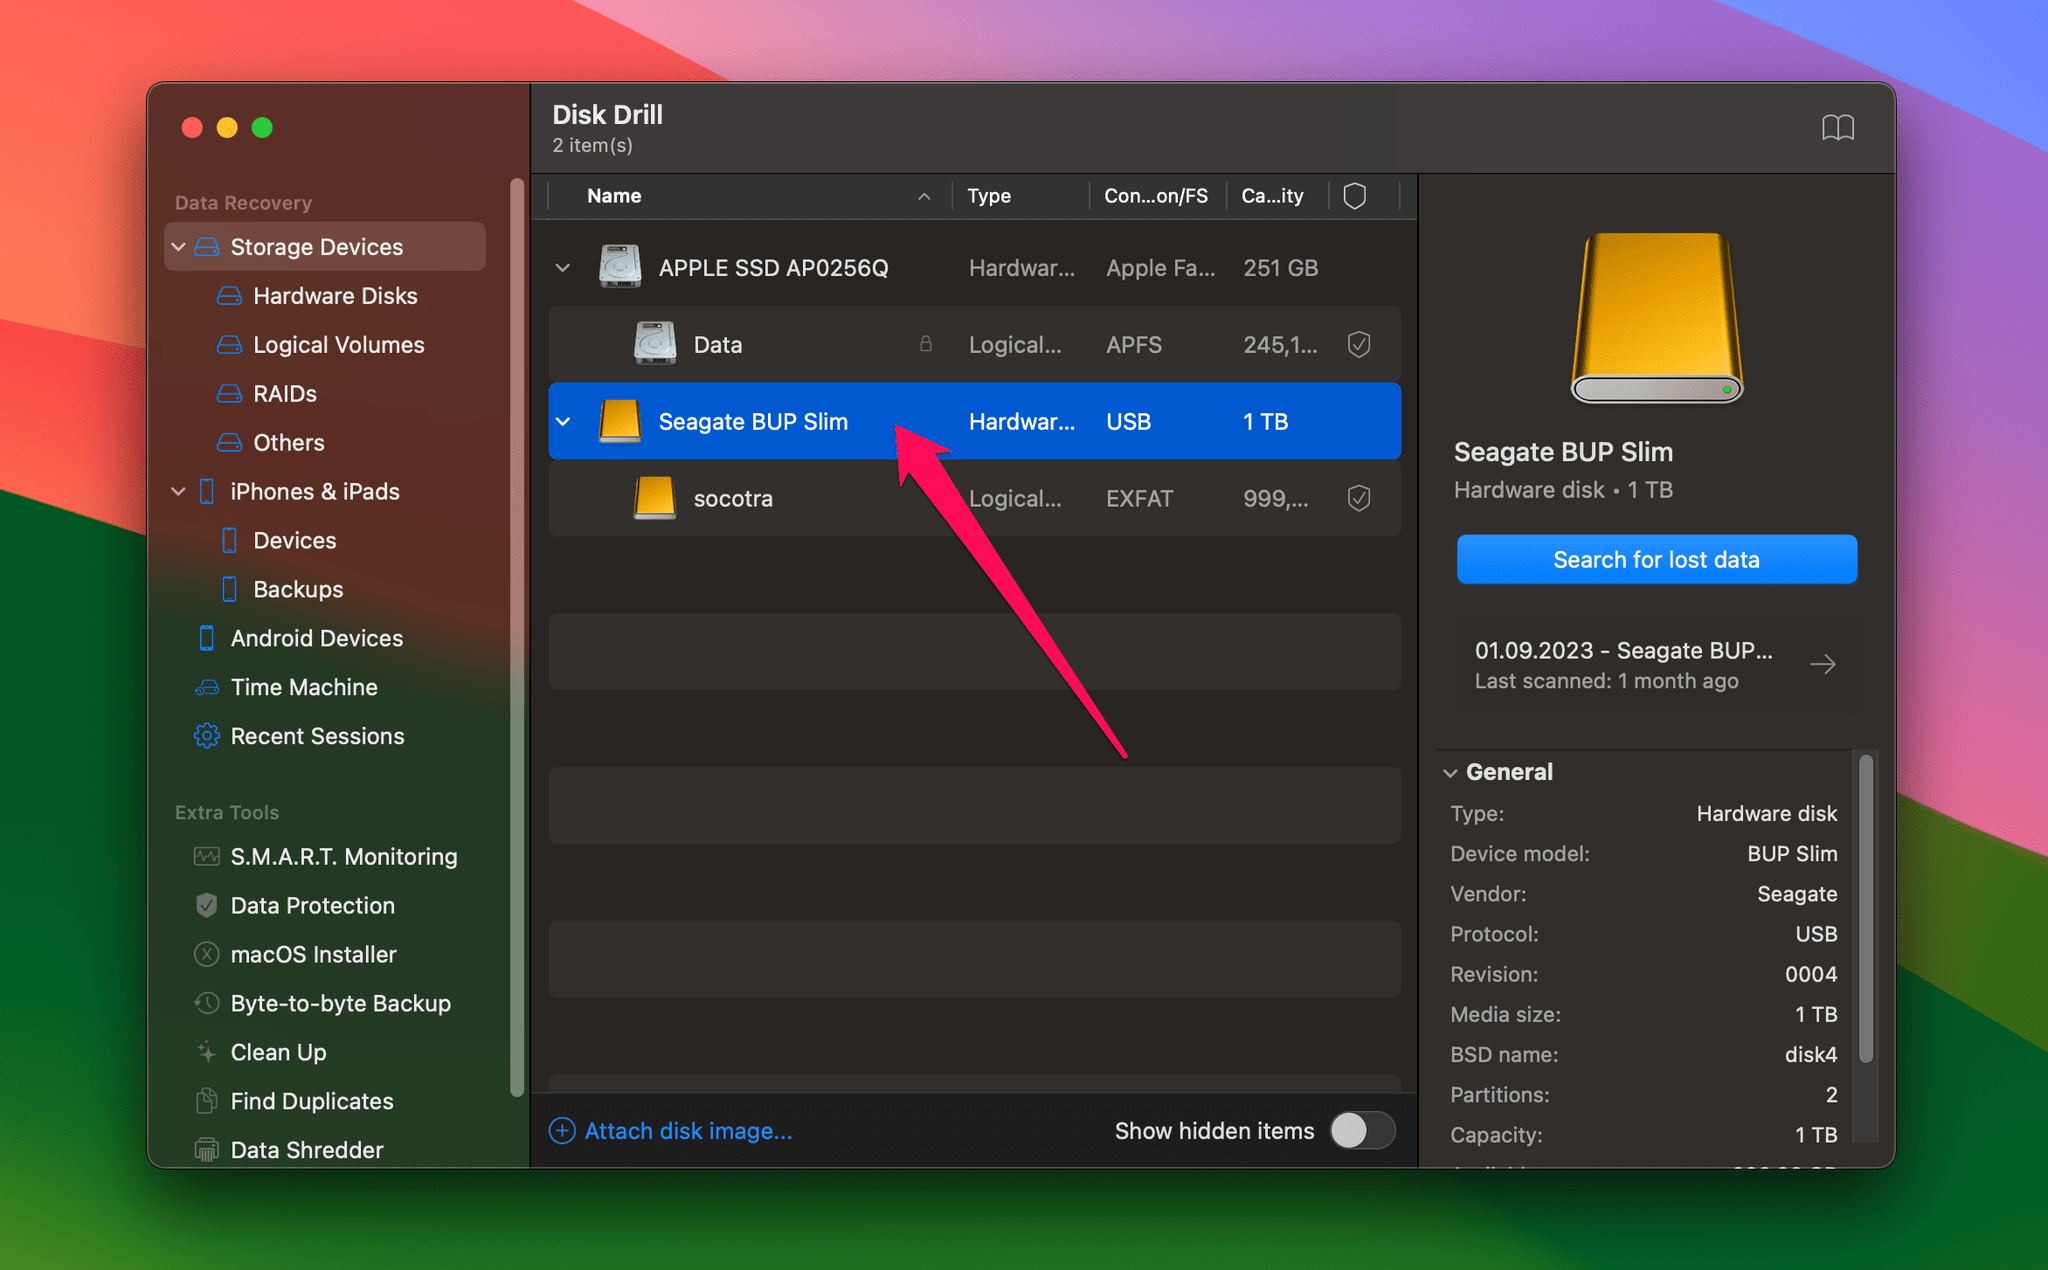
- Click the Search for lost data button to initiate the scanning process.
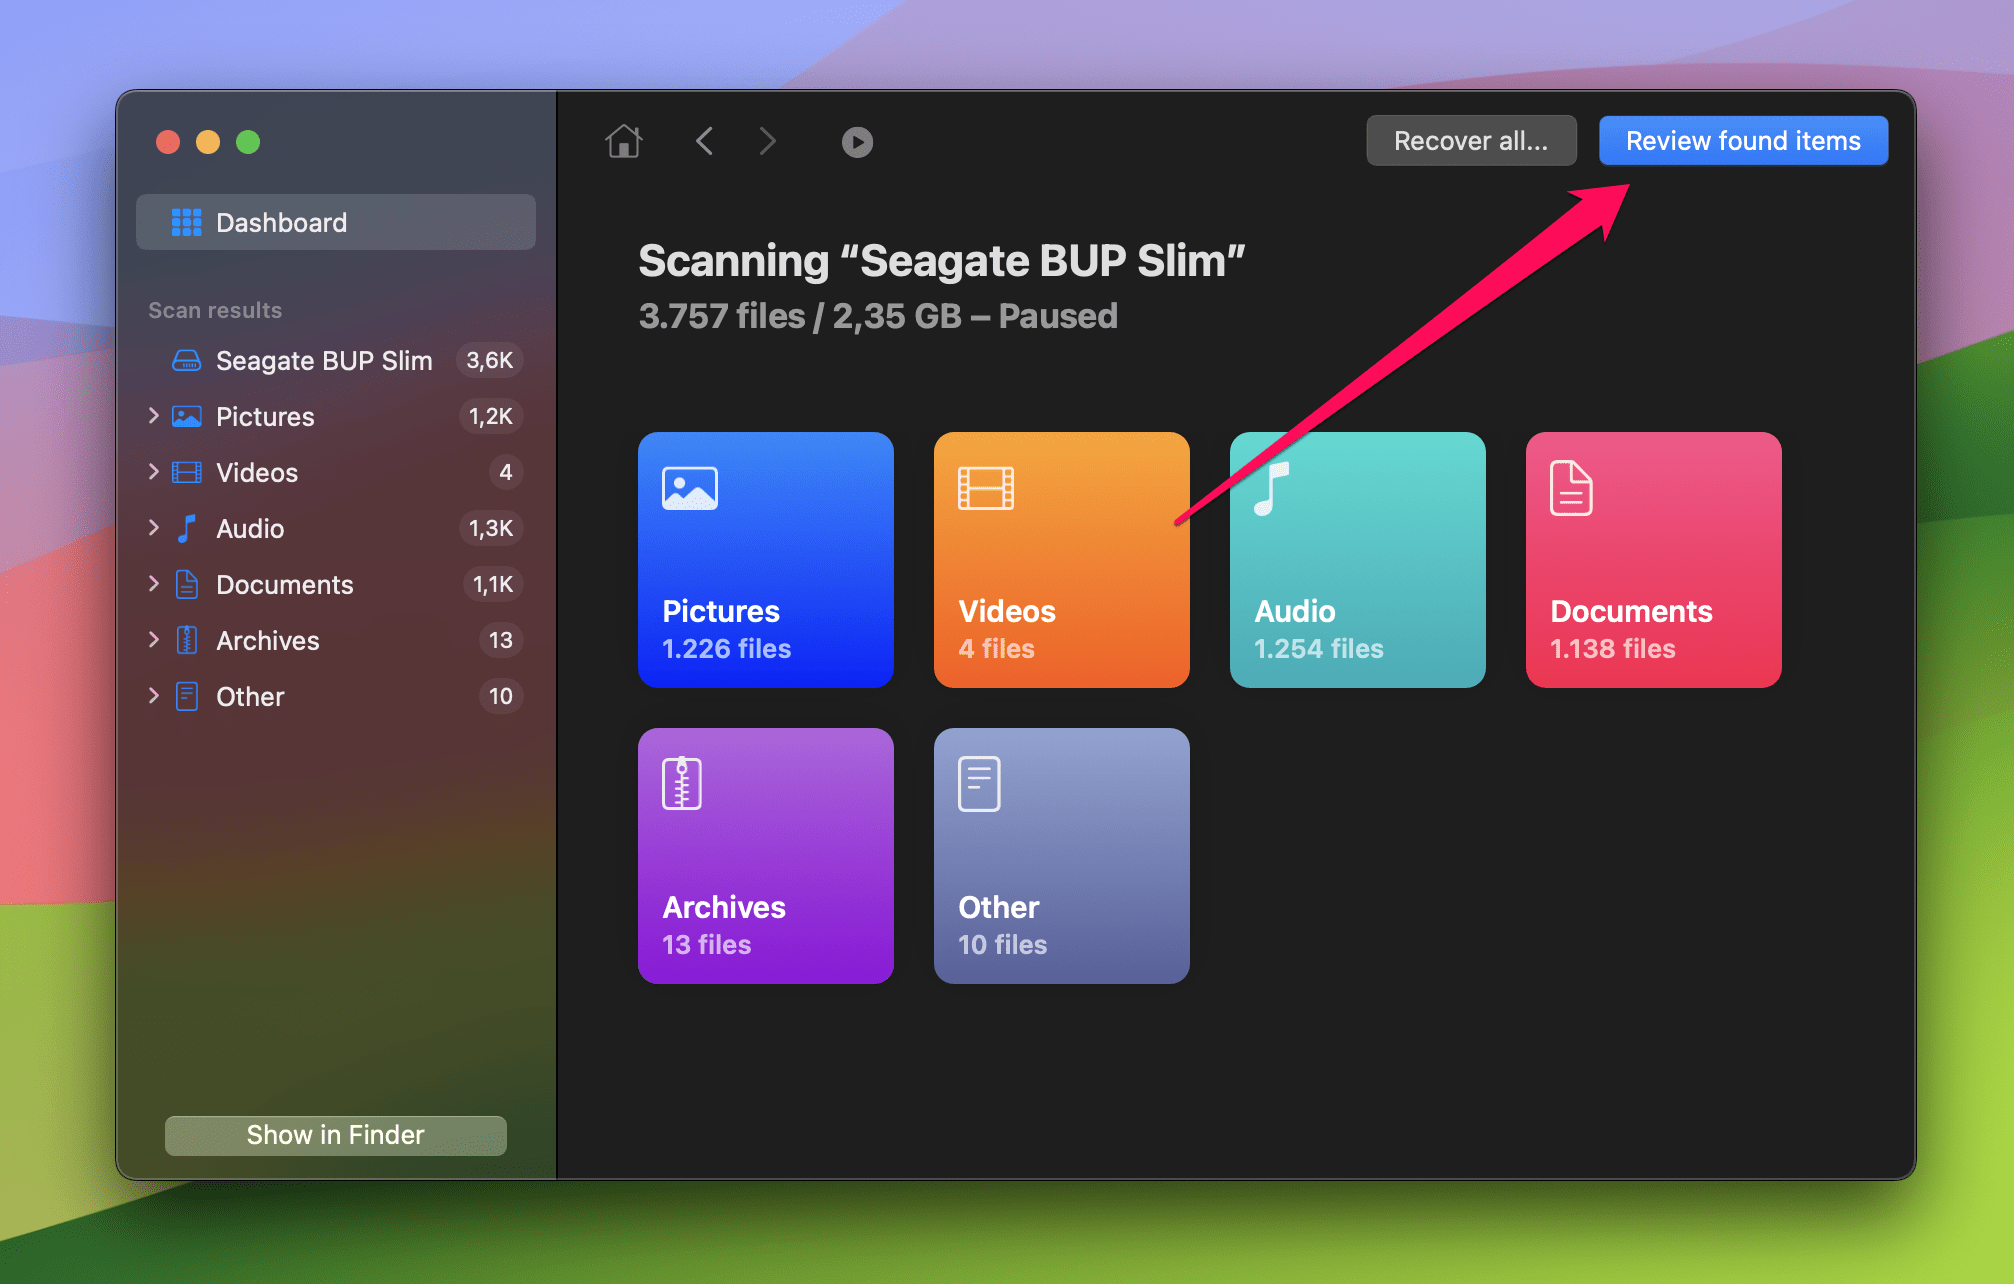
- Click Review found items in the top right when the scanning process is done.
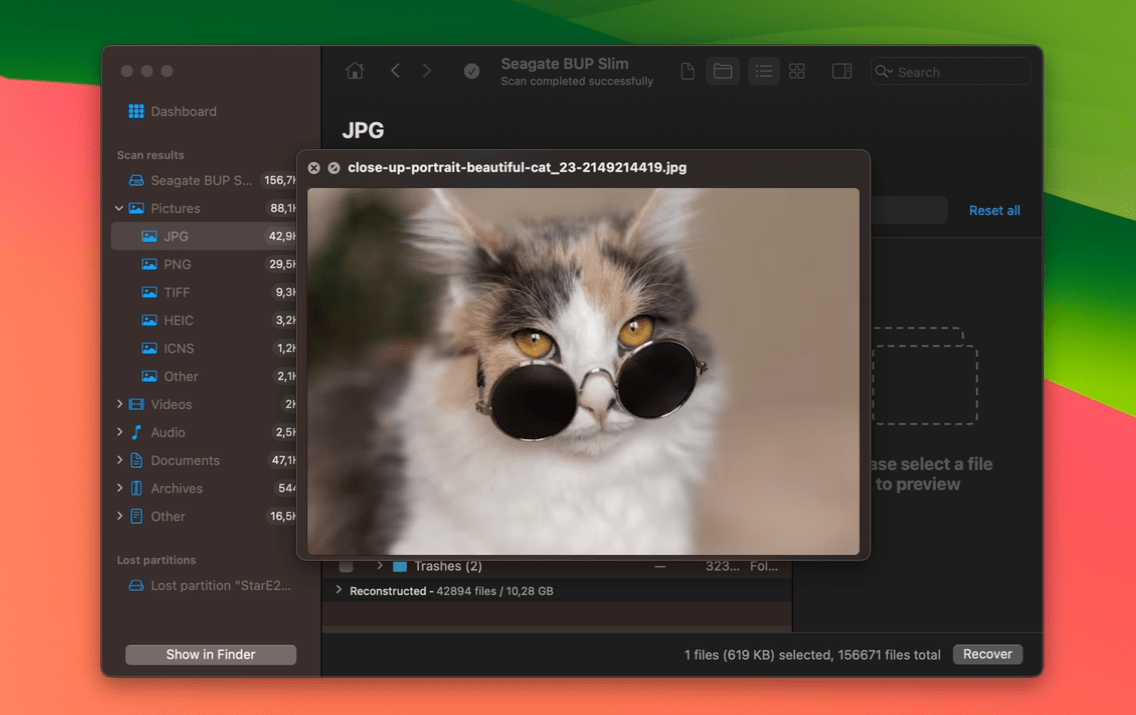
- Preview the recoverable files that Disk Drill finds to determine which ones you want to recover. Files are categorized into Pictures, Videos, Audio, Documents, and Archives folders for easy identification.

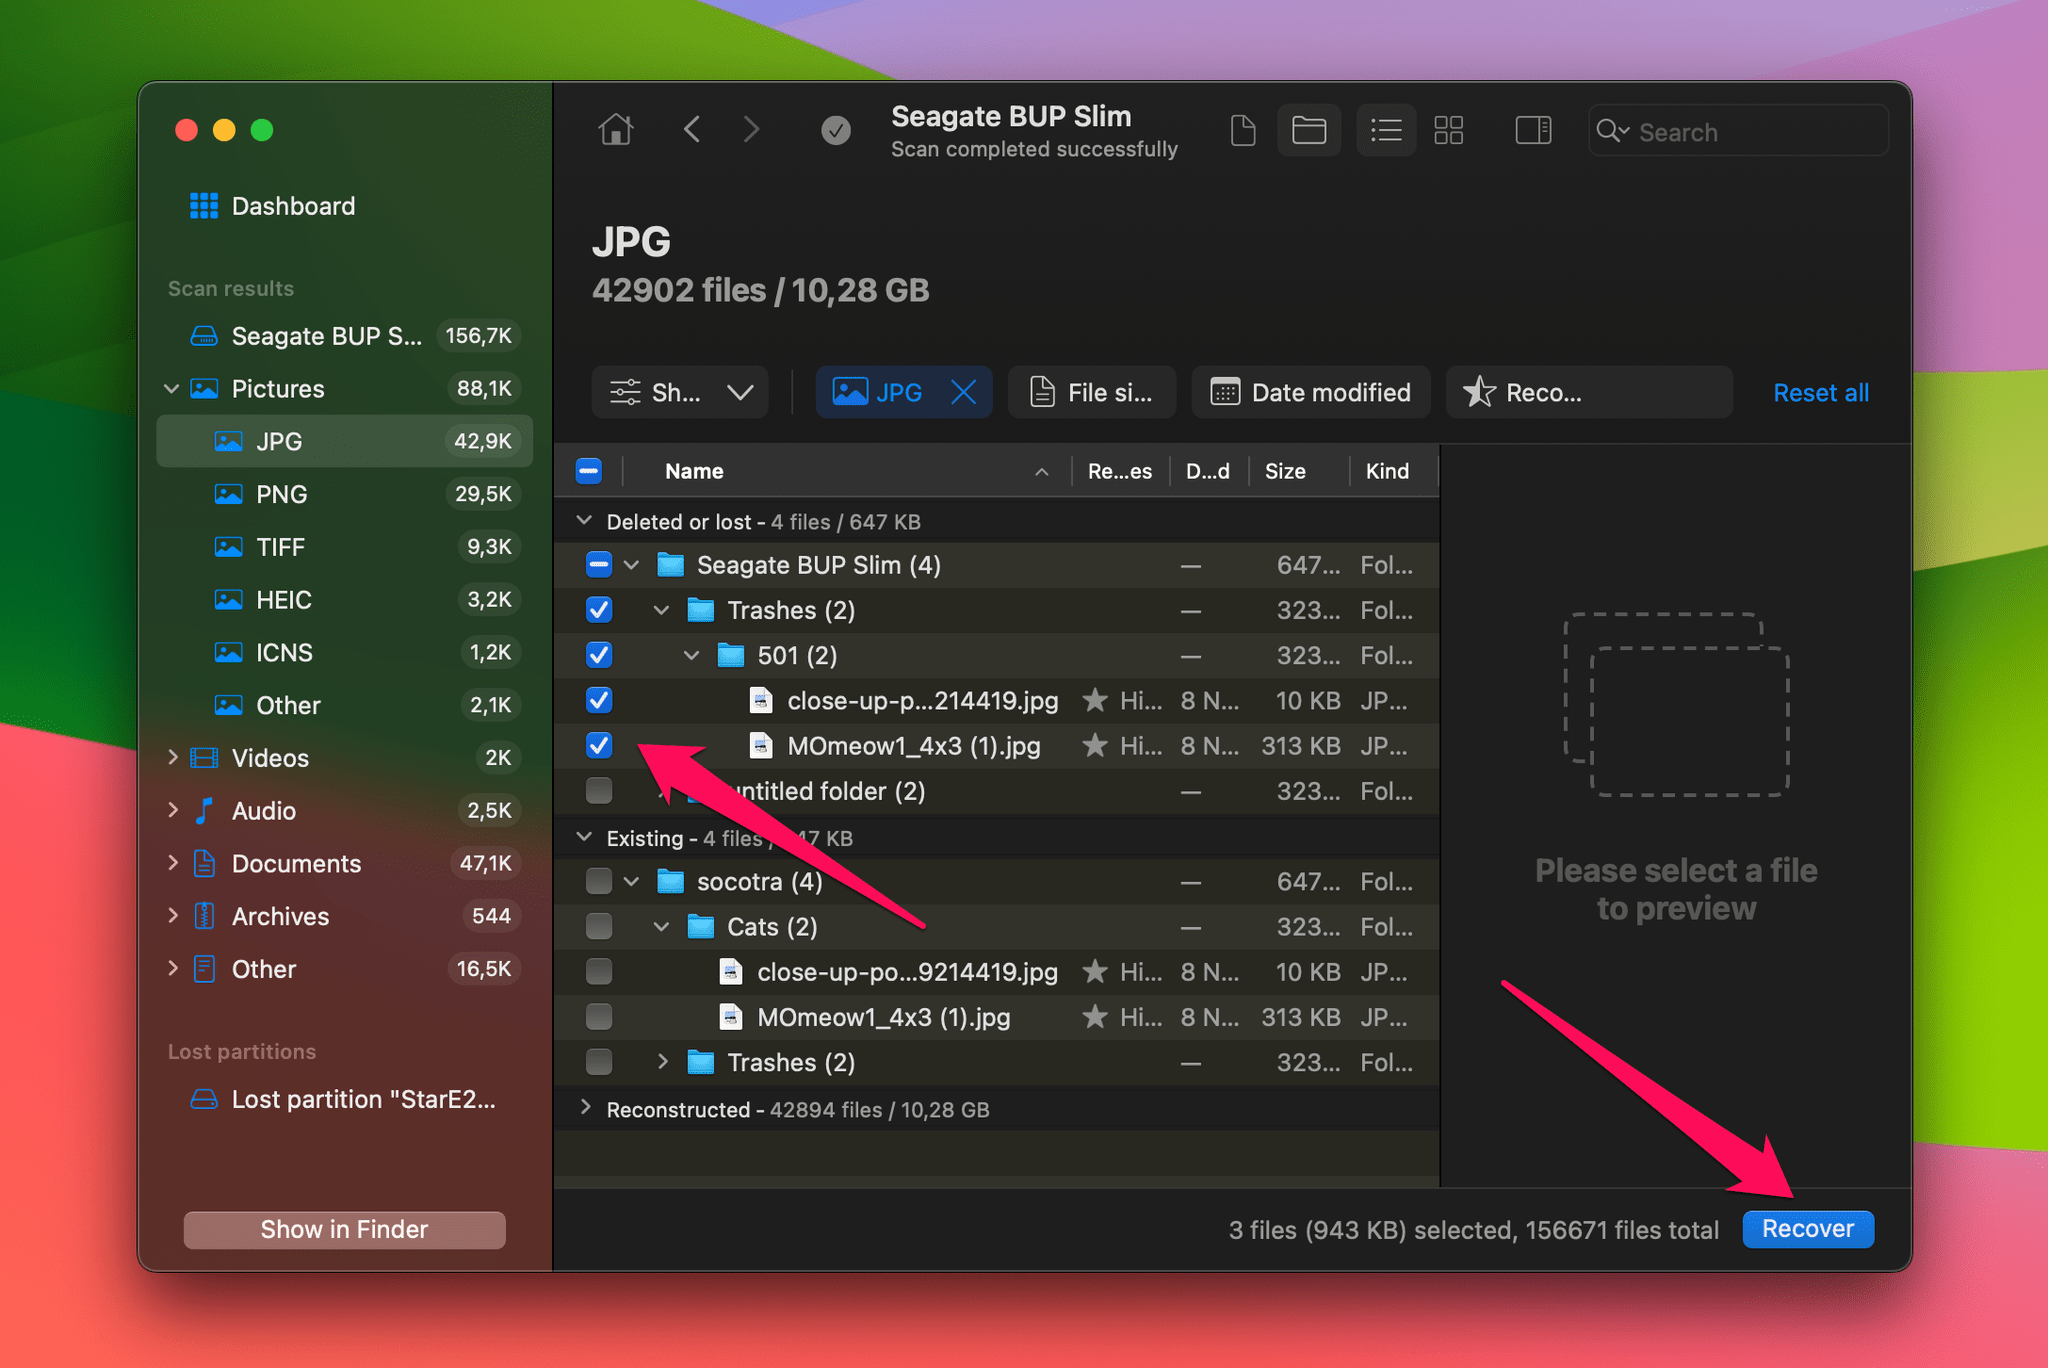
- Select the files you want to restore and click Recover.
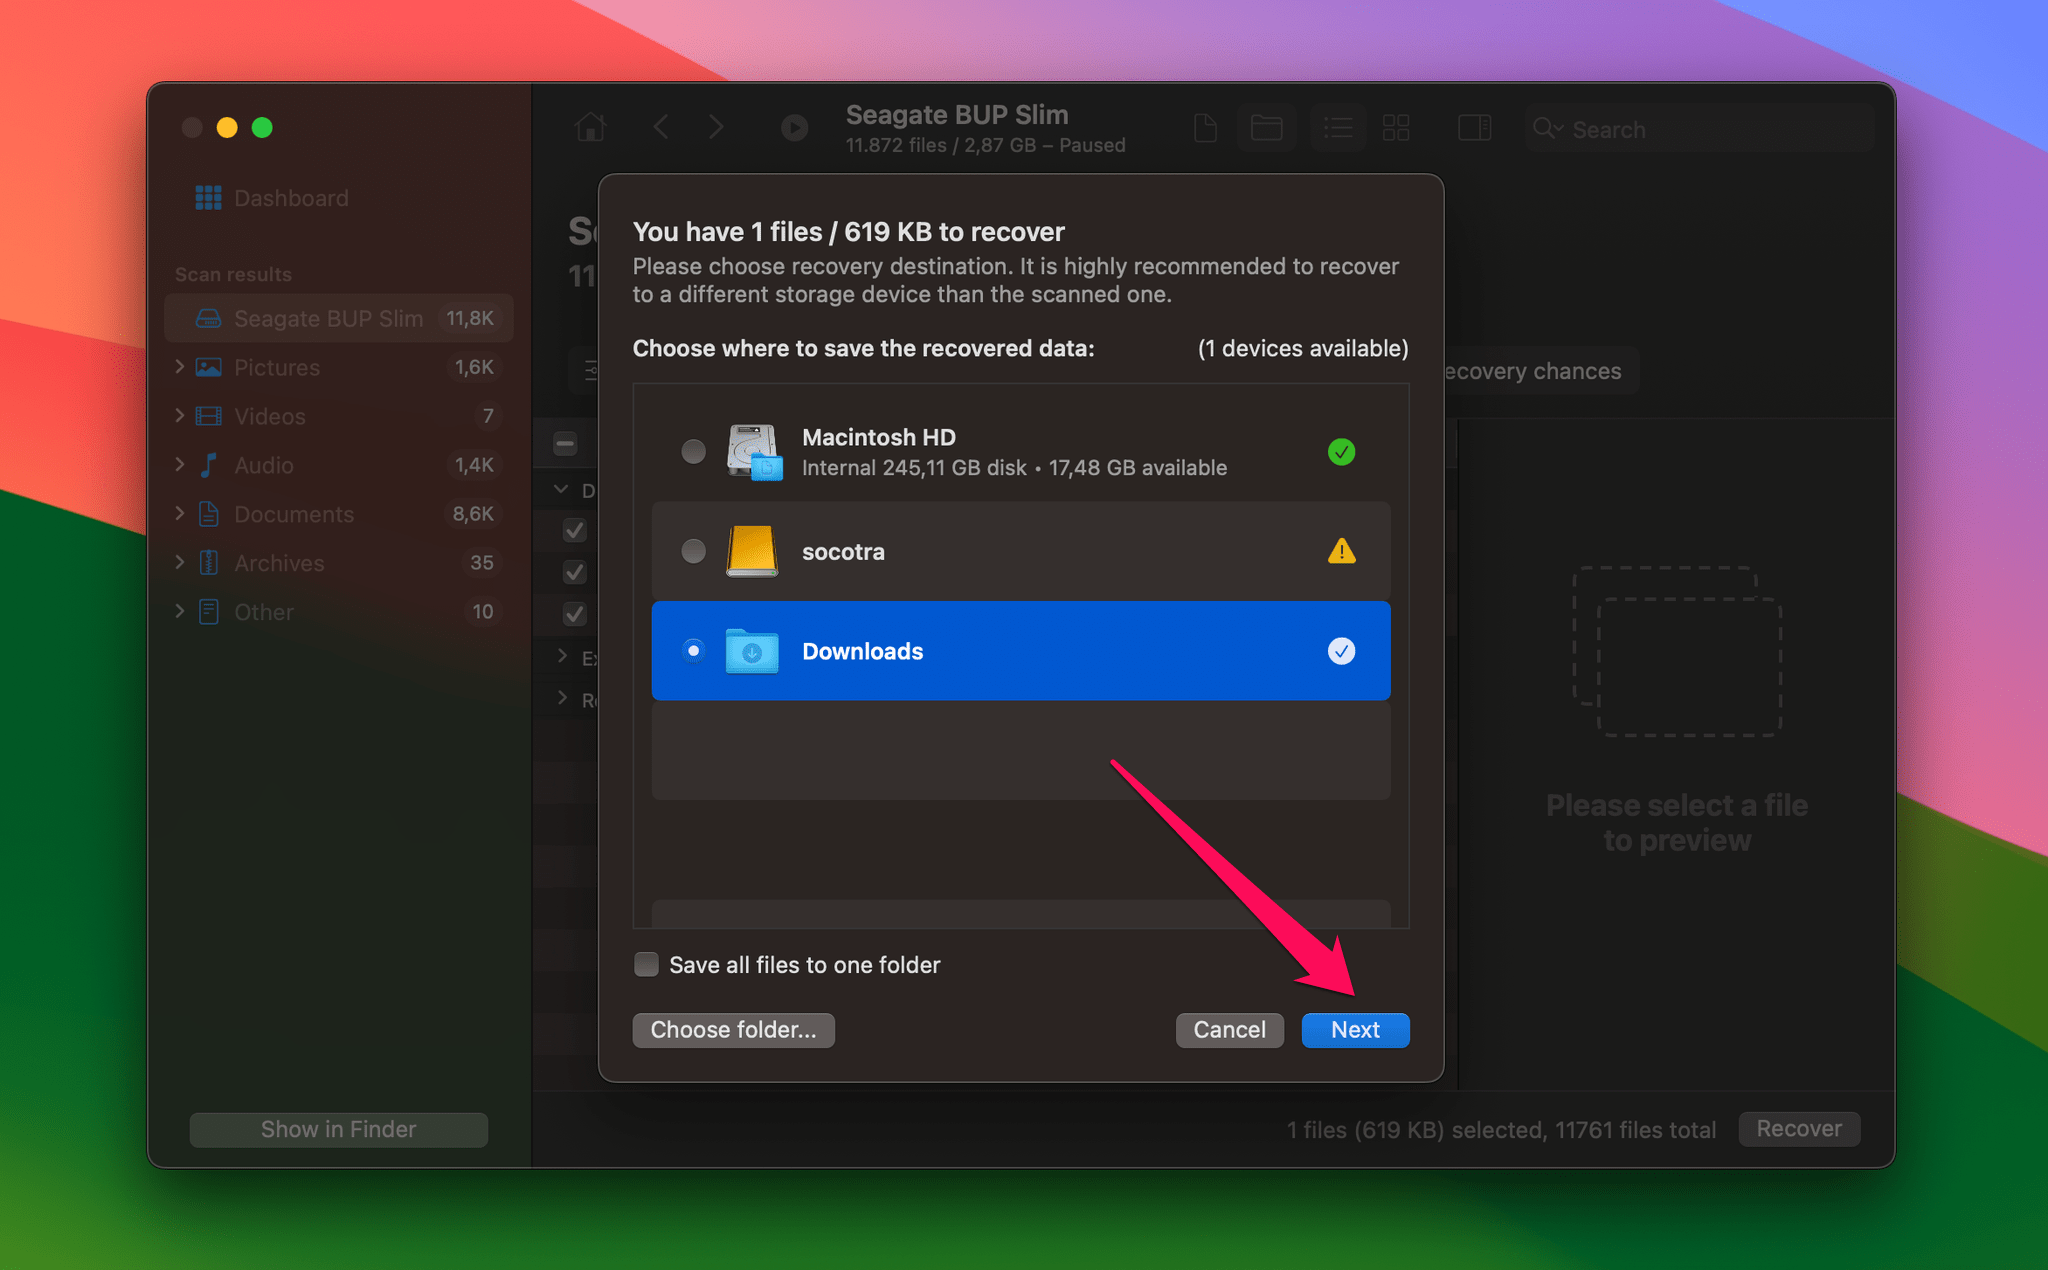
- Provide a safe location for storing the recovered data that is not on the original device.
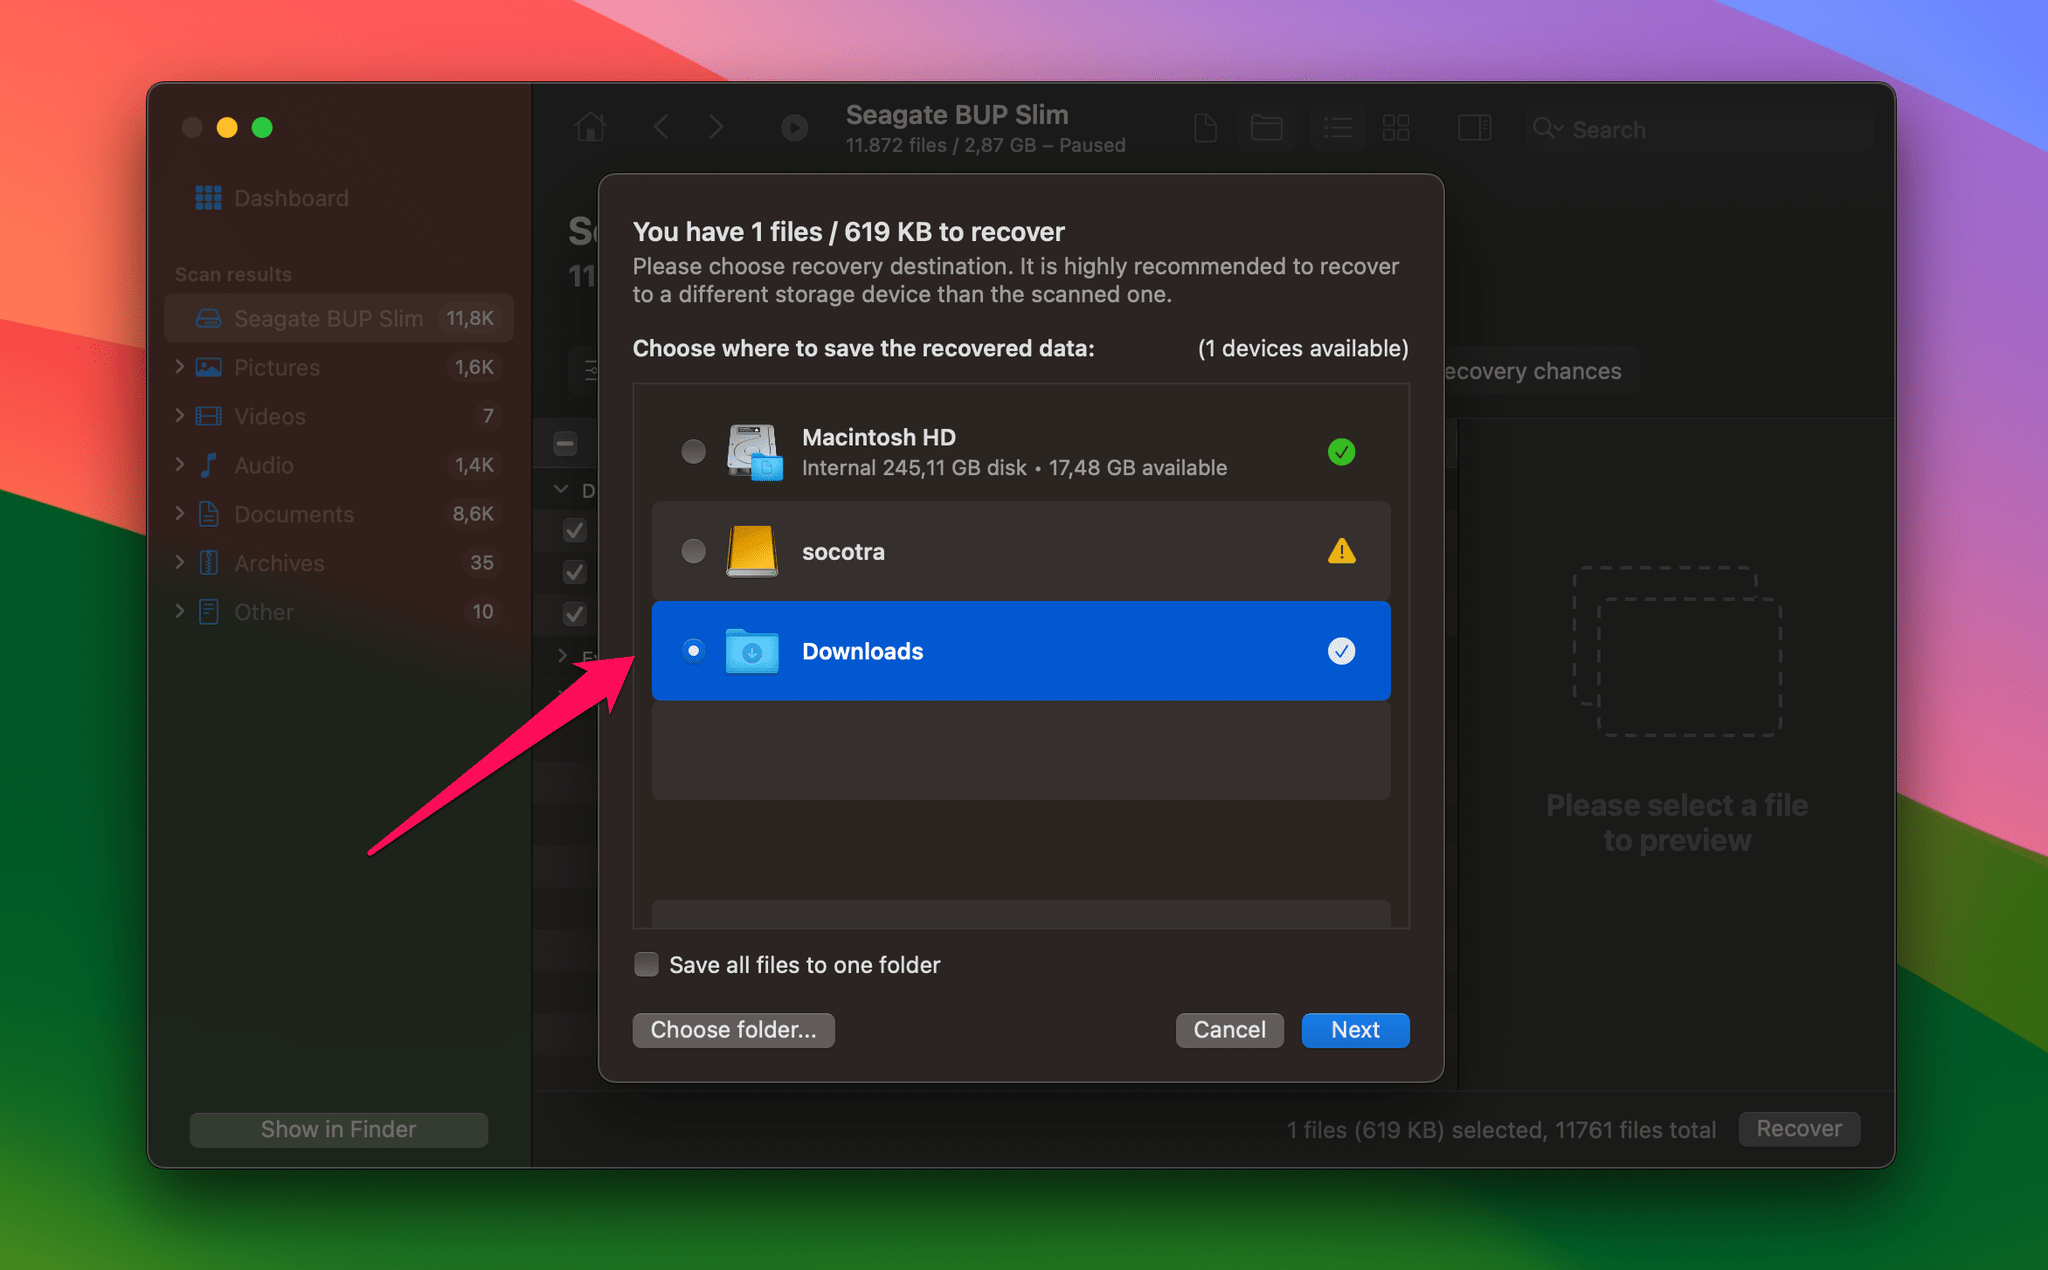
- Click Next to complete the hard drive data recovery process.
Option B: PhotoRec
PhotoRec uses a command line interface, unlike Disk Drill which uses a graphical interface. The command line interface makes PhotoRec less user friendly; it requires some technical knowledge to use it effectively.
It uses signature scanning, meaning it’s not capabe of recovering original file names. But you can recover differnet types of files including photos, videos, word documents, and more. You can recover file from various file systems, including NTFS, FAT, exFAT, HFS, EXT, etc.
This tool has a slower scanning process and no file preview and filtering capabilites like Disk Drill. However, PhotoRec is a free and open-source software you don’t need to pay for.
Follow the below steps to restore files from a formatted hard drive using PhotoRec:
- Install Homebrew on your Mac by navigating to the Terminal app and entering this command:
/bin/bash -c "$(curl -fsSL https://raw.githubusercontent.com/Homebrew/install/HEAD/install.sh)"

You may be prompted to enter yur Mac’s password.

- Enter the below command to install TestDisk:
brew install testdisk

- Run PhotoRec by entering the below command:
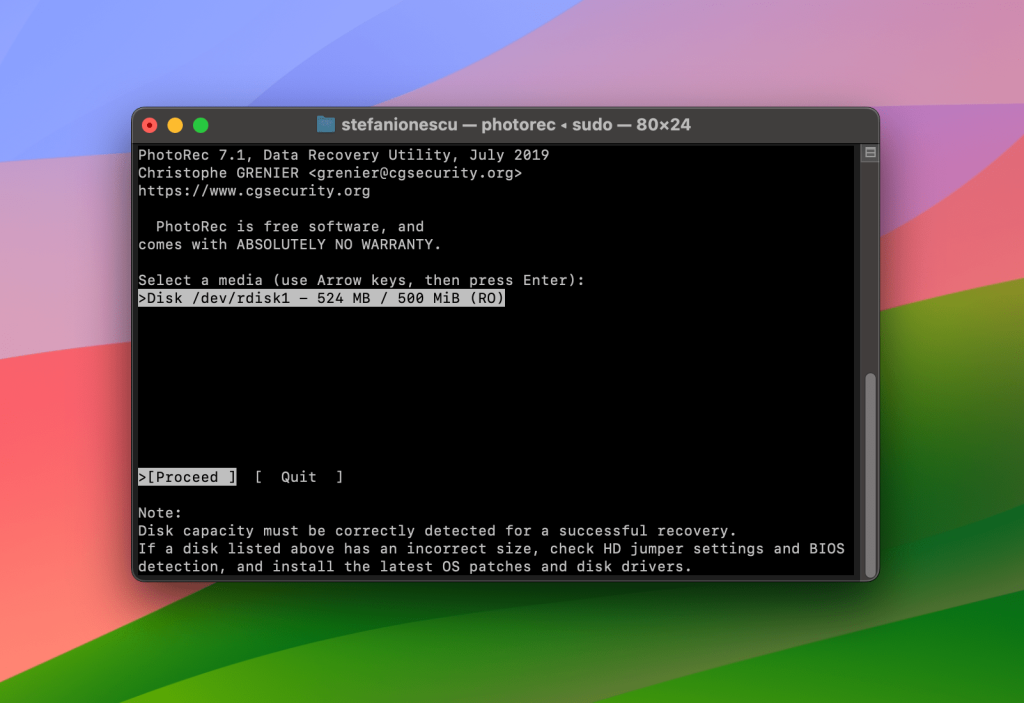
sudo photorec

- Use your keyboard’s up and down arrows to choose the formatted hard disk you want to recover from the list. If the disk isn’t showing, double-check that it’s connected to your Mac and relaunch PhotoRec.
- Select the partition and click Search in the bottom-left corner.

- Select the file format the disk uses and press Return/Enter.

- Choose the location you want to store the recovered files in. You can not select individual files on PhotoRec. Instead, the app recovers all the files it finds, so ensure to save the files in a place you can easily locate.

- PhotoRec will start the recovery process, and you’ll receive a notification when it’s done. Afterward, head to the location you chose in the preceding step, and you should see your recoverd files there.


Are there any specific challenges when recovering formatted external disks?
The main issue users can run into when trying to recover a formatted external hard drive is making sure your Mac recognizes the device. Before launching Disk Drill to start a recovery, you need to connect the external drive to your computer. You should open a Finder window to verify the computer sees the drive.

If the device is not showing up in Finder, it may be that the cable is not firmly connected, either to the drive or the computer. Disconnect and reconnect the cable and attach it to the computer again.
It is better to ensure the disk appears in the Disk Utility app with the correct size instead of Finder. If something is wrong with the disk’s file system, it will not appear on Finder but can still appear in Disk Utility. Showing up in Disk Utility is enough for a Disk Drill recovery.
You should be able to access the external drive at this point. If not, you may have a damaged cable. Try using a different connector to attach the external drive to your Mac. But, reconnecting the disk does not always restore access to it.
Once the device is connected to your Mac and the operating system can access the drive, the recovery steps are essentially the same as for an internal drive. Select the external hard drive from the list of available devices presented by Disk Drill and click the Search for lost data button to start scanning the drive for recoverable files and folders.
Alternative Approaches to Recover Data from Formatted Drive on Mac
Here are some alternative approaches to recover from formatted hard drive on a Mac.
Time Machine Backups
If you have previously backed up your files to an external hard disk with the Time Machine app, you can recover it with the same software. The drawback is that this method only works if you previously remembered to back up your Mac device, which many people don’t.
Using iCloud Backups
If your Mac device is connected to an iCloud account with sufficient storage space, you can recover files from iCloud back to the device. This method will hardly work if you’re on iCloud’s free tier, which gives just 5 GB of storage space, insufficient for Mac backups. You must pay for a premium plan to access more than 5 GB. Apple offers different plans between 50 GB and 12 TB.
Contacting Professional Data Recovery Services
You can contact professional data recovery services to take a look at your Mac and see if they can recover files for you. However, this option is usually expensive. It can take significant time and also doesn’t guarantee successful recovery.