Table of Contents
Did you delete an important file from your Mac by mistake? Or did your startup disk suddenly fail? Luckily, if you’ve been regularly backing up your Mac, you’ll be able to easily restore files from a Time Machine backup whenever needed. So, whether you want to recover a particular document, restore your Mac to an earlier version, or migrate data from the Time Machine backup to a different Mac, it’s all possible.
Quick Overview of Mac Time Machine’s Capabilities
All Macs come with a built-in tool called Time Machine. It is an Apple software that helps to backup data and recover accidentally deleted or corrupted files. But not all Mac users are aware of why exactly this tool is one of the top choices when it comes to creating backups.
For you to get a better understanding of what Time Machine has to offer, here are the main features that this tool comes equipped with:
- 💻 Automated and manual backup: Once you set up Time Machine on your Mac, the tool will automatically perform backups either hourly, daily, or weekly. And aside from that, you also have the chance to manually backup your computer whenever you need. This way, you can be sure that all of your data will be safe in case of a system failure or corruption.
- 🗂️ Multiple restore points for system and files: Whenever trying to recover the data using Time Machine, you are able to view a timeline of your backups and therefore, choose a specific version of a file or system.
- 🔌 Data migration: This feature is extremely useful when transferring data from a backup after macOS reinstallation or when setting up a new Mac. With Time Machine, you can easily transfer all of the files, apps, and settings from any backup version when needed.
- 💾 External drive compatibility (to backup external devices): Time Machine allows you to backup the files from your external devices as well (for example, from an external hard drive or a USB flash drive). However, this will work only with HFS and APFS file systems.
- ⛑️ Backup encryption: Time Machine can help you add an extra level of protection to the data in your backup by encrypting it. This is especially helpful when dealing with confidential files.
How to Ensure Your Time Machine is Up and Running
Not sure if Time Machine is working on your Mac? Well, first things first, you should check whether this tool is enabled and set up on your computer.
Follow these steps to see whether Time Machine is already enabled and creating backups of the files on your Mac (and if disabled, we’ll show you how to set it up):
- Click the Time Machine icon on the menu at the top of the screen and choose Open Time Machine Settings (if you can’t find the icon, open the System Settings from the Dock and type Time Machine in the search field).

- If Time Machine hasn’t been set up on your Mac yet, you’ll see an Add Backup Disk button.
- To enable Time Machine, connect an external HDD (if you want to use it to store the backups) and click Add Backup Disk.
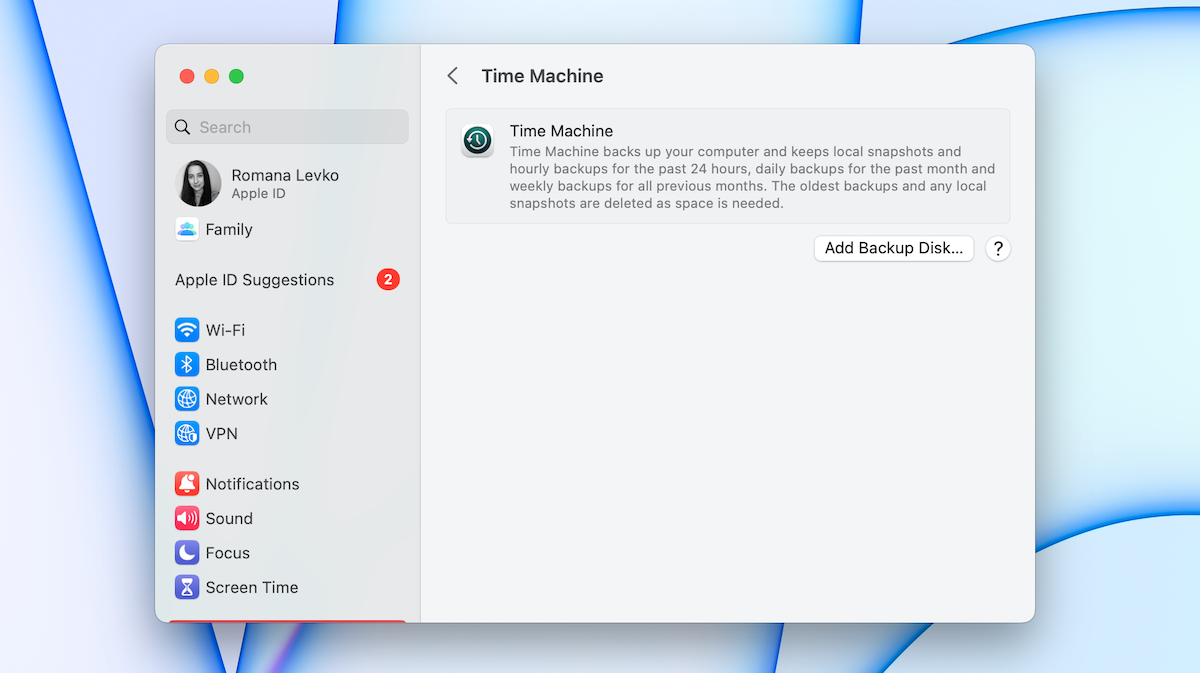
- Choose your device from the list and click Set Up Disk (finish the setup process by following the onscreen instructions).
Now if you’re sure that Time Machine is actually enabled, but still want to check whether it’s creating backups, here’s what you should do:
- Click the Time Machine icon in the menu bar at the top of your screen
- Press and hold the Option key.
- Select Verify Backups.
3 Proven Ways of Restoring from a Time Machine
Don’t know how to restore files from a Time Machine backup properly? It’s alright; we’ve all been there. If you do everything right, you’ll be able to recover the needed data in no time.
Here’s how to recover files from a Time Machine backup using three different methods.
Method 1: How to Use a Time Machine to Restore Files
![]()
When it comes to recovering data from a Time Machine backup, this method is the most frequently used as it allows you to restore previous versions of files, in case you made some mistake with editing them. Aside from that, this method also lets you recover an accidentally resaved, deleted, or corrupted file. So basically, you should be able to recover any file from your Time Machine backup, regardless of the reason why it got lost, changed, inaccessible, or deleted in the first place.
There are two ways you can approach this data recovery method: either by using a backup disk or local snapshots. Time Machine automatically makes backup files of the data stored on your Mac and calls local snapshots almost every hour. They are kept for 24 hours and then get automatically replaced with the newer ones. If you want to restore a file that has recently been altered or erased from your Mac, you can easily recover it simply from a local snapshot. Otherwise, you’ll have to connect the disk containing your Time Machine backups to restore the needed data.
Here’s how to recover individual files on your Mac using Time Machine:
- Open the needed folder or file. Head to the folder where the deleted file was previously located, or open the document that you wish to revert.
- Launch Time Machine. You can do this either from the Launchpad or by clicking the Time Machine icon on the menu bar at the top of the screen and then clicking Browse Time Machine Backups from the drop-down menu.

- Choose the right Time Machine backup. Use the arrows or the timeline on the right side of the screen to navigate through all of the previous backups. Optionally, you can use the multiple windows stacked on one another to navigate between different versions of the file or folder you’re browsing through.
- Click on the file that you want to restore. To preview it, press Space on your keyboard. If it is the right one, then click the Restore button to confirm and recover the chosen file.
Method 2: How to Restore Mac from Time Machine
![]()
If there is a problem with your startup disk and you can no longer use your Mac properly, your best option is to restore the entire macOS from a Time Machine backup to the version when your Mac had no issues.
This method is especially helpful in the following scenarios:
- 💻 System malfunction – If your Mac is not functioning properly because of macOS corruption or software incompatibility, restoring the whole Mac from a recent Time Machine backup is a great option that will help to fix your computer without losing data.
- ⚙️ Unintended system changes – If you made any changes to your Mac’s settings or deleted important system files that led to severe issues, Time Machine can help you revert your Mac to a state when it was functioning properly.
- ❌ Security incidents – Malware or unauthorized access can lead to serious security issues. If you’re experiencing such an issue, restoring the entire Mac from a Time Machine backup is one of the best options that will let you fix the problem.
To do this, you must have a ready Time Machine backup of your Mac on an external drive. So, to restore all of the data from a Time Machine backup, you should do the following:
- Connect the external drive with the Time Machine backup to your Mac. Also, make sure that it is turned on and working.
- Boot into macOS Recovery. To do this, head to the Apple menu and click Restart. As soon as you click it, press and hold Command + R. Hold these two keys until you see the startup screen and then follow the instructions. However, the process of running an M1 Apple Silicon Mac in the macOS Recovery mode is different: you should head to Apple menu and click Shut Down, power it back on by holding the power button until the Loading startup options screen appears, then click Options, and Continue.
- Click Restore From Time Machine. Use the macOS Utilities window to restore your entire Mac from a Time Machine backup.
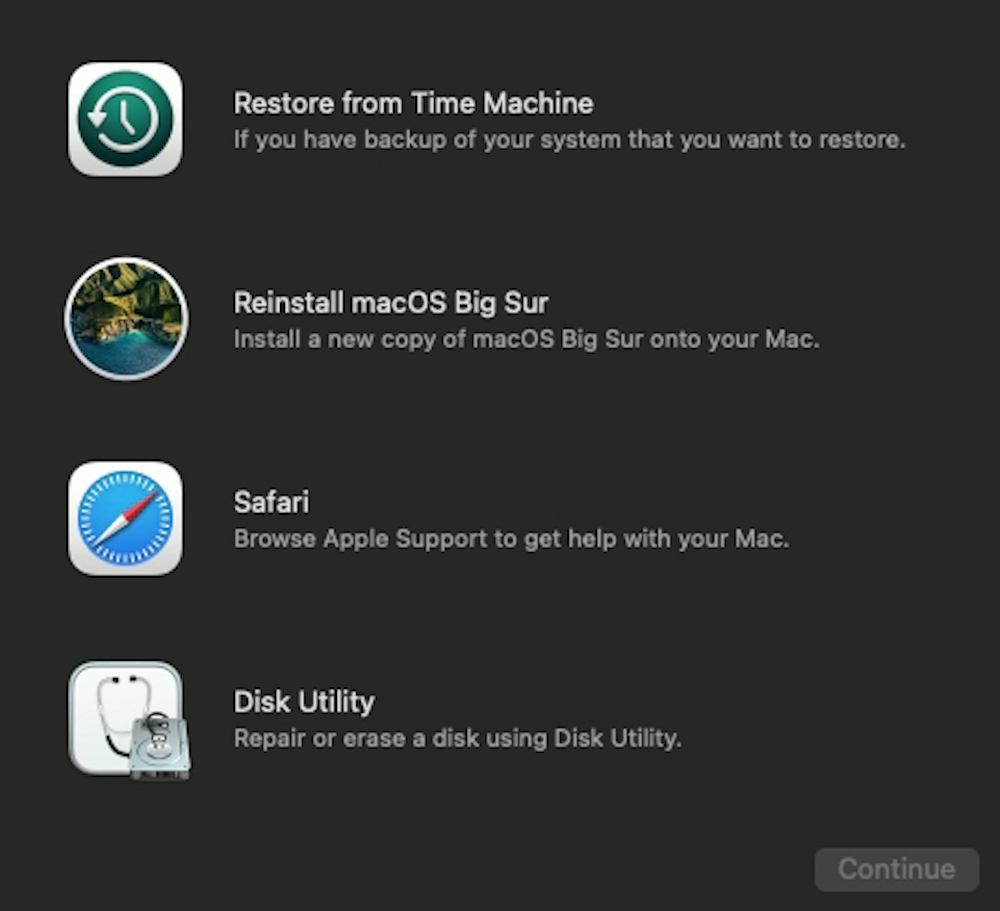
- Select your external drive containing the Time Machine backup.
- Select the needed backup version. Check the data, click the right Time Machine backup, and then click Continue to confirm.
- Select a destination. Click your Mac’s hard disk to choose it as the destination. Then click Restore to start the transferring process.
Method 3: How to Restore from Time Machine to New Mac
![]()
If you have a new MacBook that you wish to set up entirely as your old one, you can use your Time Machine backup for this job. This way, all of your user accounts, files, apps, and settings will get automatically imported into your new device.
The best way to move everything from a specific Time Machine backup to a new Mac is with the help of a tool called Migration Assistant. Here’s how to do it:
- Connect the drive with the needed Time Machine backup to your new Mac.
- Launch the Migration Assistant app on your computer (go to Launchpad and type Migration Assistant in the search field at the top). If you’re launching your new Mac for the first time, follow the onscreen instructions until you see the Migration Assistant screen.
- Choose the option to transfer your information From a Mac, Time Machine backup or a Startup disk. To confirm, click Continue.
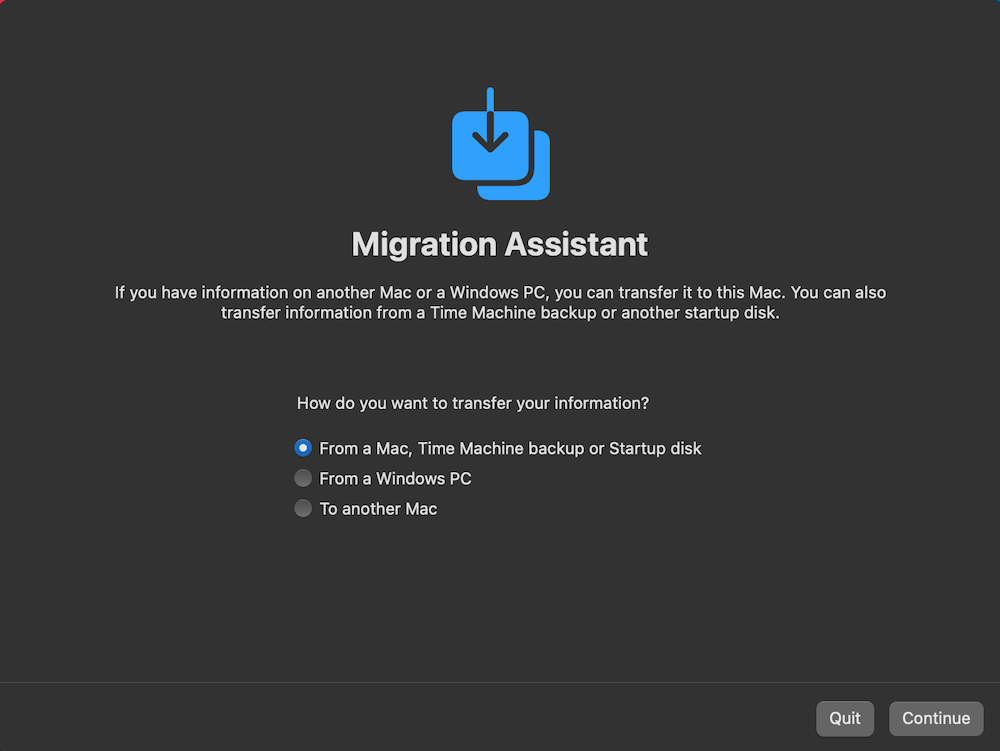
- Choose the right Time Machine backup. Click Continue to move forward.
- Select all of the data. Place a checkmark near every information type to transfer everything from the backup to your Mac. Click Continue to start the recovery process.
Now you can enjoy all of the data from your old Mac’s Time Machine backup on your new device.
What to Do When You Lack the Necessary Backups
But what to do if you haven’t backed up your Mac with Time Machine and need to recover an important file that you’ve mistakenly deleted? Even though Time Machine is a great tool when it comes to restoring data from a backup, it has a major downside—if you haven’t backed up your Mac before losing that file, you can’t use this tool to restore it.
If the needed file is not located in your Time Machine backup and you’ve already emptied your Trash bin, the only option that you have left is to use data recovery software.
For this demo and testing, we chose Disk Drill because it received the highest score in our comparison of the best data recovery software. Disk Drill is known as a data recovery app that can be used to recover over 400 file formats. So, when testing this application, our team decided to see how it works when recovering three types of files: a TXT file, JPG image, and MOV video clip. And the truth is, we were pretty impressed with the results since Disk Drill successfully recovered each of them. In addition to internal disks, Disk Drill also recovers data from external media, such as SD cards or external hard drives.
If you want to give Disk Drill a try, here’s what you should do:
- Download Disk Drill for Mac and follow the onscreen instructions to install the application.
- Launch Disk Drill and click Storage devices from the sidebar on the left.
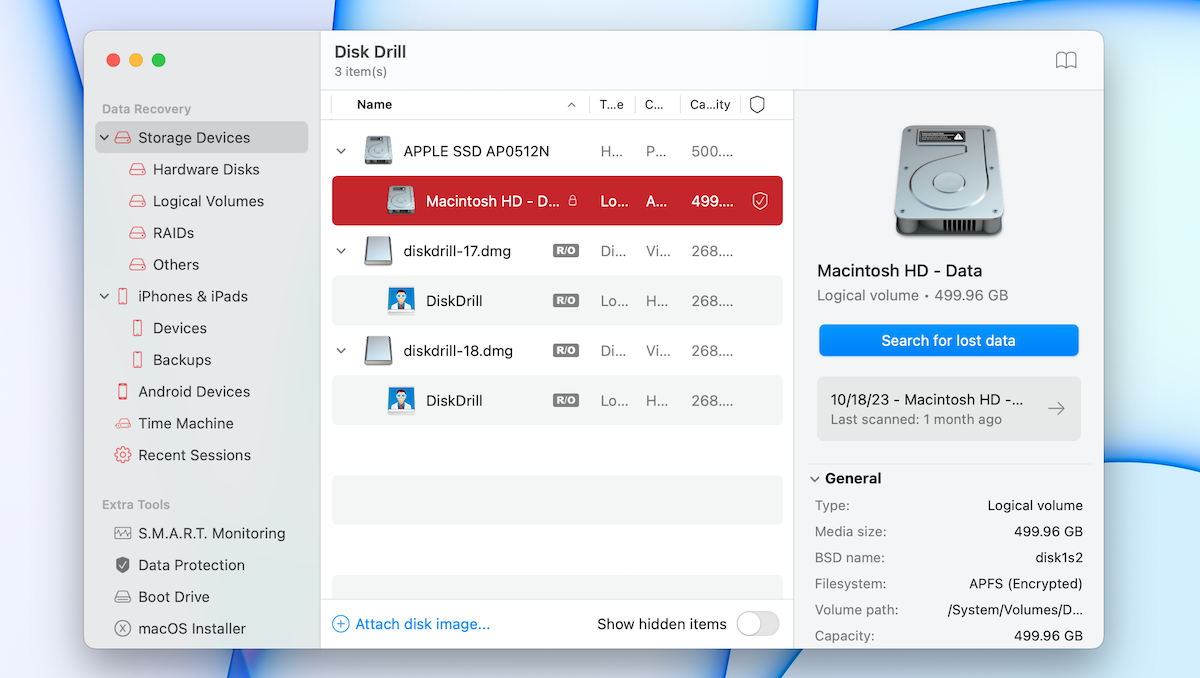
- Choose the drive where the needed files used to be located and click Search for lost data to initiate the scan.
- When ready, click the Review found items button.

- Look through the files that were discovered by the tool. If you’re looking for a specific file, you can filter the discovered files by file type, date, or size using the toolbar located on top of the search results. Or use the search field on the top-right to type in the file’s name or format.
- Click any file to preview it (if it can be previewed, then you should be able to successfully recover it). The Preview feature shows you only those files that can be displayed natively by the macOS, or for which readers are installed on the Mac.

- Select the files you wish to restore and click the Recover button.
- Choose a location where you wish to retrieve the files to (make sure to choose a folder located on a drive different from where the files were originally stored). Click OK.
- Click Show results in Finder if you wish to view the recovered files.
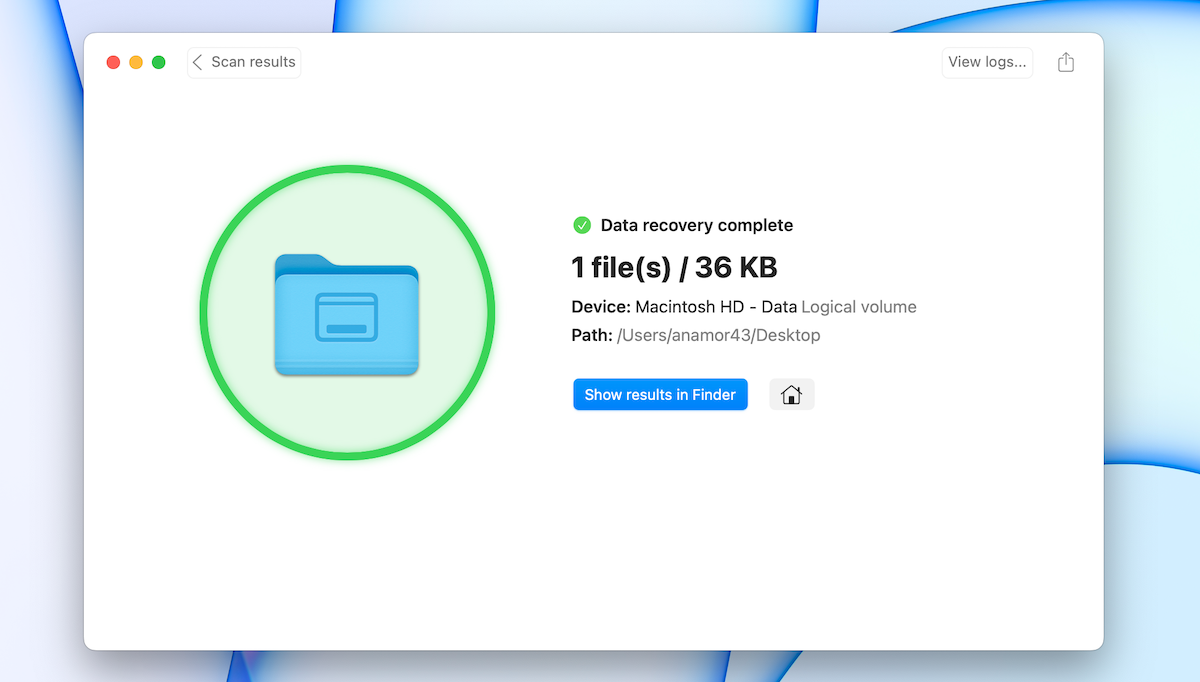
That’s it! Just as easy as that, you can recover files on your Mac that you previously thought are long lost.
FAQ
No. There is no need to buy a new external drive to complete a Time Machine backup. If there is enough space left on your external hard drive for a backup, there’s nothing stopping you from using it. However, make sure that the disk is formatted correctly. Otherwise, you’ll be prompted to erase the data stored there and reformat it.
Note that if you’re using an internal drive, it should be partitioned into two volumes before the backup. And alternatively, if you wish, you can create a network backup.
Follow these steps to view your Time Machine backups on your Mac:
- Connect the external hard drive that is used for Time Machine backups to your Mac (if you were using the Mac drive for that, skip this step).
- Click the Time Machine icon on the menu at the top of the screen.
- Choose Browse Time Machine Backups from the drop-down menu.
- Use the timeline on the right side of the screen to navigate between the available Time Machine backups.
Conclusion
Time Machine is an excellent tool for creating backups of your Mac’s data. If you make them regularly, then with the methods described above, you should be able to restore any valuable information stored on the external drive with the Time Machine backup.
However, there are cases when Time Machine backups don’t help. If you find yourself in such a situation, then using data recovery software might be your only chance left in getting your data back.


