
Table of Contents
You’d be forgiven for mistakenly deleting files from an SD card on a Mac and wanting to recover them. The good news is that you can actually do this.
However, realize that recovering files involves a dose of luck. You might still lose some files even if you follow the correct recovery steps. But there’s no harm in trying, especially if you safely disconnected the SD card as fast as possible.
First Things to Do In Case of SD Card Data Loss
- 🛑 Stop using the SD card. On many modern computer systems, deleting a file doesn’t actually delete the data associated with it. That would be too time-consuming, especially for large files. Instead, many computer operating systems – including Mac – simply mark the file as deleted instead, and treat the space it used to occupy as free for writing new files. This means that deleted files can still be recovered, especially immediately after the deletion incident. However, you must stop using the card immediately. Any additional writing operations to it might end up overwriting parts of the data you’re trying to recover. In some cases, this might not be fatal. Formats like images, videos and audio can often still be reproduced even when chunks of them are corrupted. But for a binary format (applications and most of their data), even one wrong byte can completely ruin the whole file and make it unusable.
- ❌ Do not format the SD card. You may be tempted to just format the card and start fresh – but this is actually a good way to completely block any attempts at data recovery. Unlike a simple delete or a quick format, a full drive format actually goes every bit of data and erases it. Once you’ve done that, there’s no going back – the data is physically gone from the card, and there are no tools that will help you get it back.
- 📁 Create a byte-to-byte backup. Before you proceed any further, you should take the time to create a byte-to-byte backup of the SD card. This can be done with the help of tools like Disk Drill. It’s important to understand that this is not the same as simply copying the contents of the card to another location. A byte-to-byte backup will create an exact clone image of the original file system of the SD card in its current state, including data belonging to deleted files.
That way, even if you make a mistake during the recovery process and end up corrupting the card even further, you’ll still have the original backup to fall back on. This is an important step when working with any kind of sensitive data because you won’t get any other opportunities to revert back to an earlier state.
Creating a Byte-to-Byte Copy of an SD Card on Mac
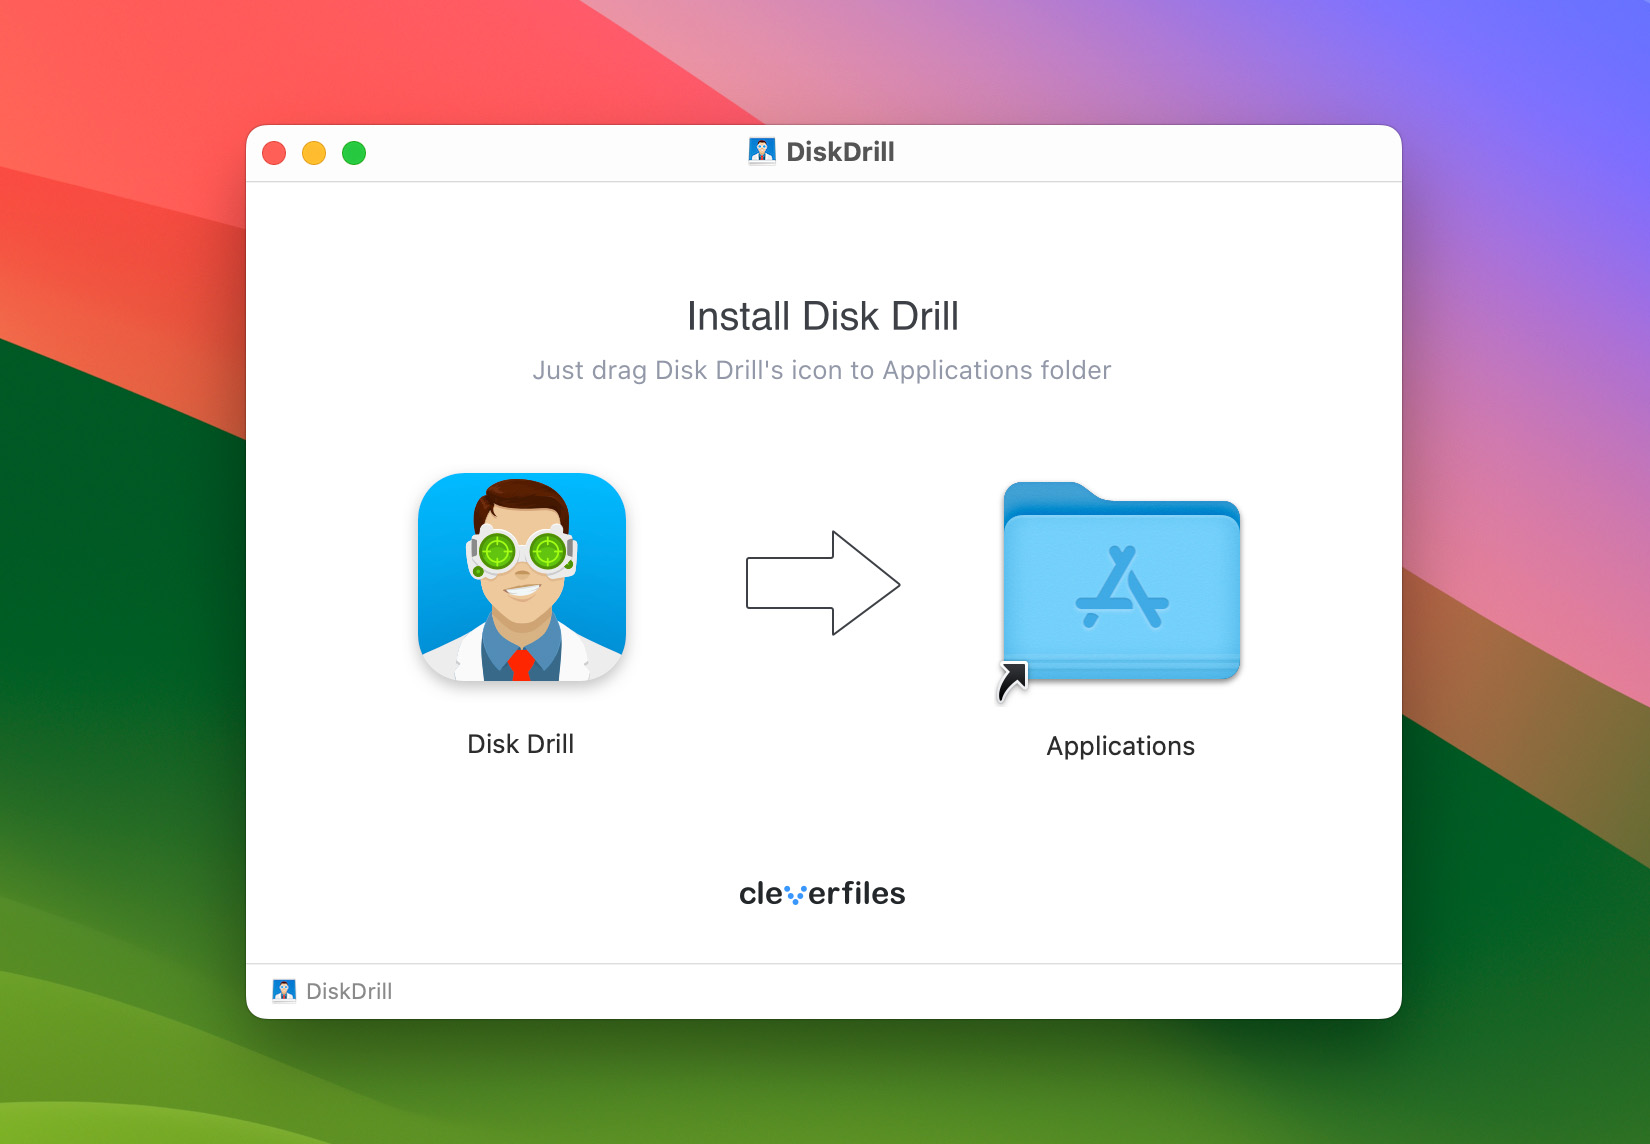
- Download and install Disk Drill on your Mac PC. Visit the official Disk Drill website to download the app. Disk Drill offers free and paid versions; download the executable file and follow the on-screen instructions to install it. The app provides illustrations to help you easily understand what to do.
- Launch the program and open the home screen. Insert your SD card into your Mac’s memory card slot or an externally connected card reader.
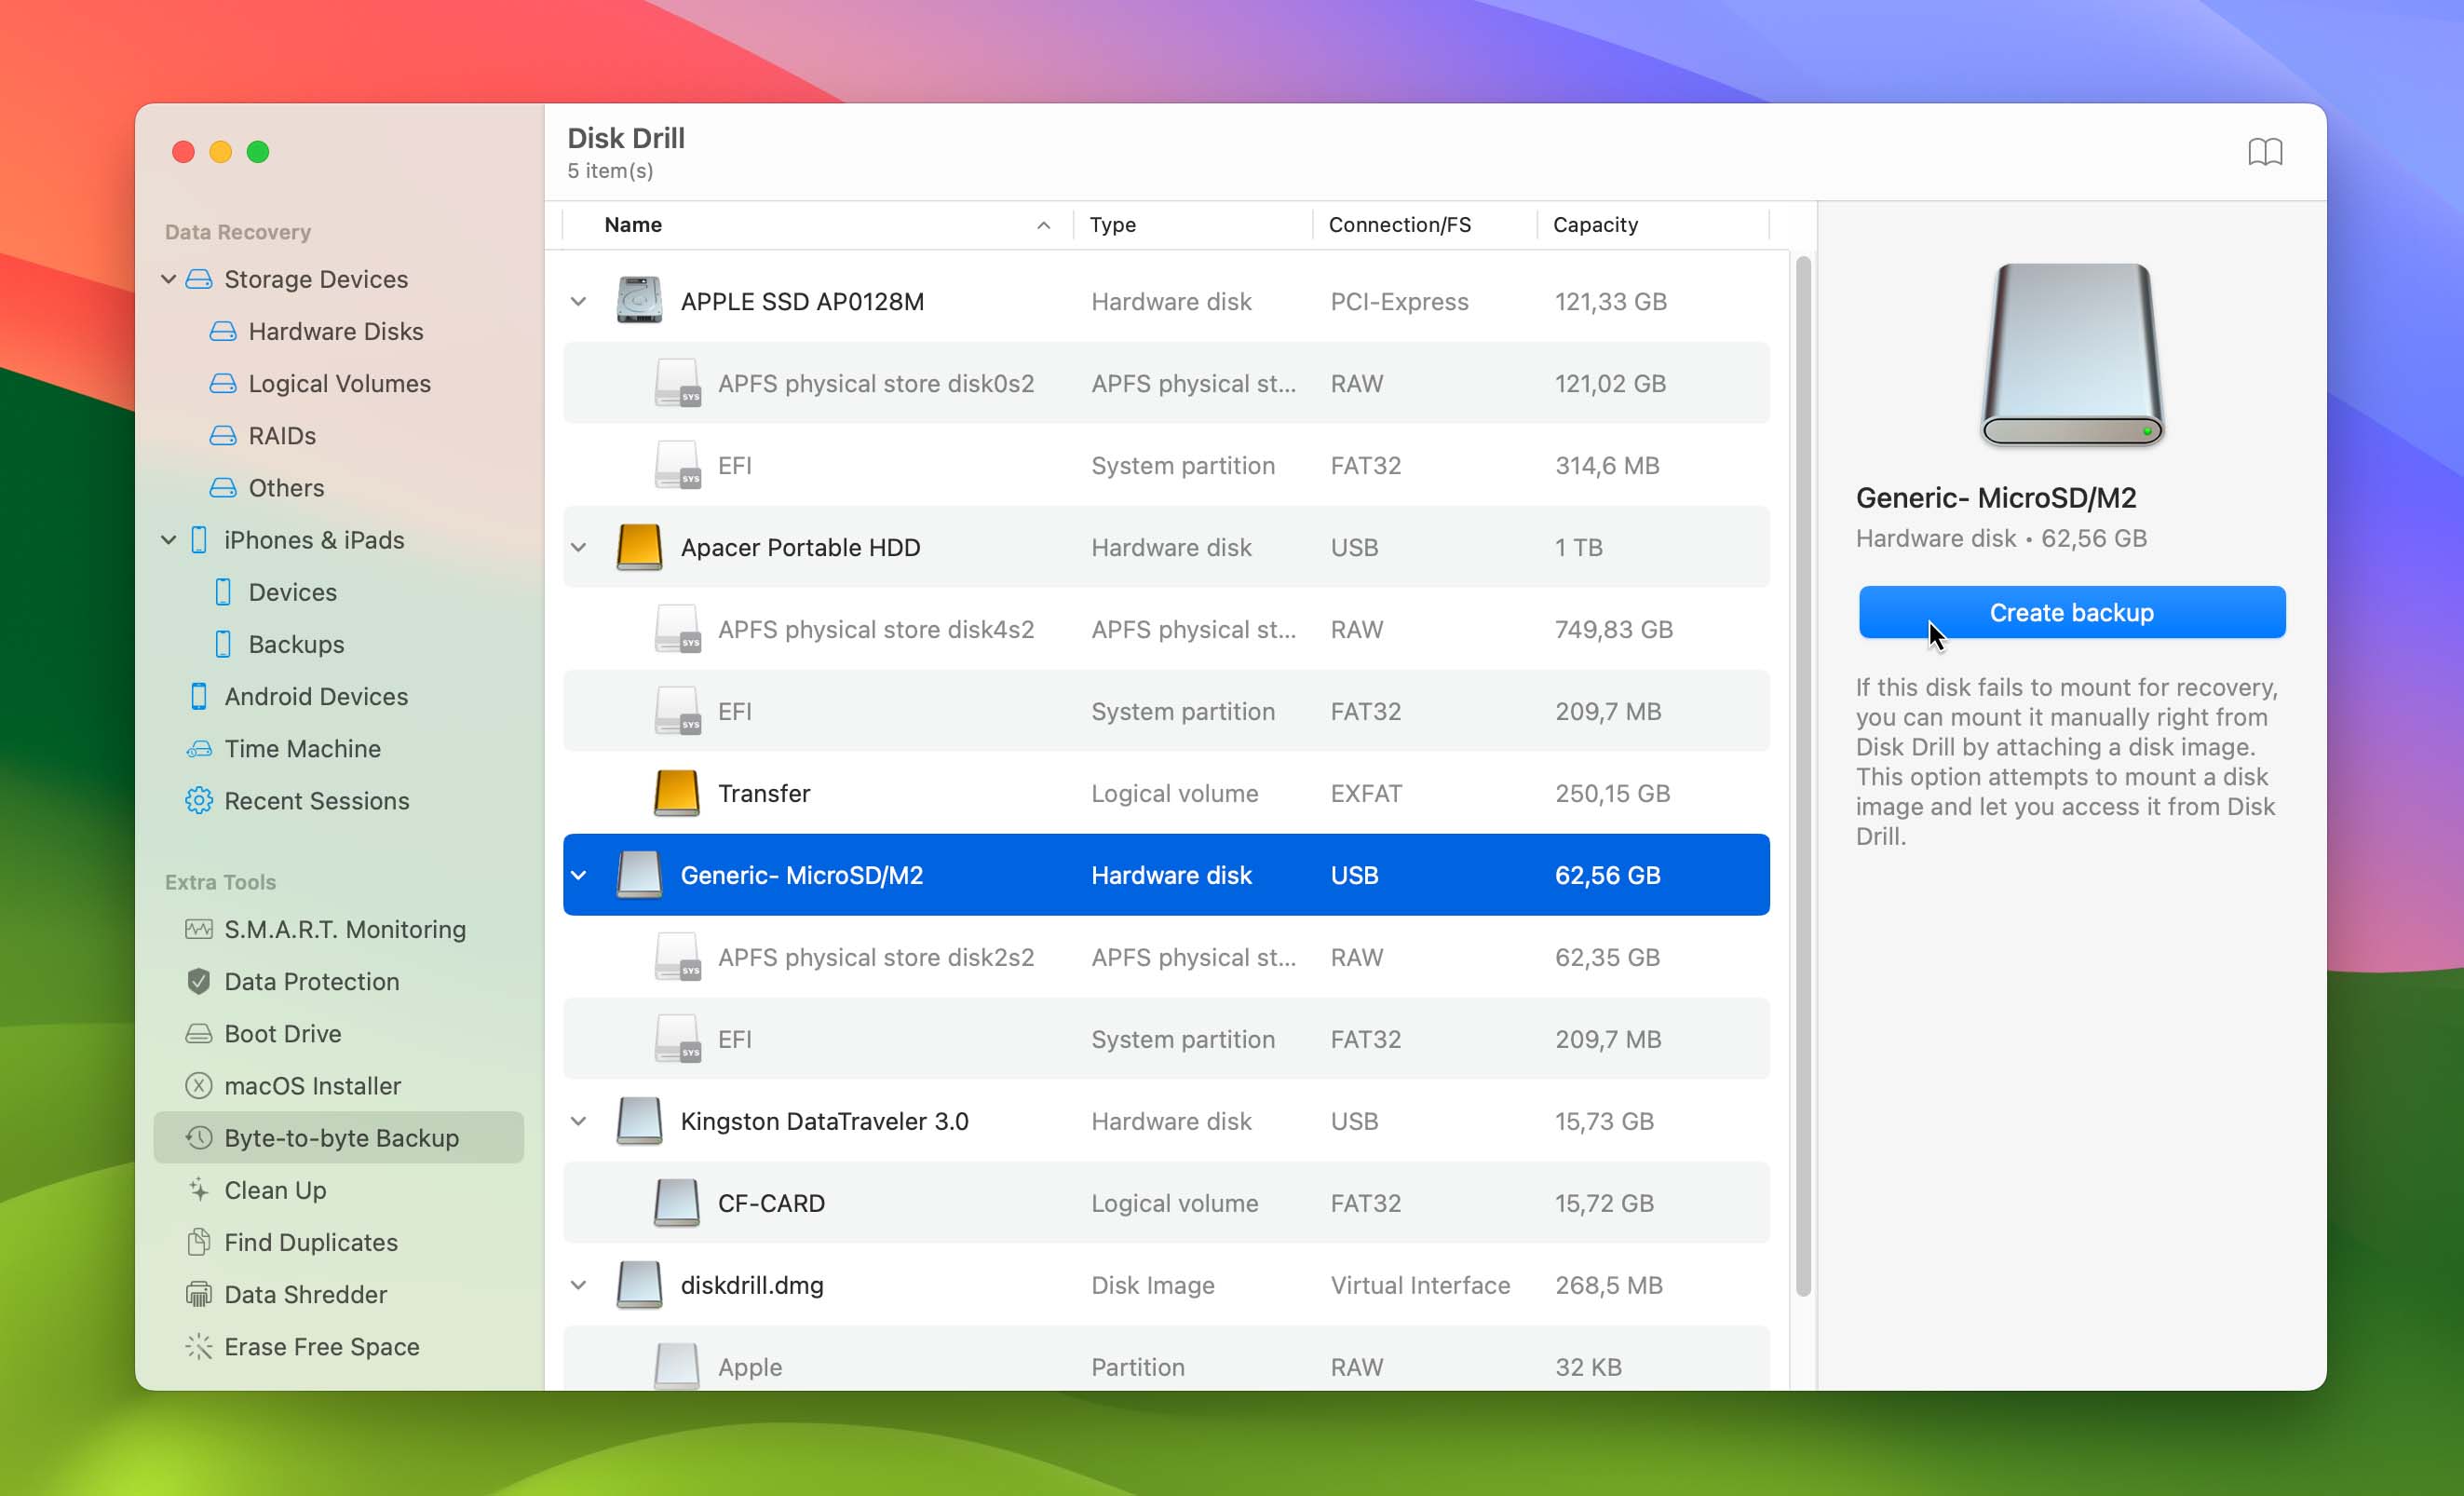
- Select Byte-to-byte Backup in the Extra Tools menu on the left hand side. Disk Drill will show the list of storage mediums available on your Mac.

- Choose the SD card and click Create Backup.
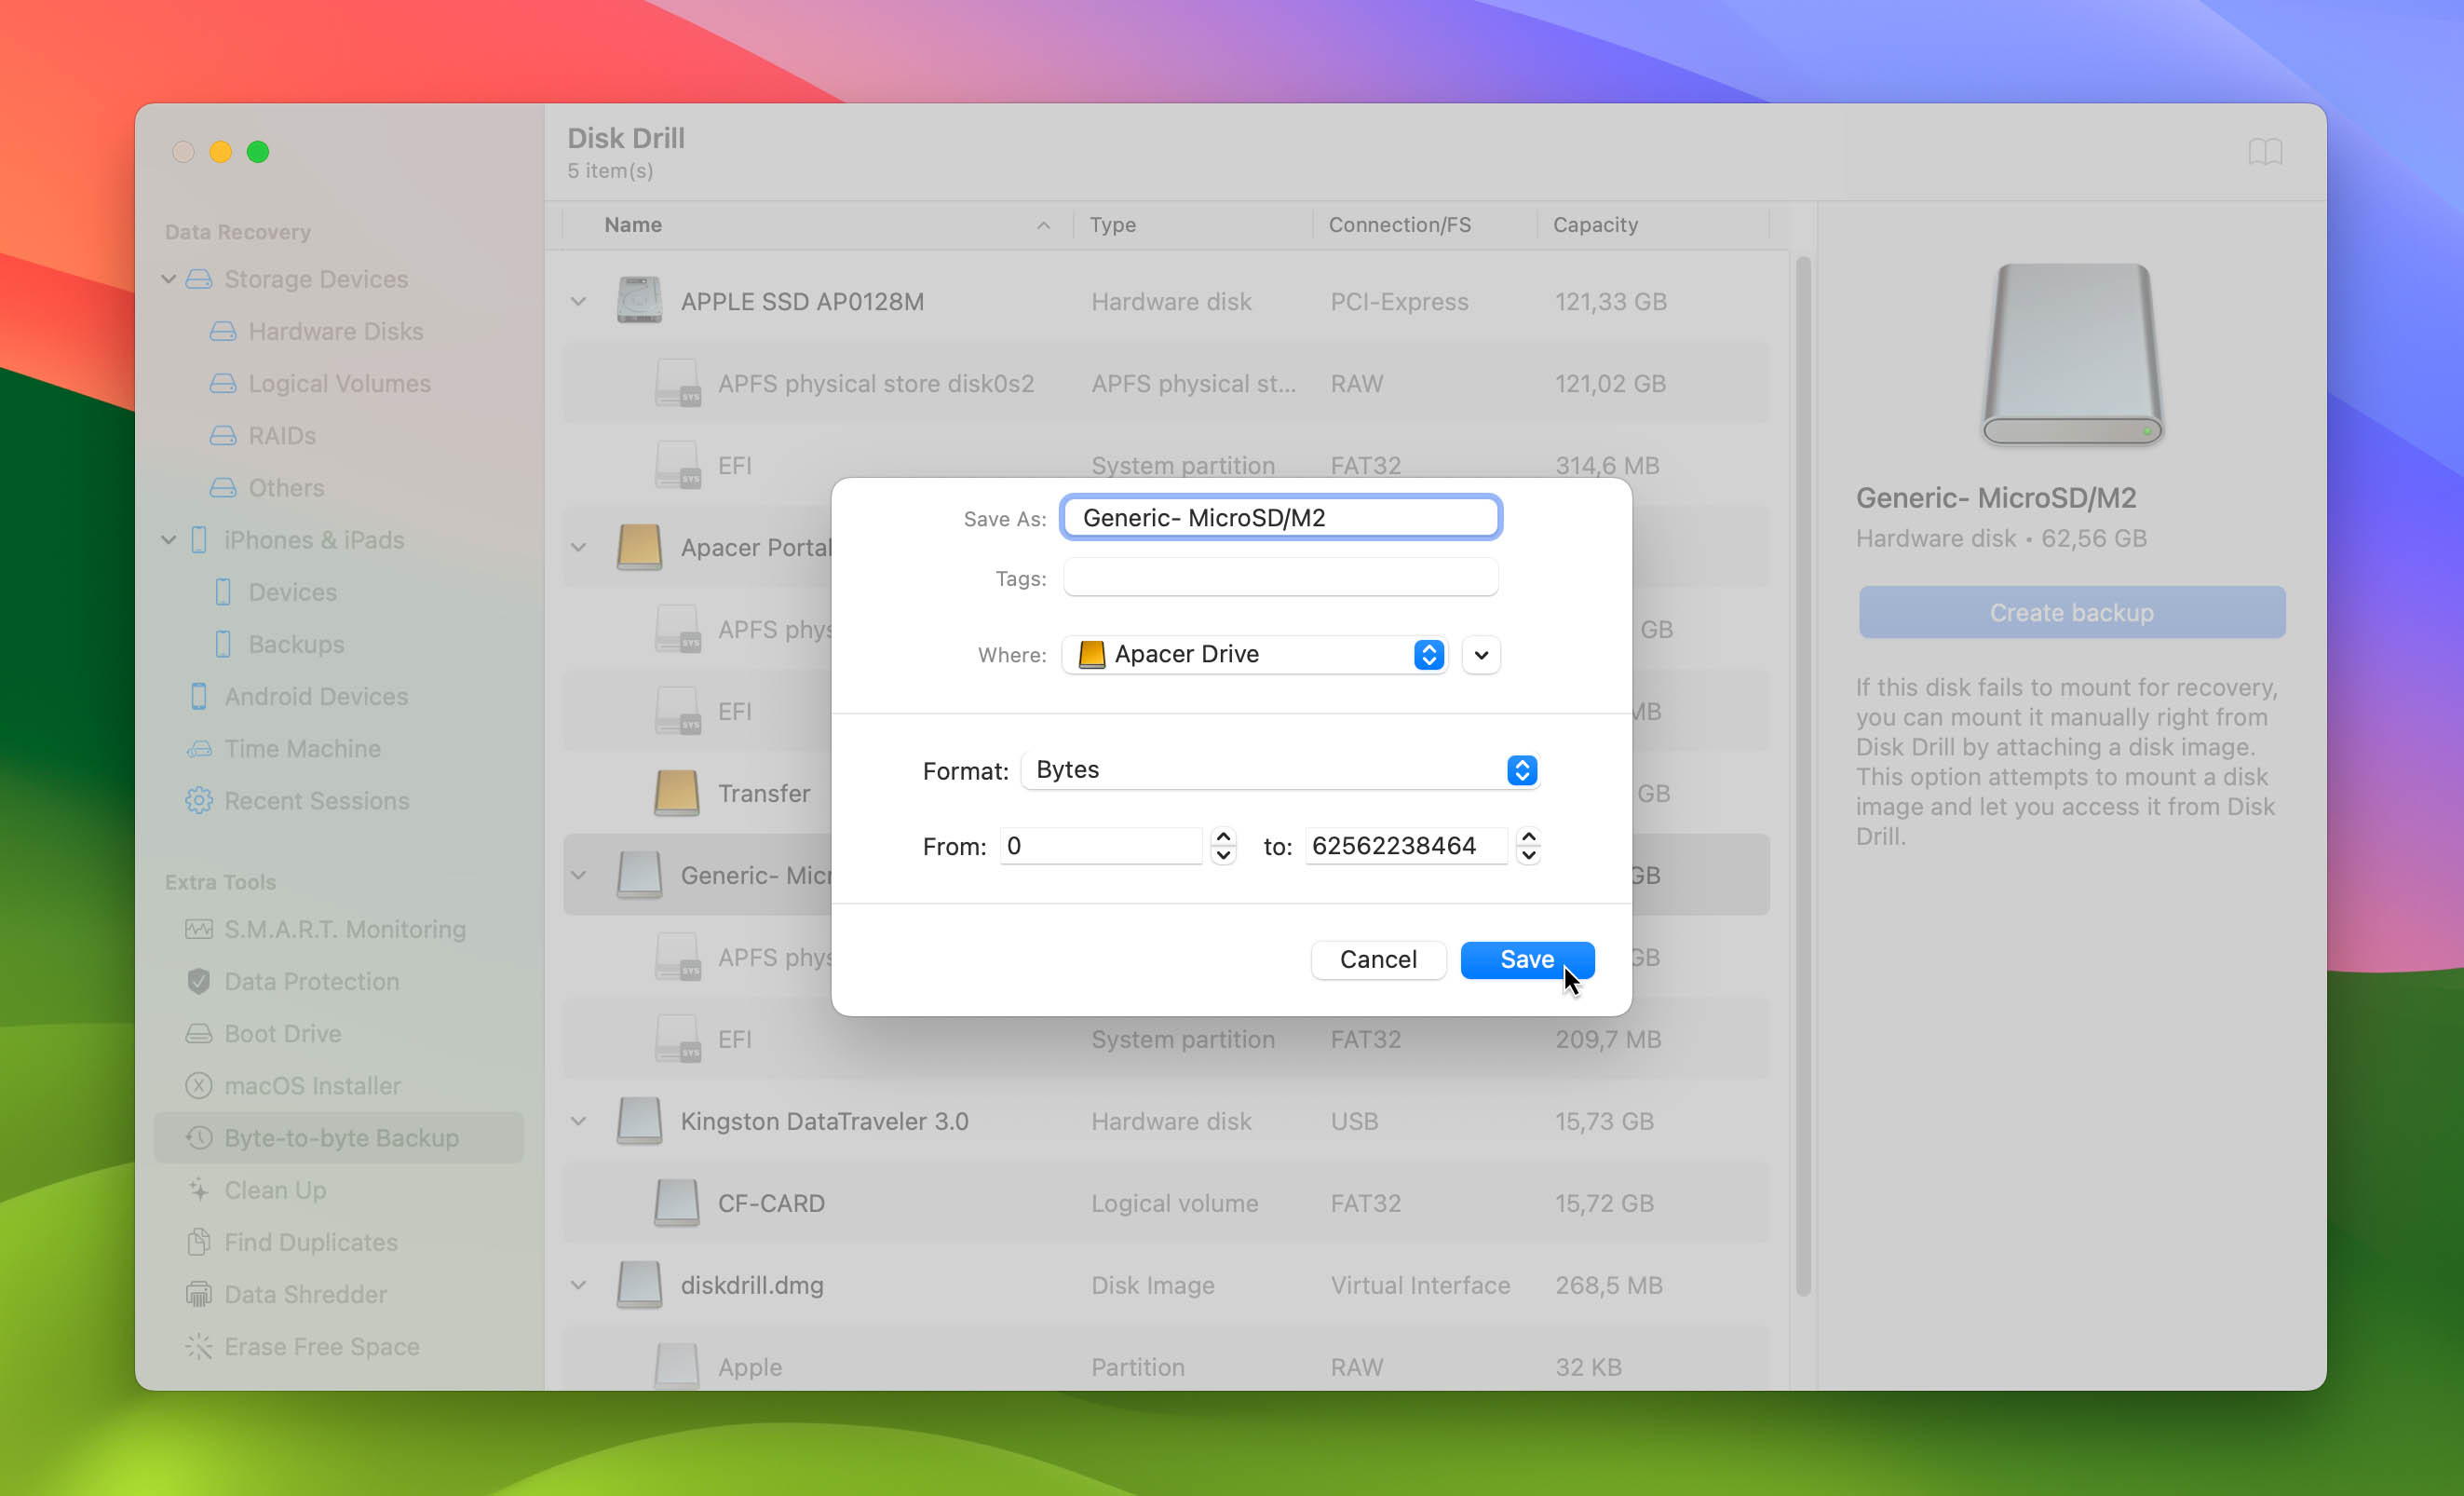
- Choose the location on your Mac to store the backup file. Also choose a name for the backup that you can easily remember.
- Click Save to start the backup process. Disk Drill displays a screen showing the progress of your backup. You can pause and resume the backup at will. You’ll be notified once the backup is complete.


How to Recover Deleted Files from SD Card on Mac
When you’ve accidentally deleted files from your SD card and there’s no backup in sight, specialized software tools prove to be indispensable. In the following section, we will introduce two different tools that have proven, in our tests, to be effective solutions for retrieving your files, even in the trickiest situations.
Below, we’ve provided a comparison table of the tools we’ve selected, allowing you to evaluate their main differences.
| Criteria | Disk Drill | PhotoRec |
|---|---|---|
| User-Friendliness | Simple, user-friendly interface | Requires familiarity with CLI |
| File recovery efficiency | Recovered all files during the test with the original file names | Recovered all files during the test but it is capable of recovering files by file signatures only, so original file names can’t be restored |
| Supported file types | Supports a wide range of file types | Supports many file types but not as extensive |
| Scanning Speed | Faster scanning process | Slower scanning process |
| Preview Functionality | Offers file preview before recovery | Limited file preview |
| Technical Knowledge Required | Minimal | Advanced |
| Cost | Paid software with a free trial | Free (open-source) |
Option A: Disk Drill
Disk Drill is a convenient tool that can help you undelete files from an SD card on Mac with practically no technical expertise. The program offers a free trial and is known for its reliability and ease of use, making it the ideal choice for the average user who just wants to get their data back with minimal hassle.
- Download and install Disk Drill. The application is available directly from the developer’s website, and comes with a free trial in case you don’t want to spend any money straight away.
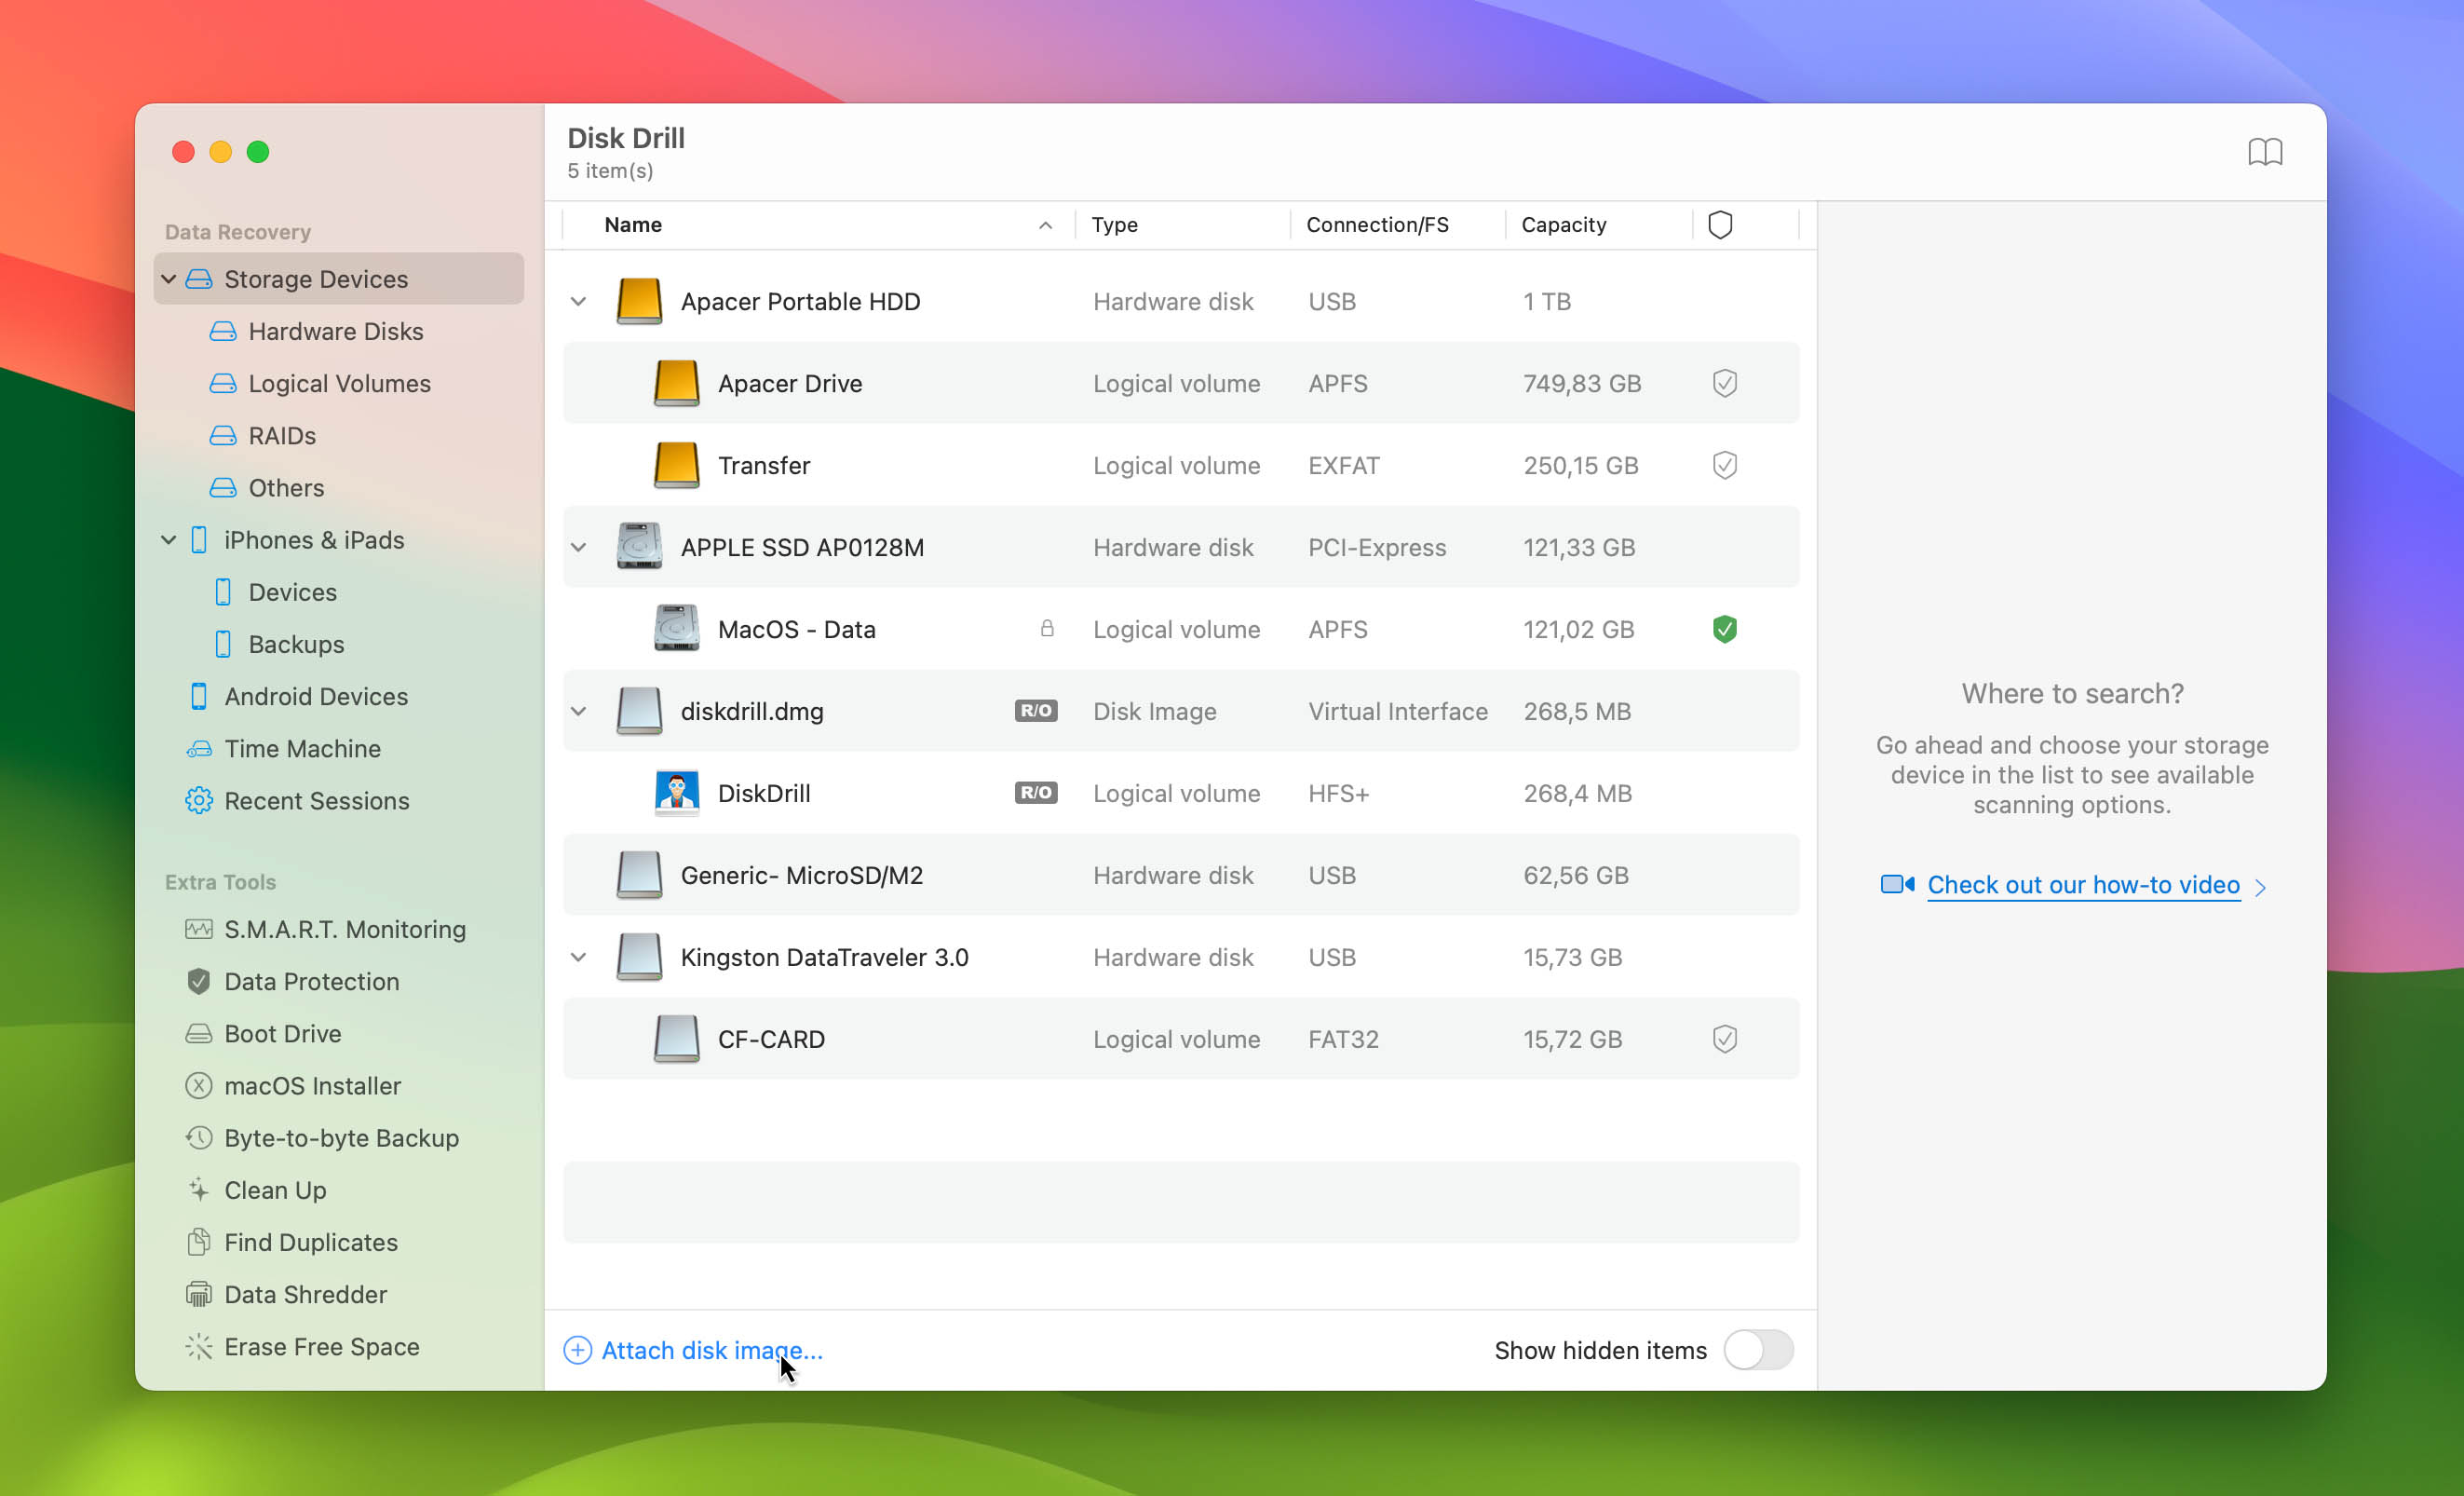
- You can scan the SD card itself or the byte-to-byte copy you saved earlier. To access the backup copy, click Attach disk image at the bottom menu of the list of storage devices.
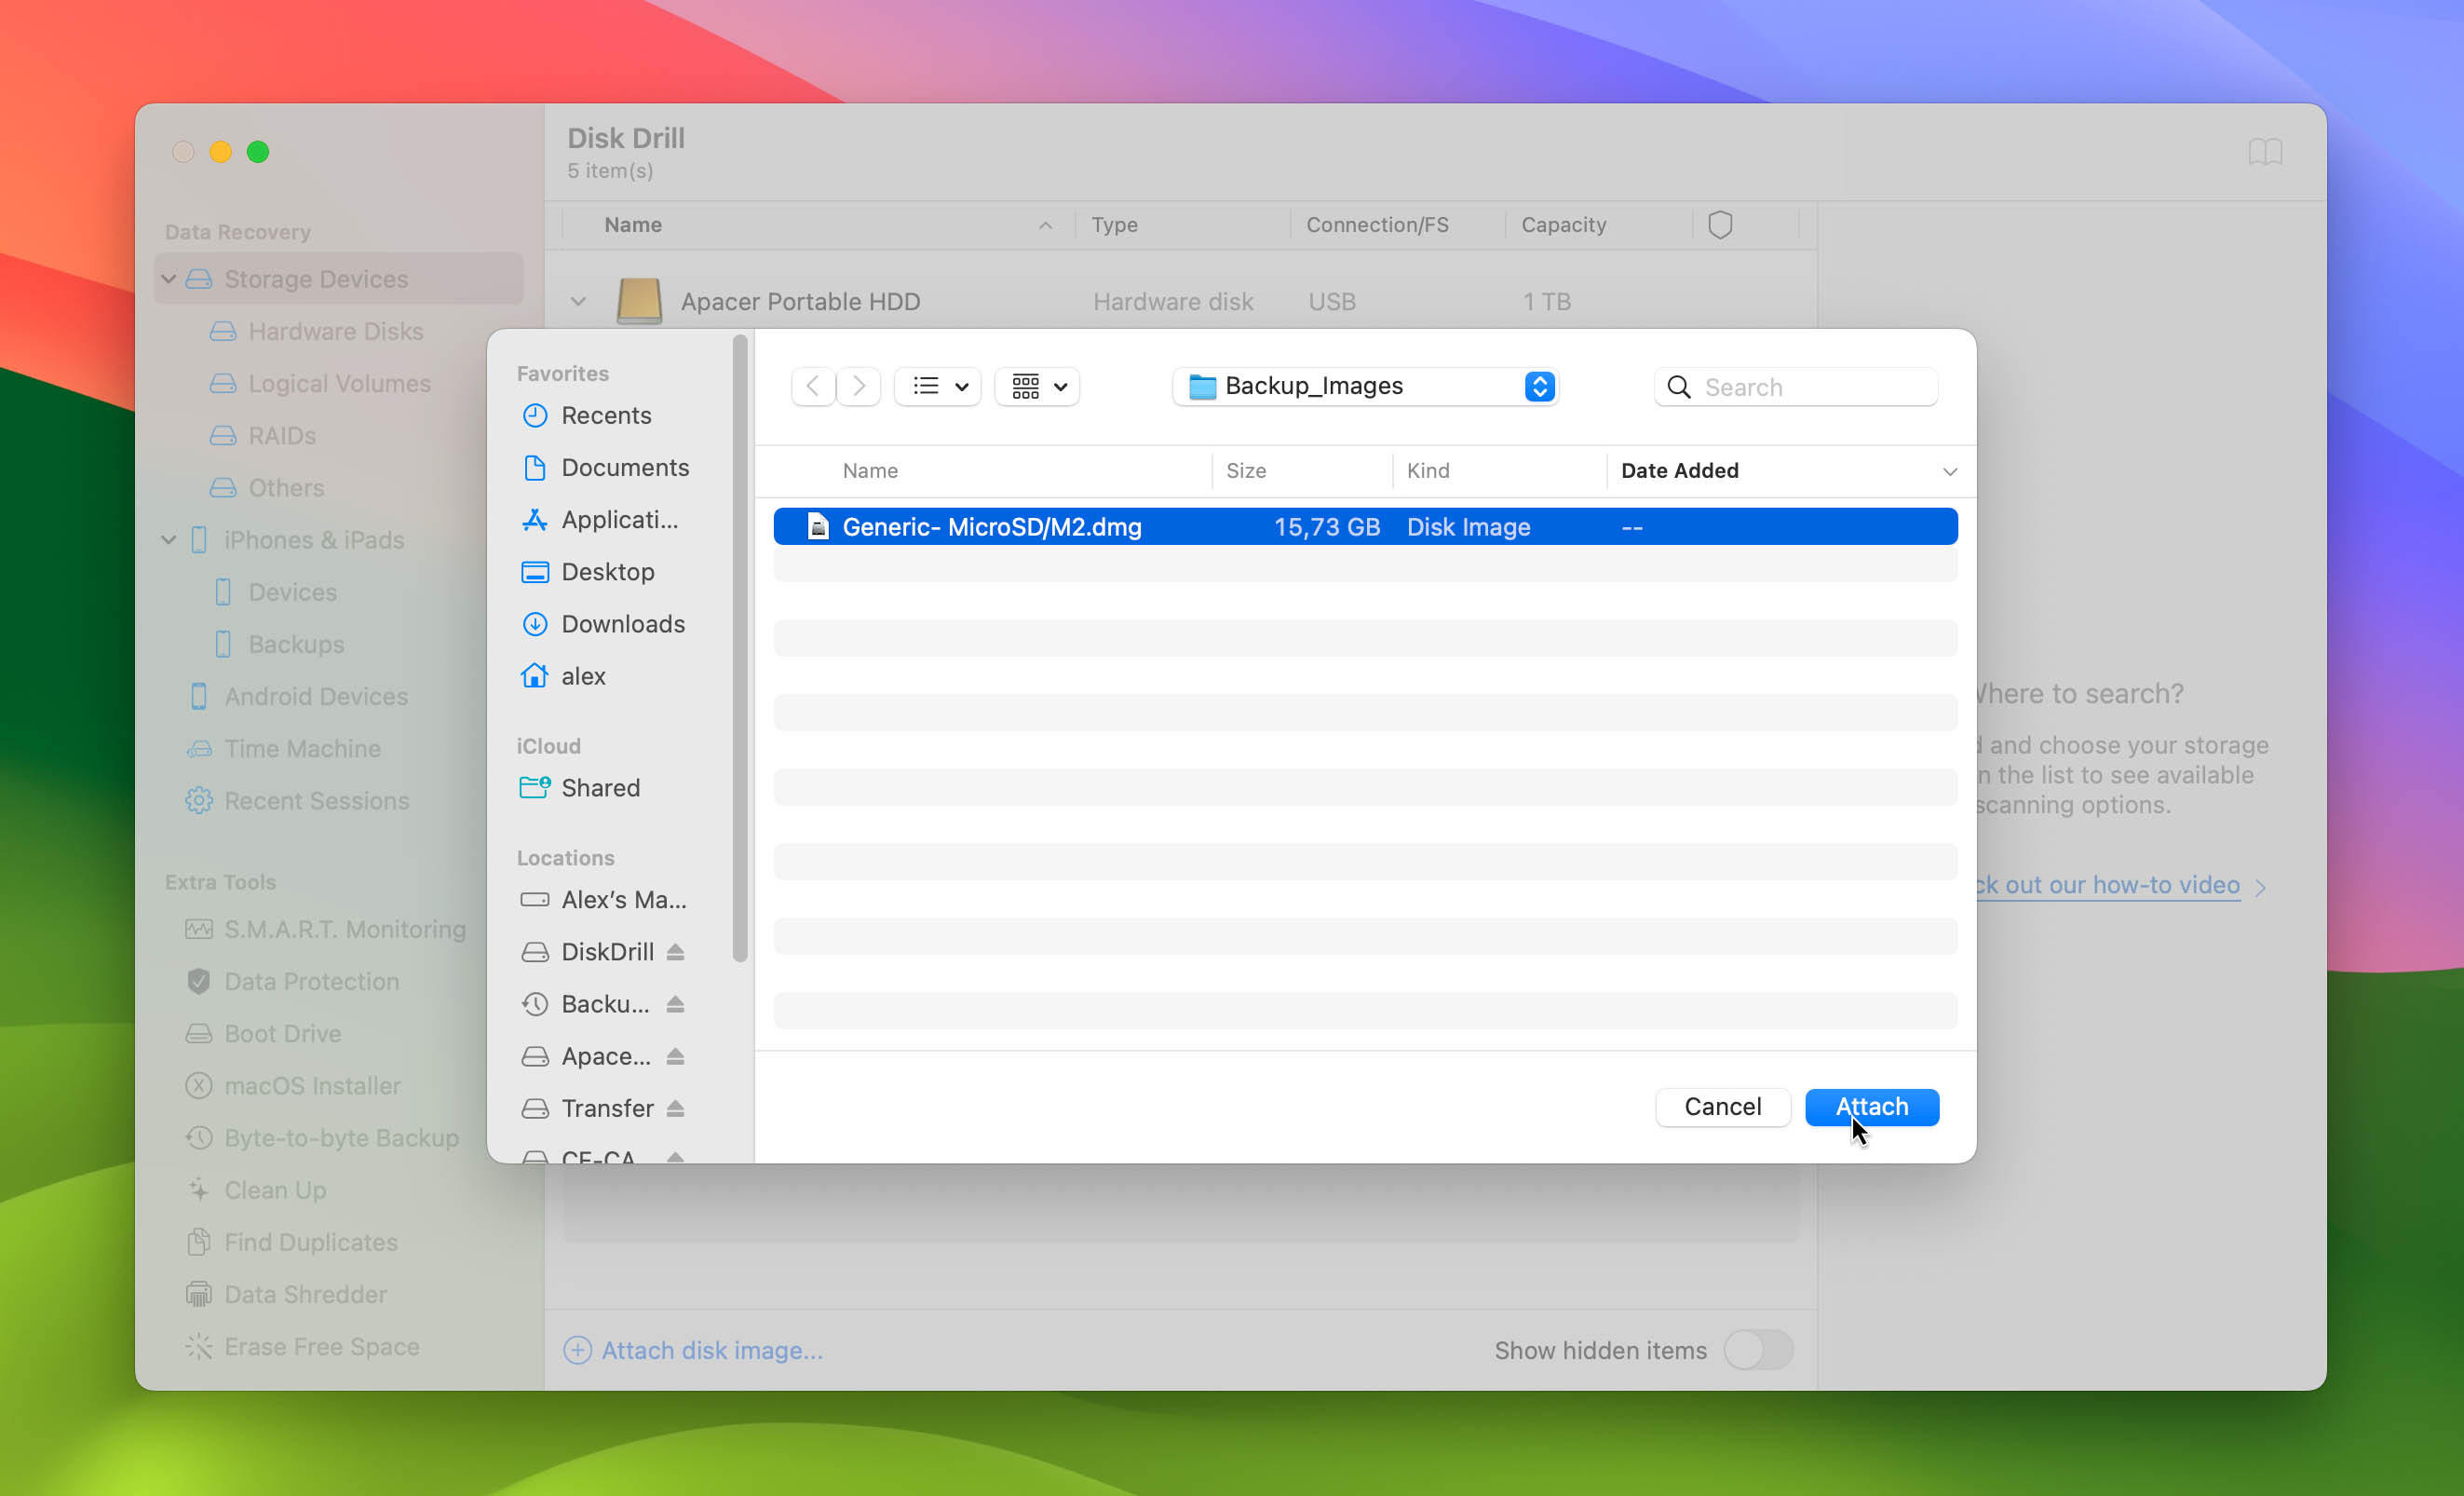
- Select the byte-to-byte copy from the location you previously stored it in and click Attach.
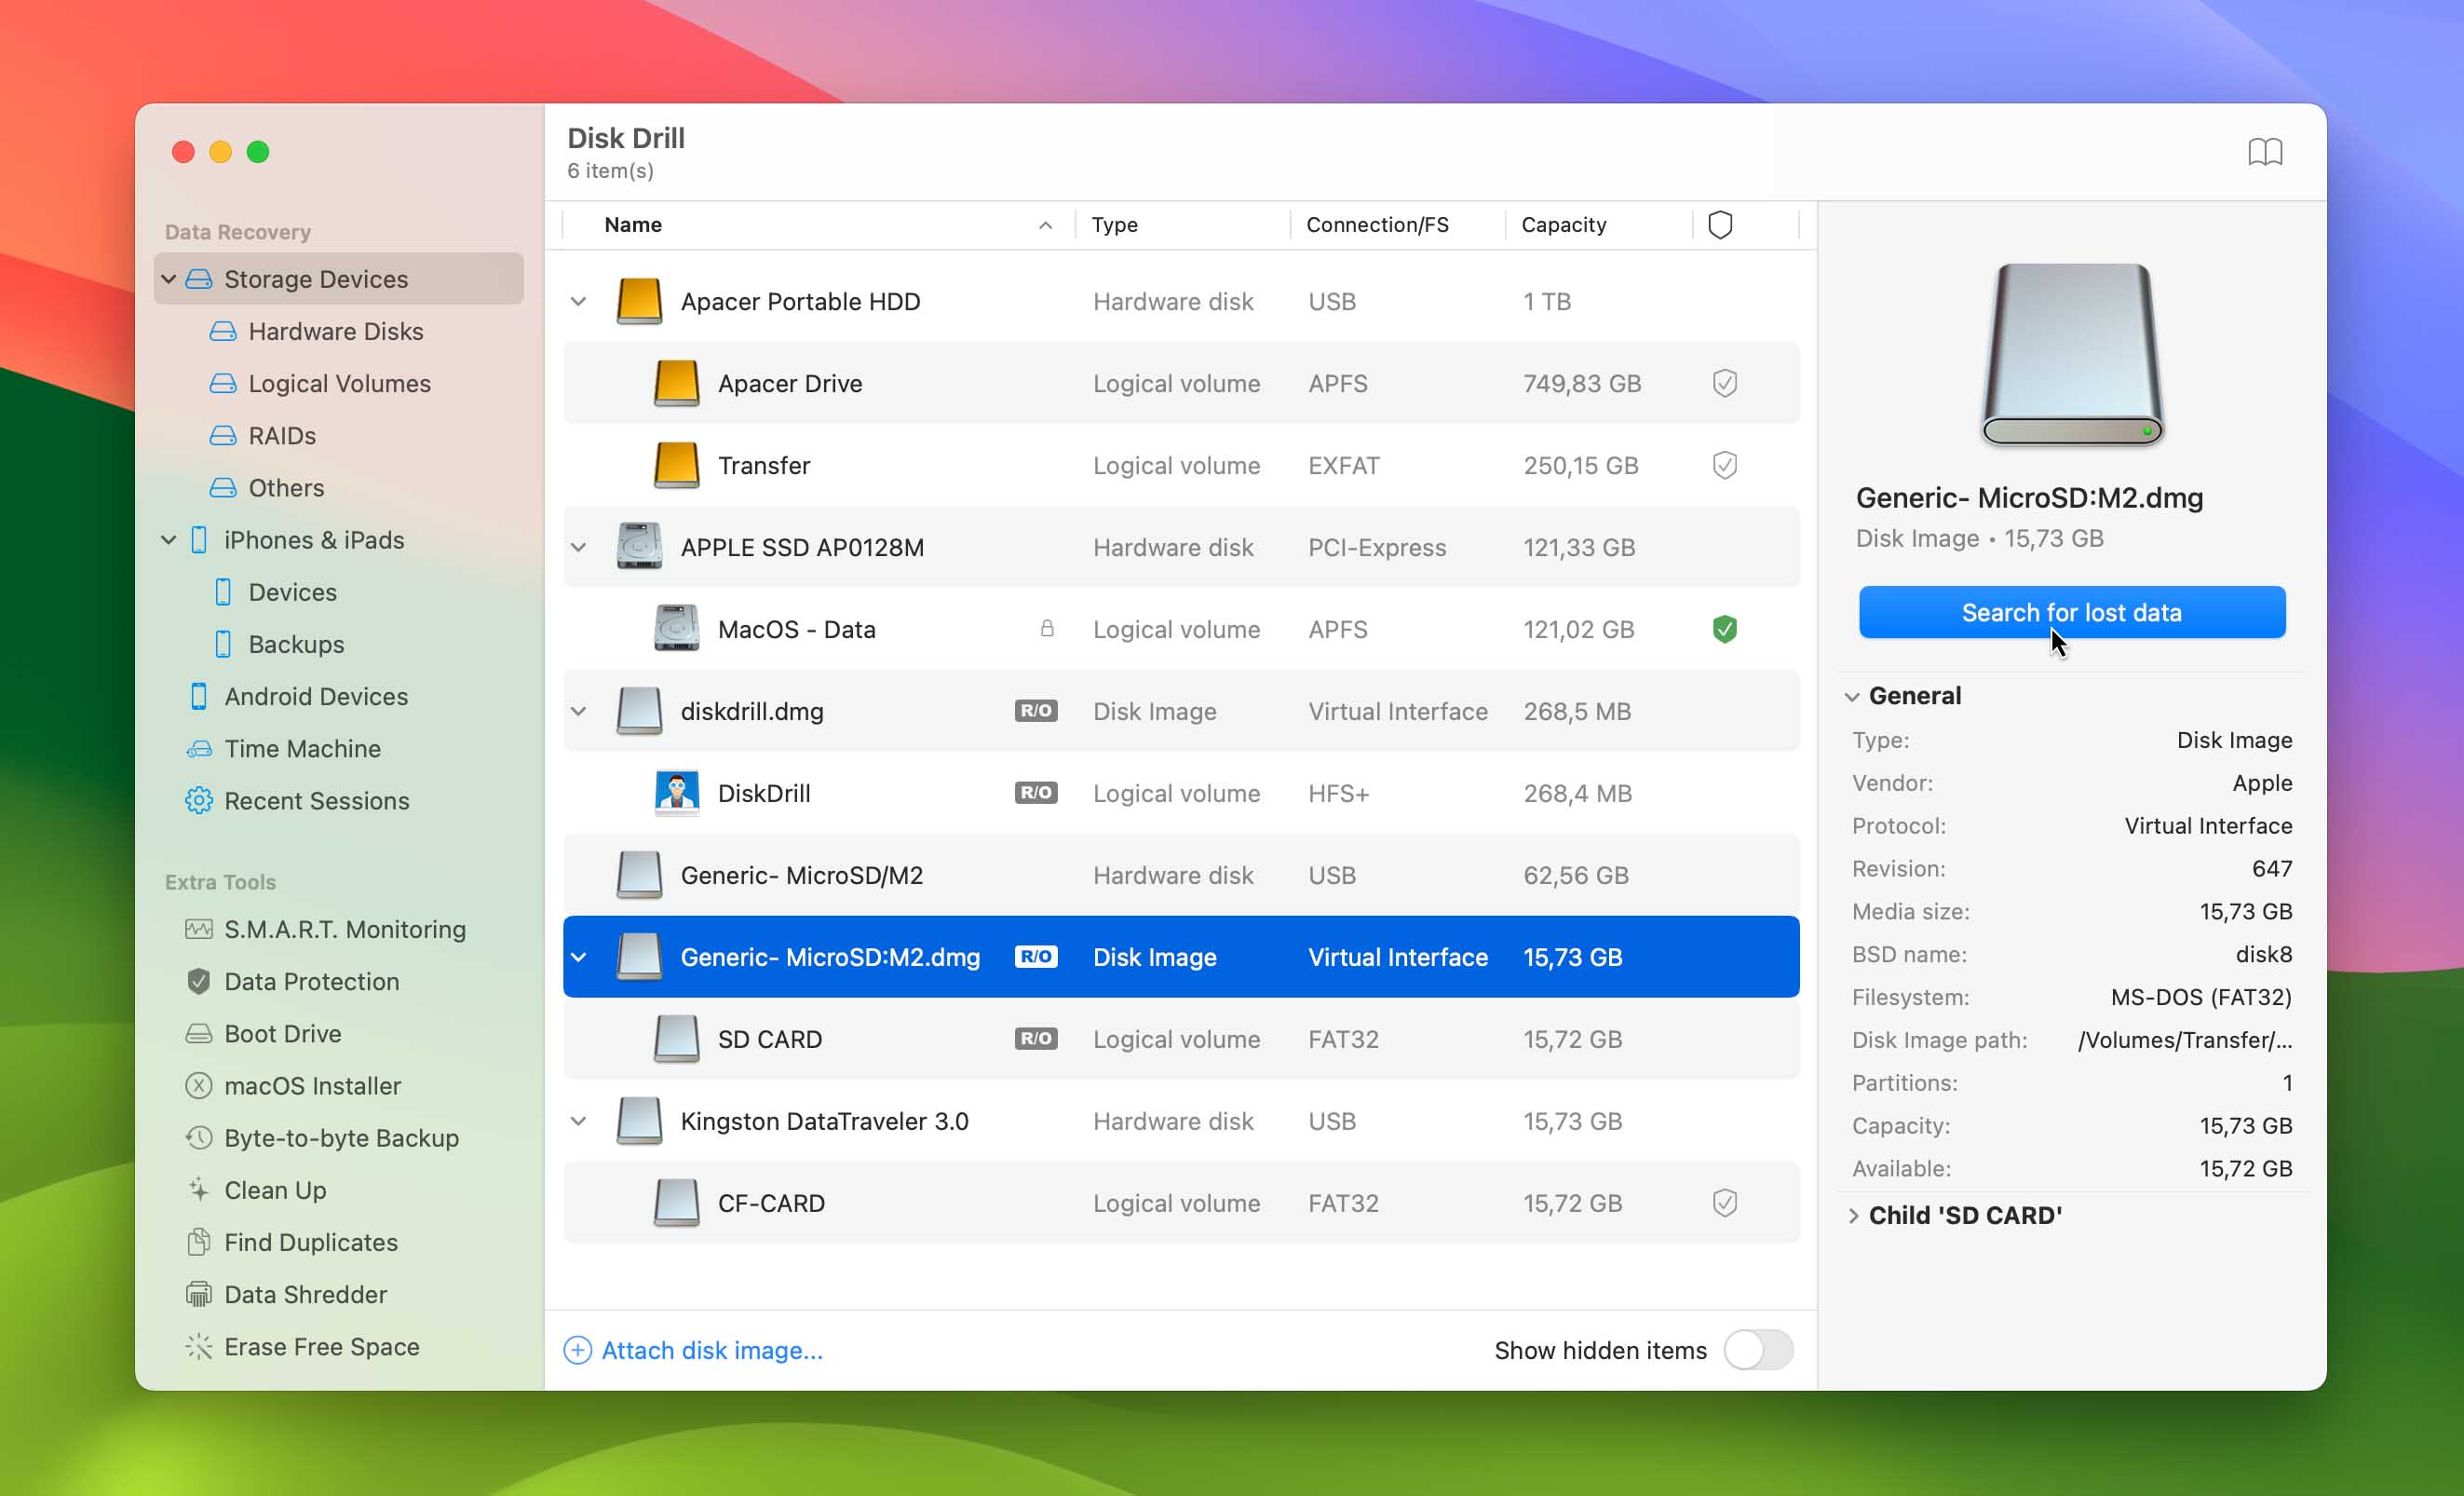
- Afterward, click on the SD card or byte-to-byte copy and choose Search for lost data.
- Click Review found items when the search is finished.

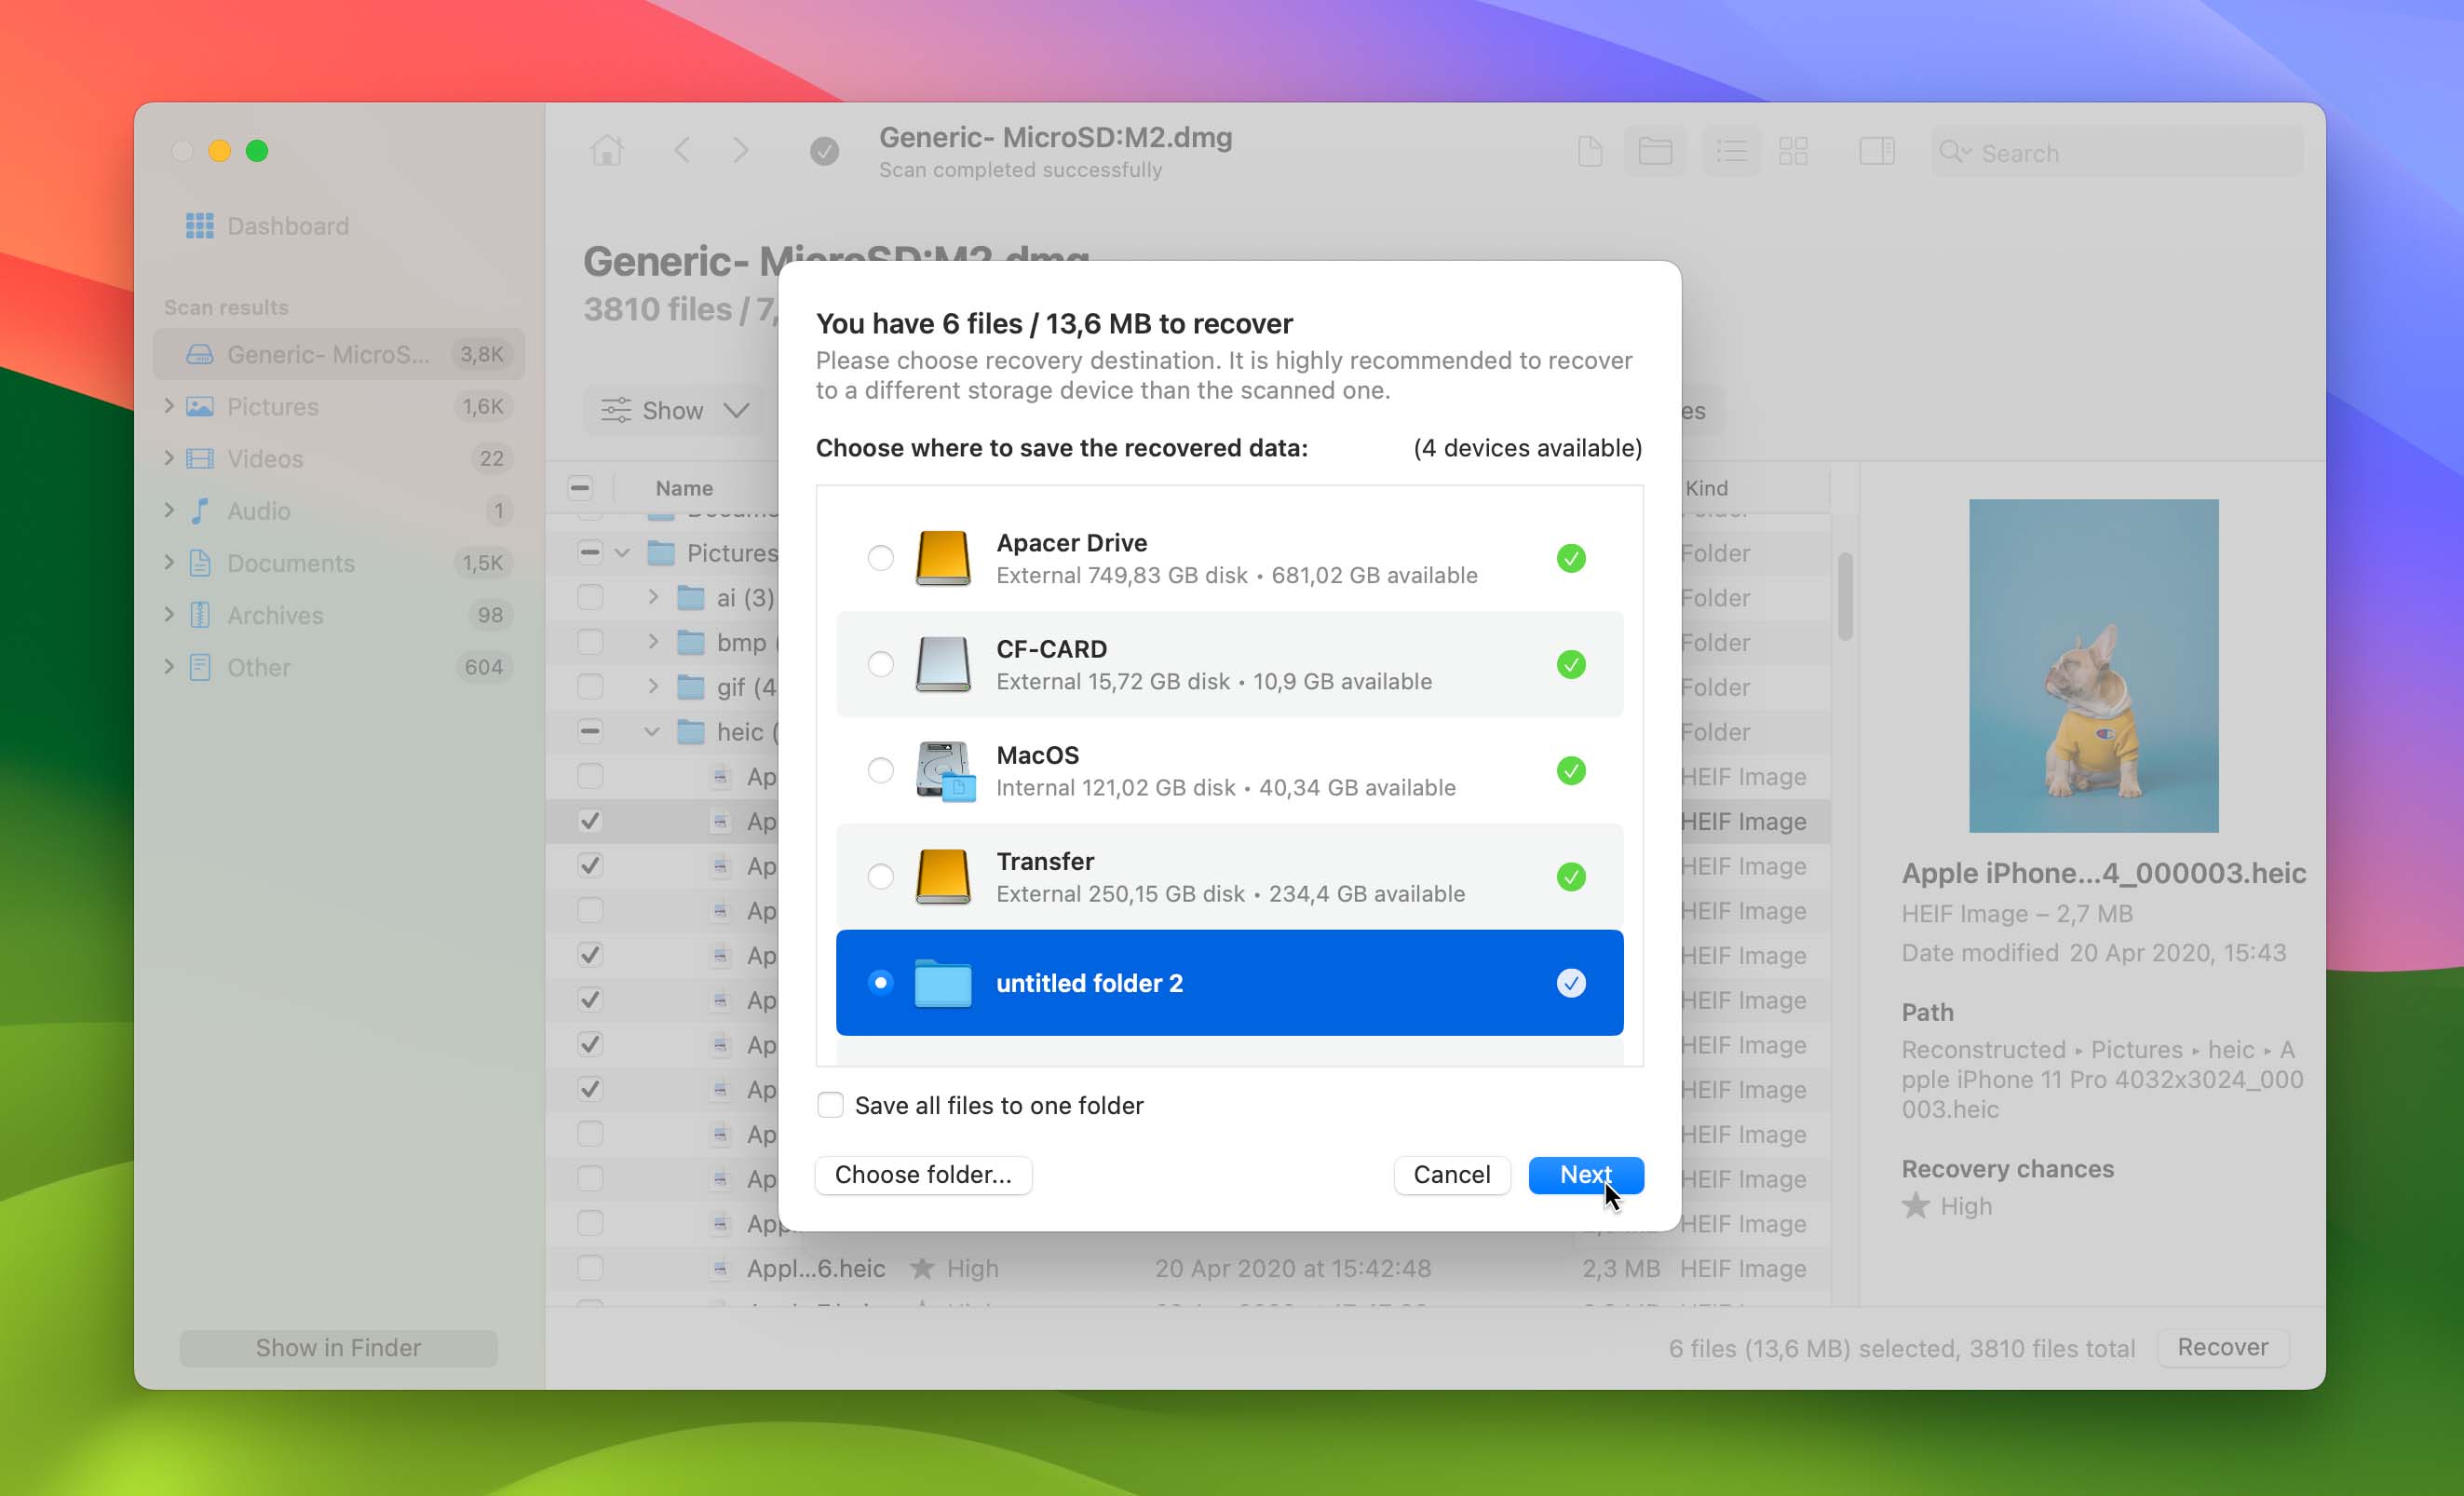
- Browse around the recovered files. Disk Drill will show you all files it’s managed to recover, providing you with some additional information about the state of each one. You can, for example, choose to only recover files that have high recovering chances.
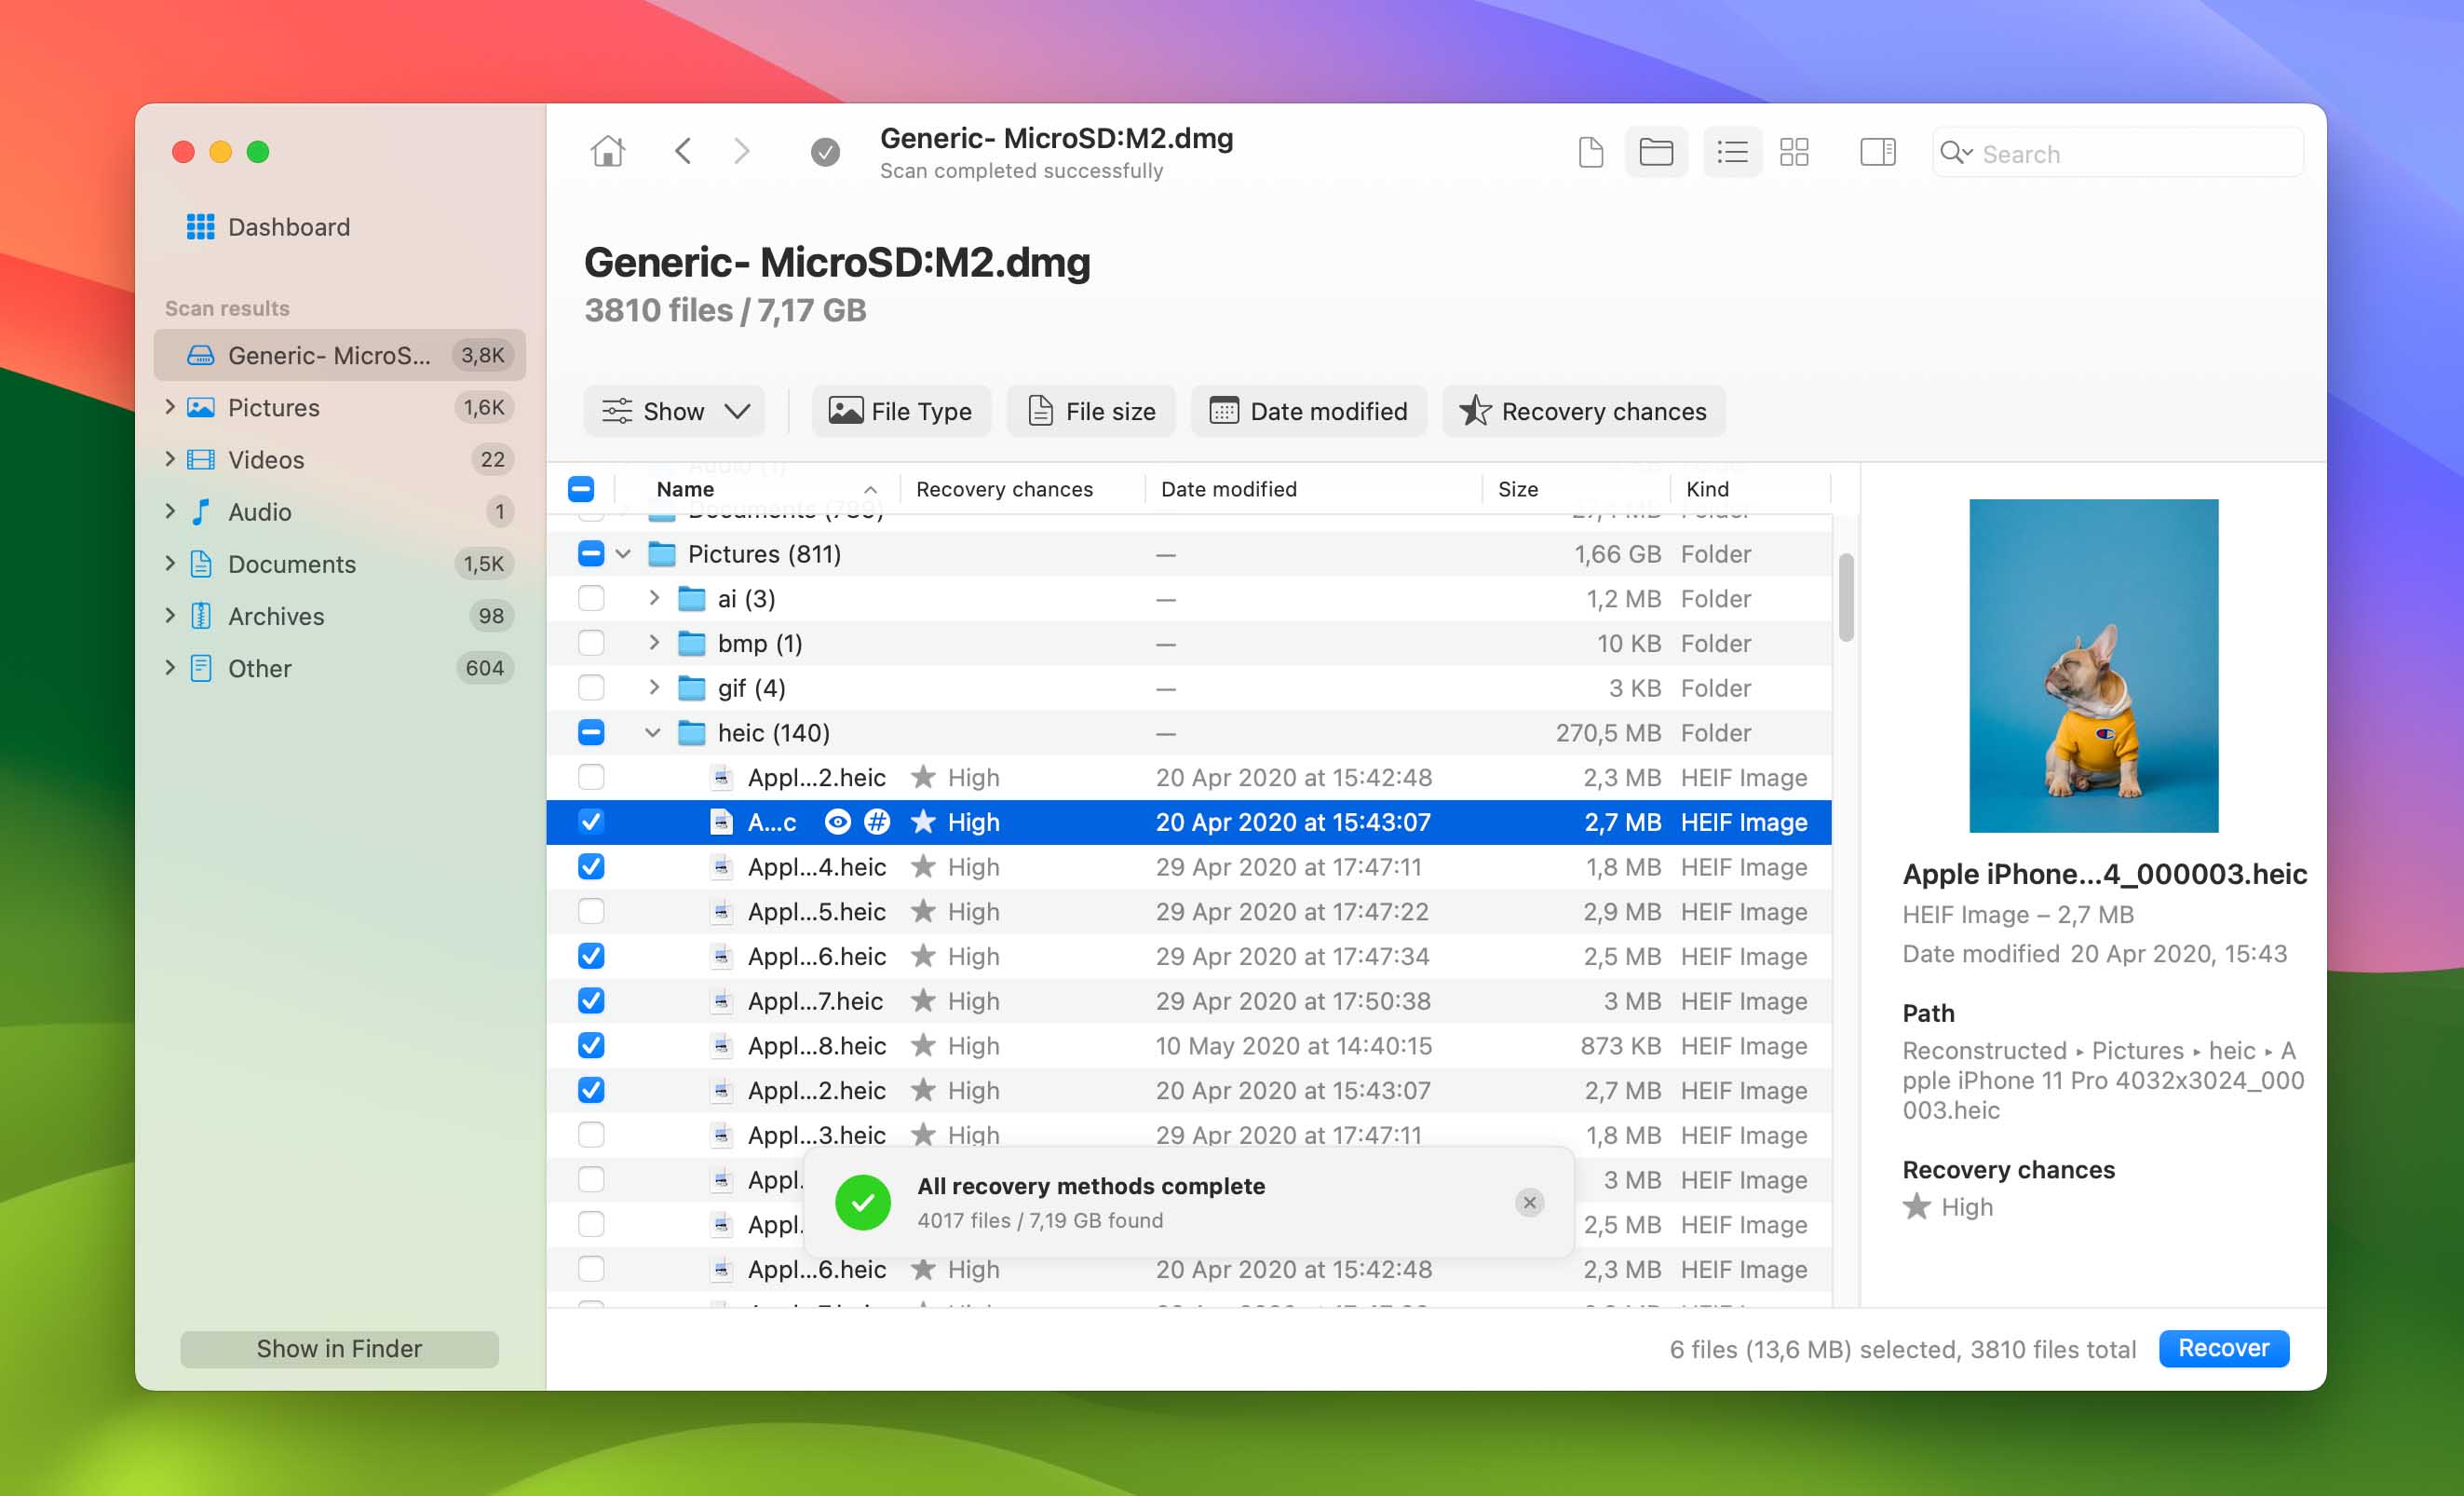
- Select the files by selecting the checkboxes next to them, then click Recover. In the window that opens, choose a place to save the data and click Next.


Option B: PhotoRec
PhotoRec is a similar utility, aimed at SD card recovery on Mac (as well as recovery from other storage devices), though aimed at a different group of users. It’s a bit more complex in its functionality, and can take a while to get used to, however, it allows you to recover deleted files from SD card on Mac completely for free. In addition, PhotoRec’s interface can be a bit clunky compared to options like Disk Drill, so if you want something that’s easy to navigate and operate, you may want to look elsewhere. The main downside compared to other similar utilities is that, at least on macOS, you are limited to a console tool without a proper graphical interface.
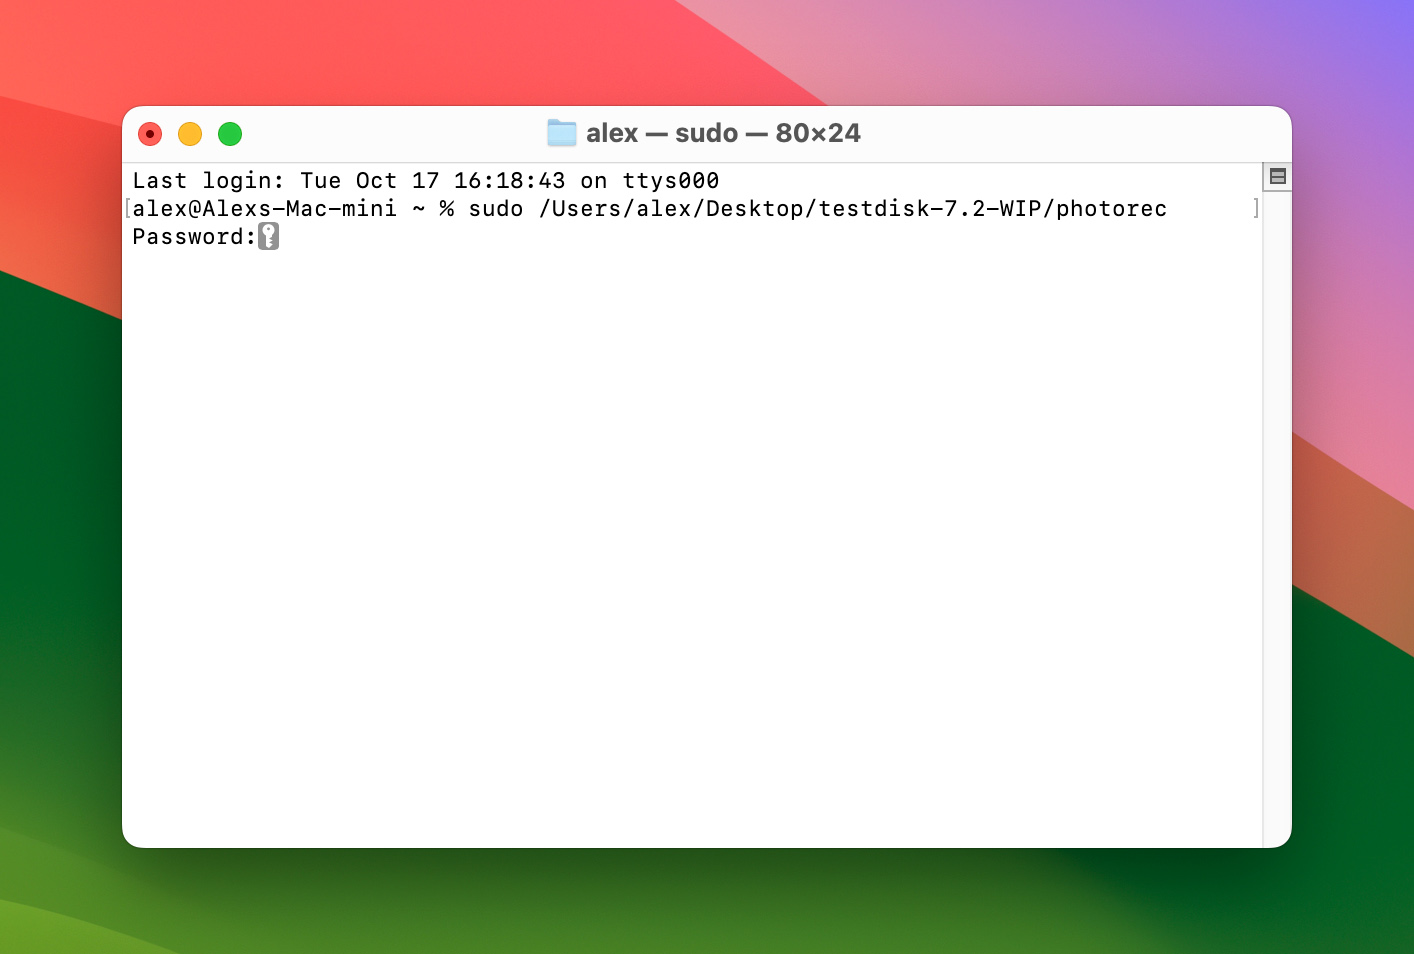
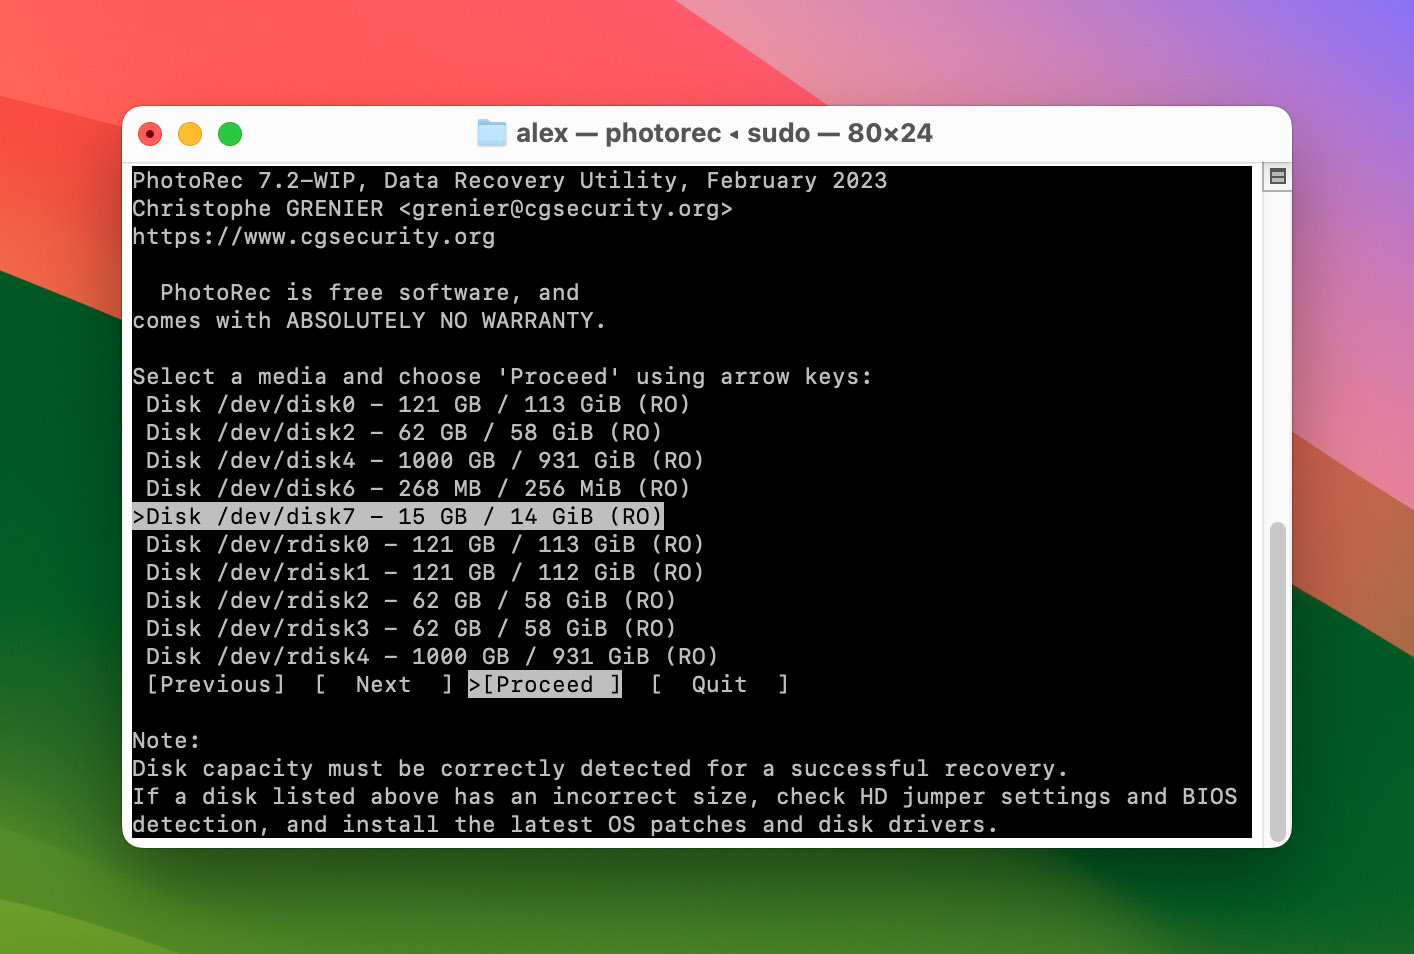
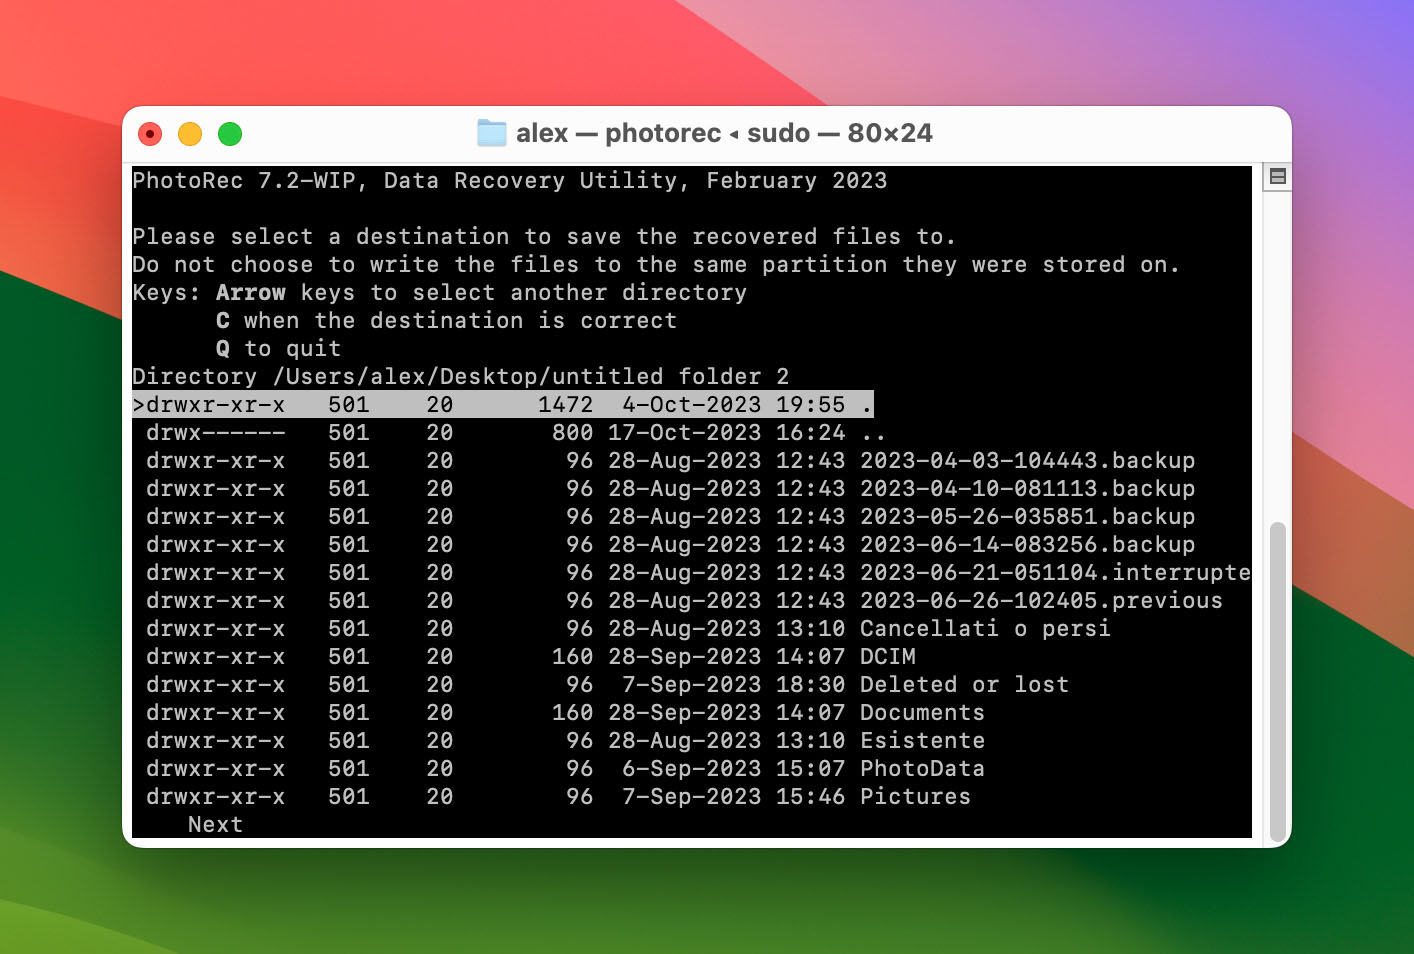
- Download PhotoRec and launch it from your terminal. The application will launch in your console, and present you with a list of detected disk drives and some of their parameters, like size.
- Choose the appropriate drive. Navigate to the SD card in the list using the arrow keys, and select “Proceed” by pressing Enter.
- Choose the whole SD card and select “Search” by pressing Enter.

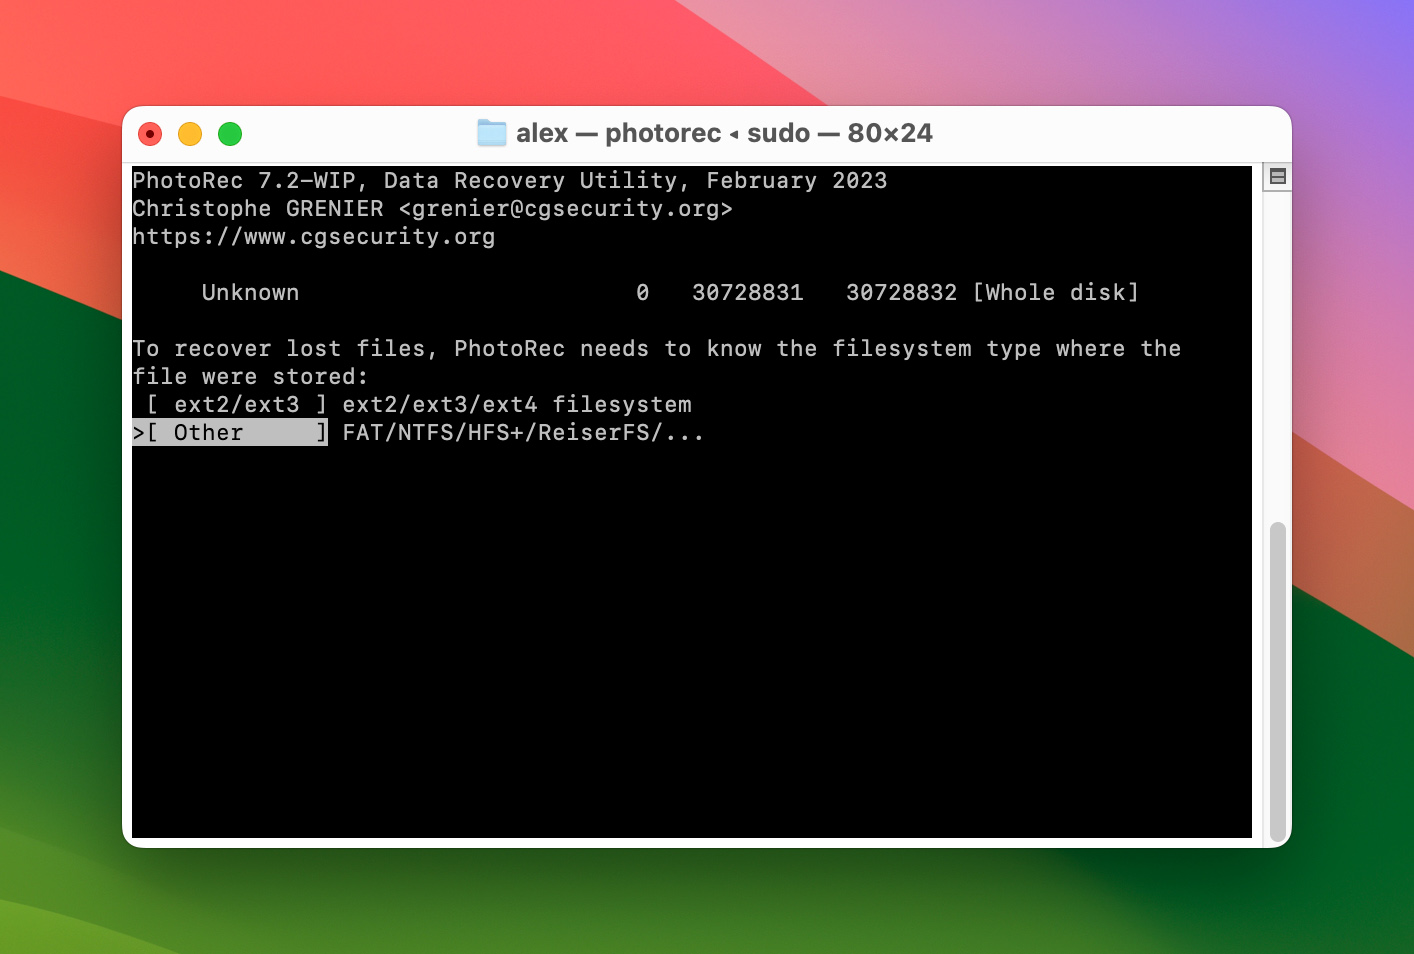
- Choose the right filesystem for the SD card from the list.
- Choose the folder where the recovered files are going to be saved. Make sure it’s not on the same SD card that you’re trying to recover!
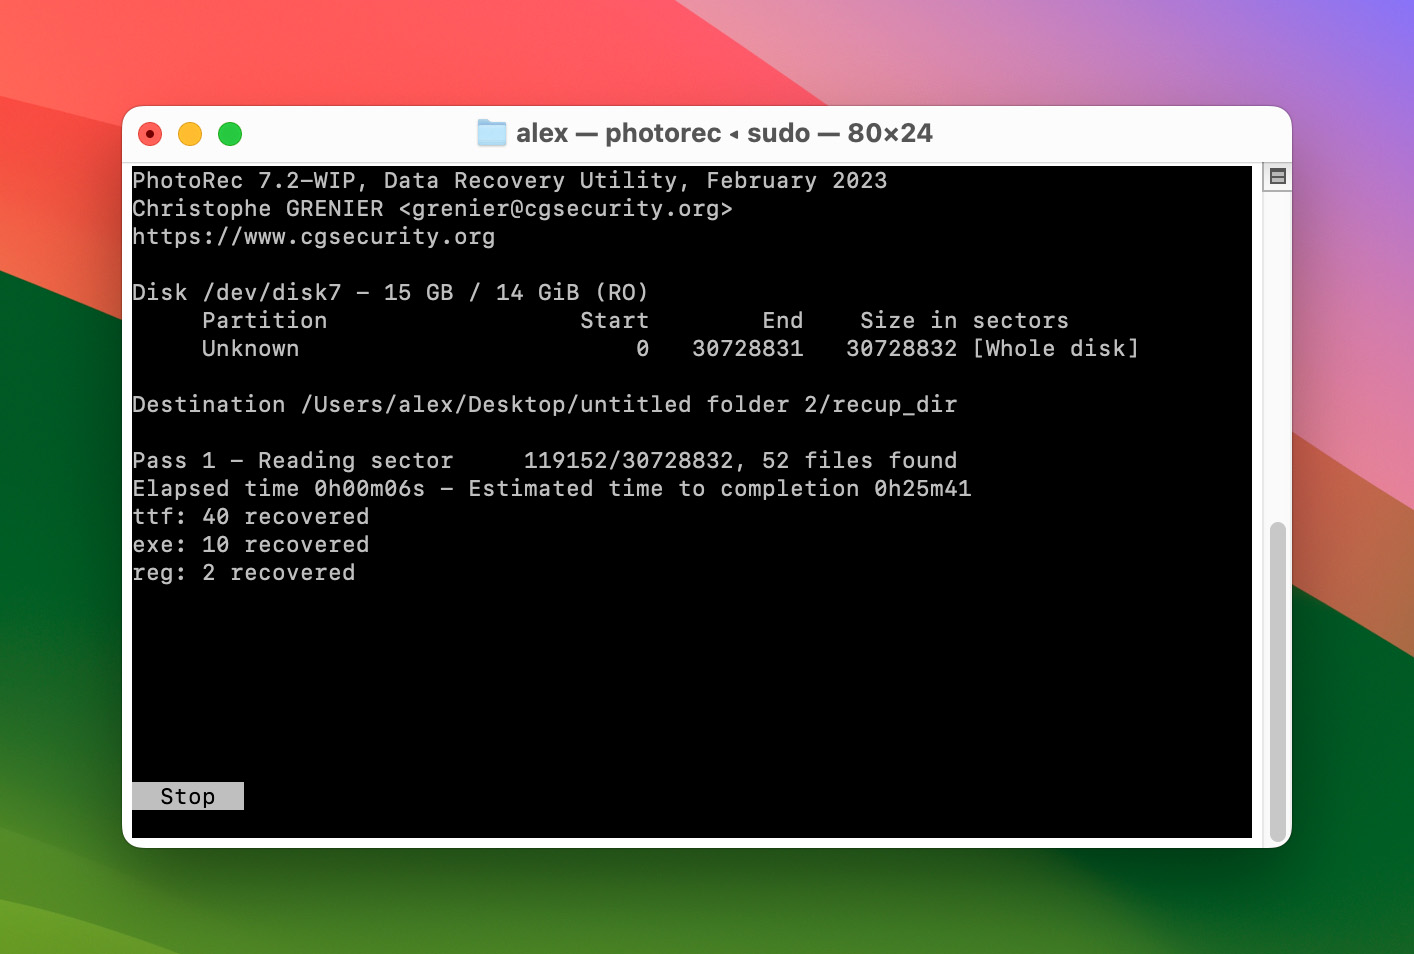
- Start the recovery process. Any successfully recovered files will be saved to the folder from the previous step.


How to Recover Deleted Files from SD Card on Mac: Honorable Mentions
- Check the Trash bin and .trashes. Perhaps the most straightforward solution, and also one that can occasionally work. To recover an SD card on Mac, start by checking to make sure that the files were actually deleted, and were not just sent to the Trash bin. Check the .trashes file in the root folder of the SD card as well. It’s a local version of the Trash bin specifically used for portable devices, and trashed files will always be in this folder. Unfortunately, the Finder app no longer shows the .trashes file, so you’ll need a third-party file explorer, such as Commander One.
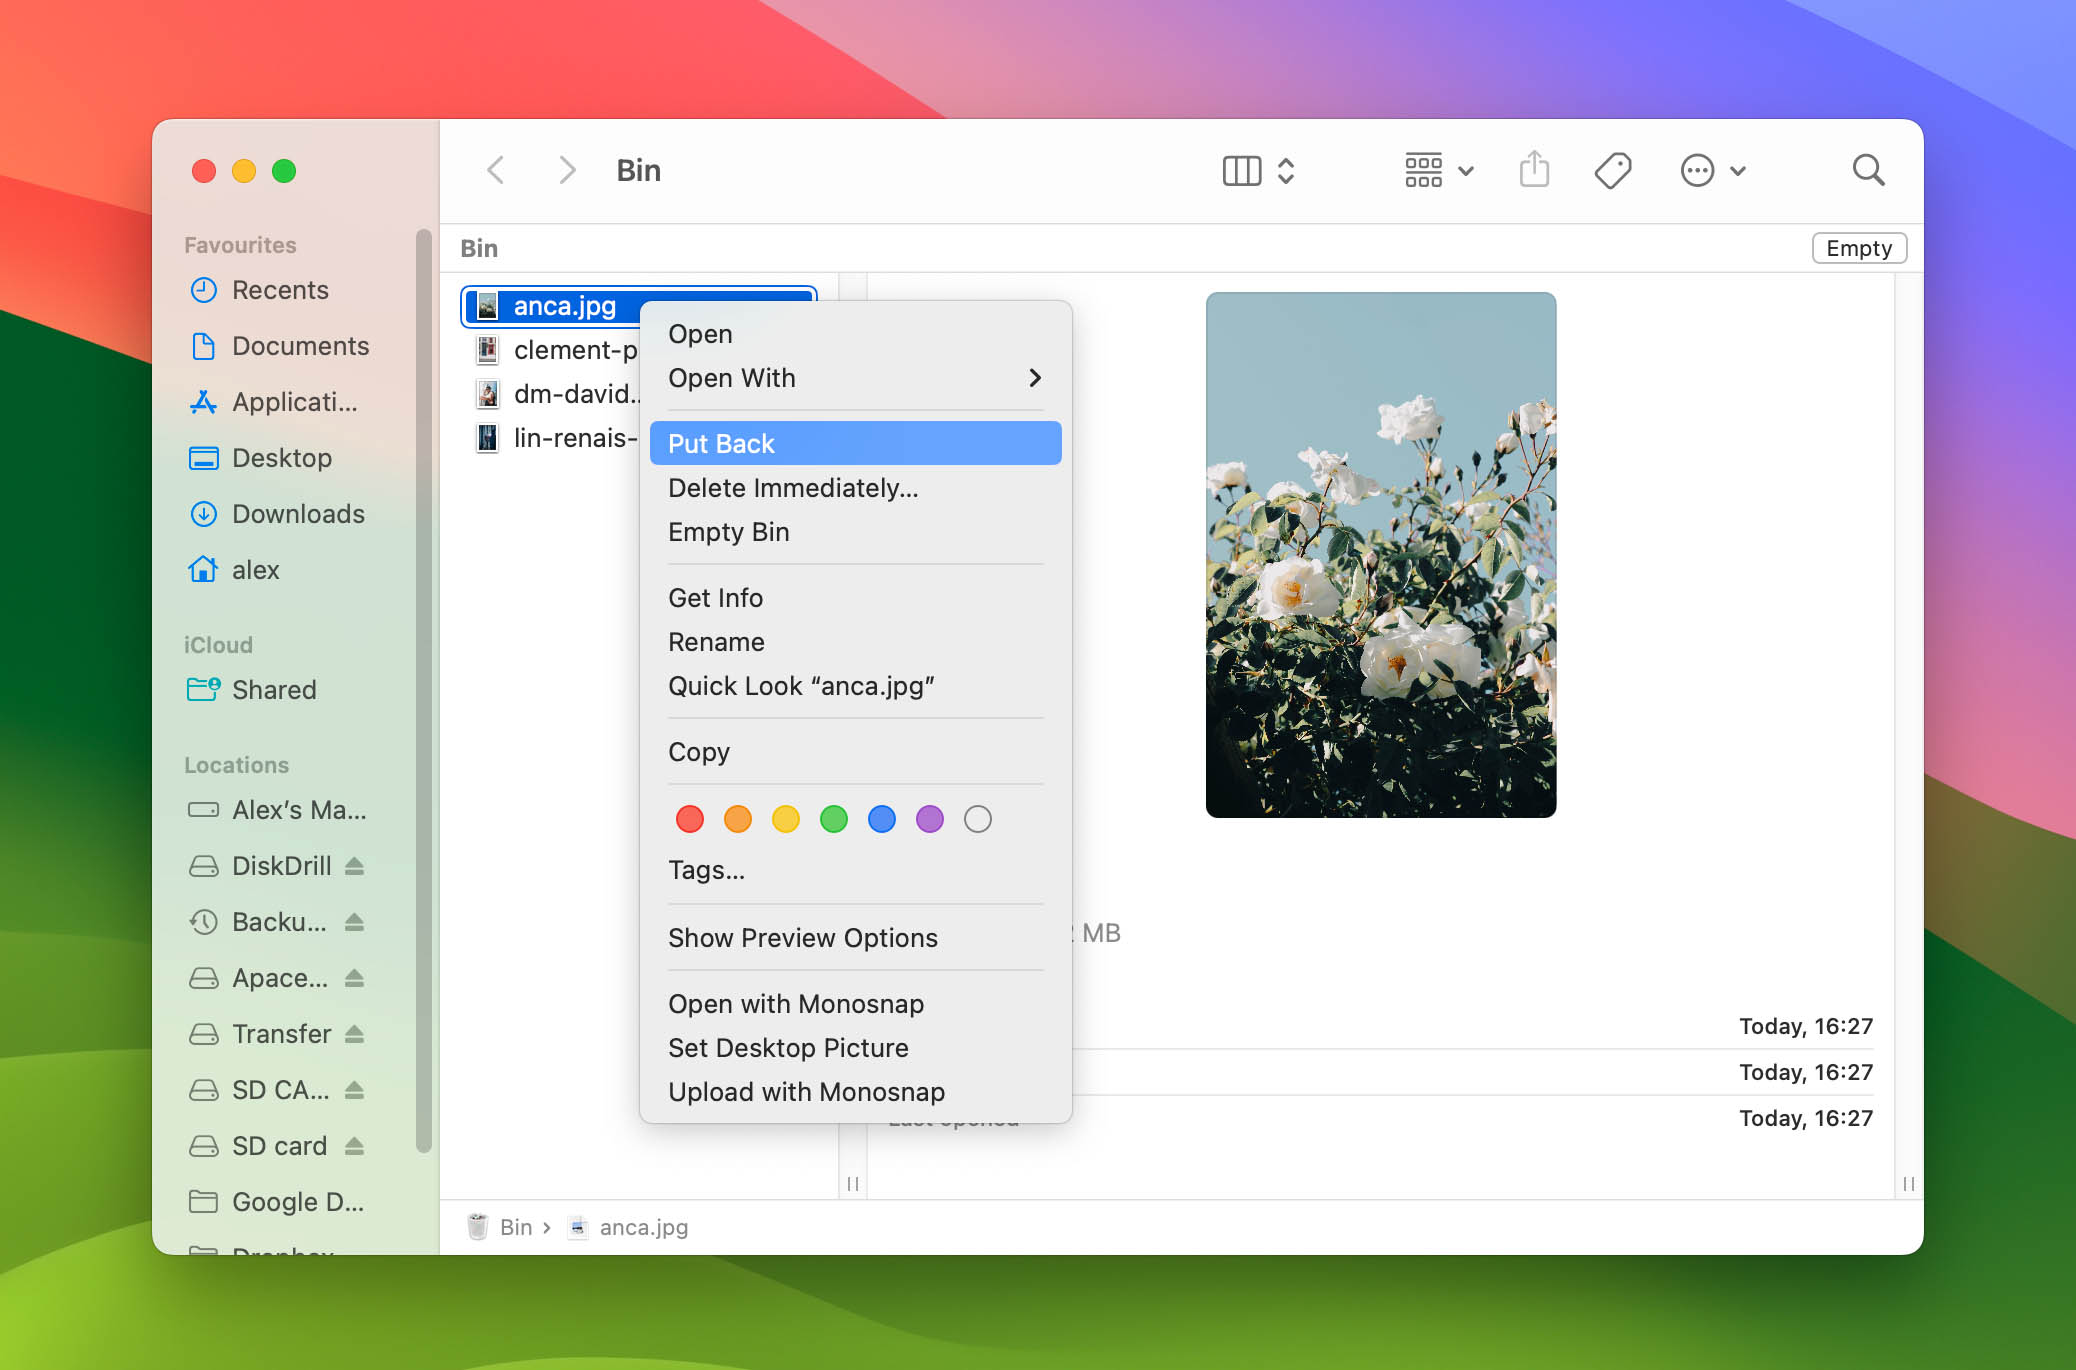 As you’re probably guessing, though, you shouldn’t expect too much from this step. It’s just a basic precaution to ensure that you’re not about to waste your time digging into more advanced recovery procedures when the files are right there for the taking to begin with.
 - Check the tmp and cache folders. On a related note, check your tmp and cache folders. The tmp folder can be accessed by simply opening a terminal and typing “open $TMPDIR”, while cache folders are located in “~/Library/Autosave Information” and “~/Library/Caches”.
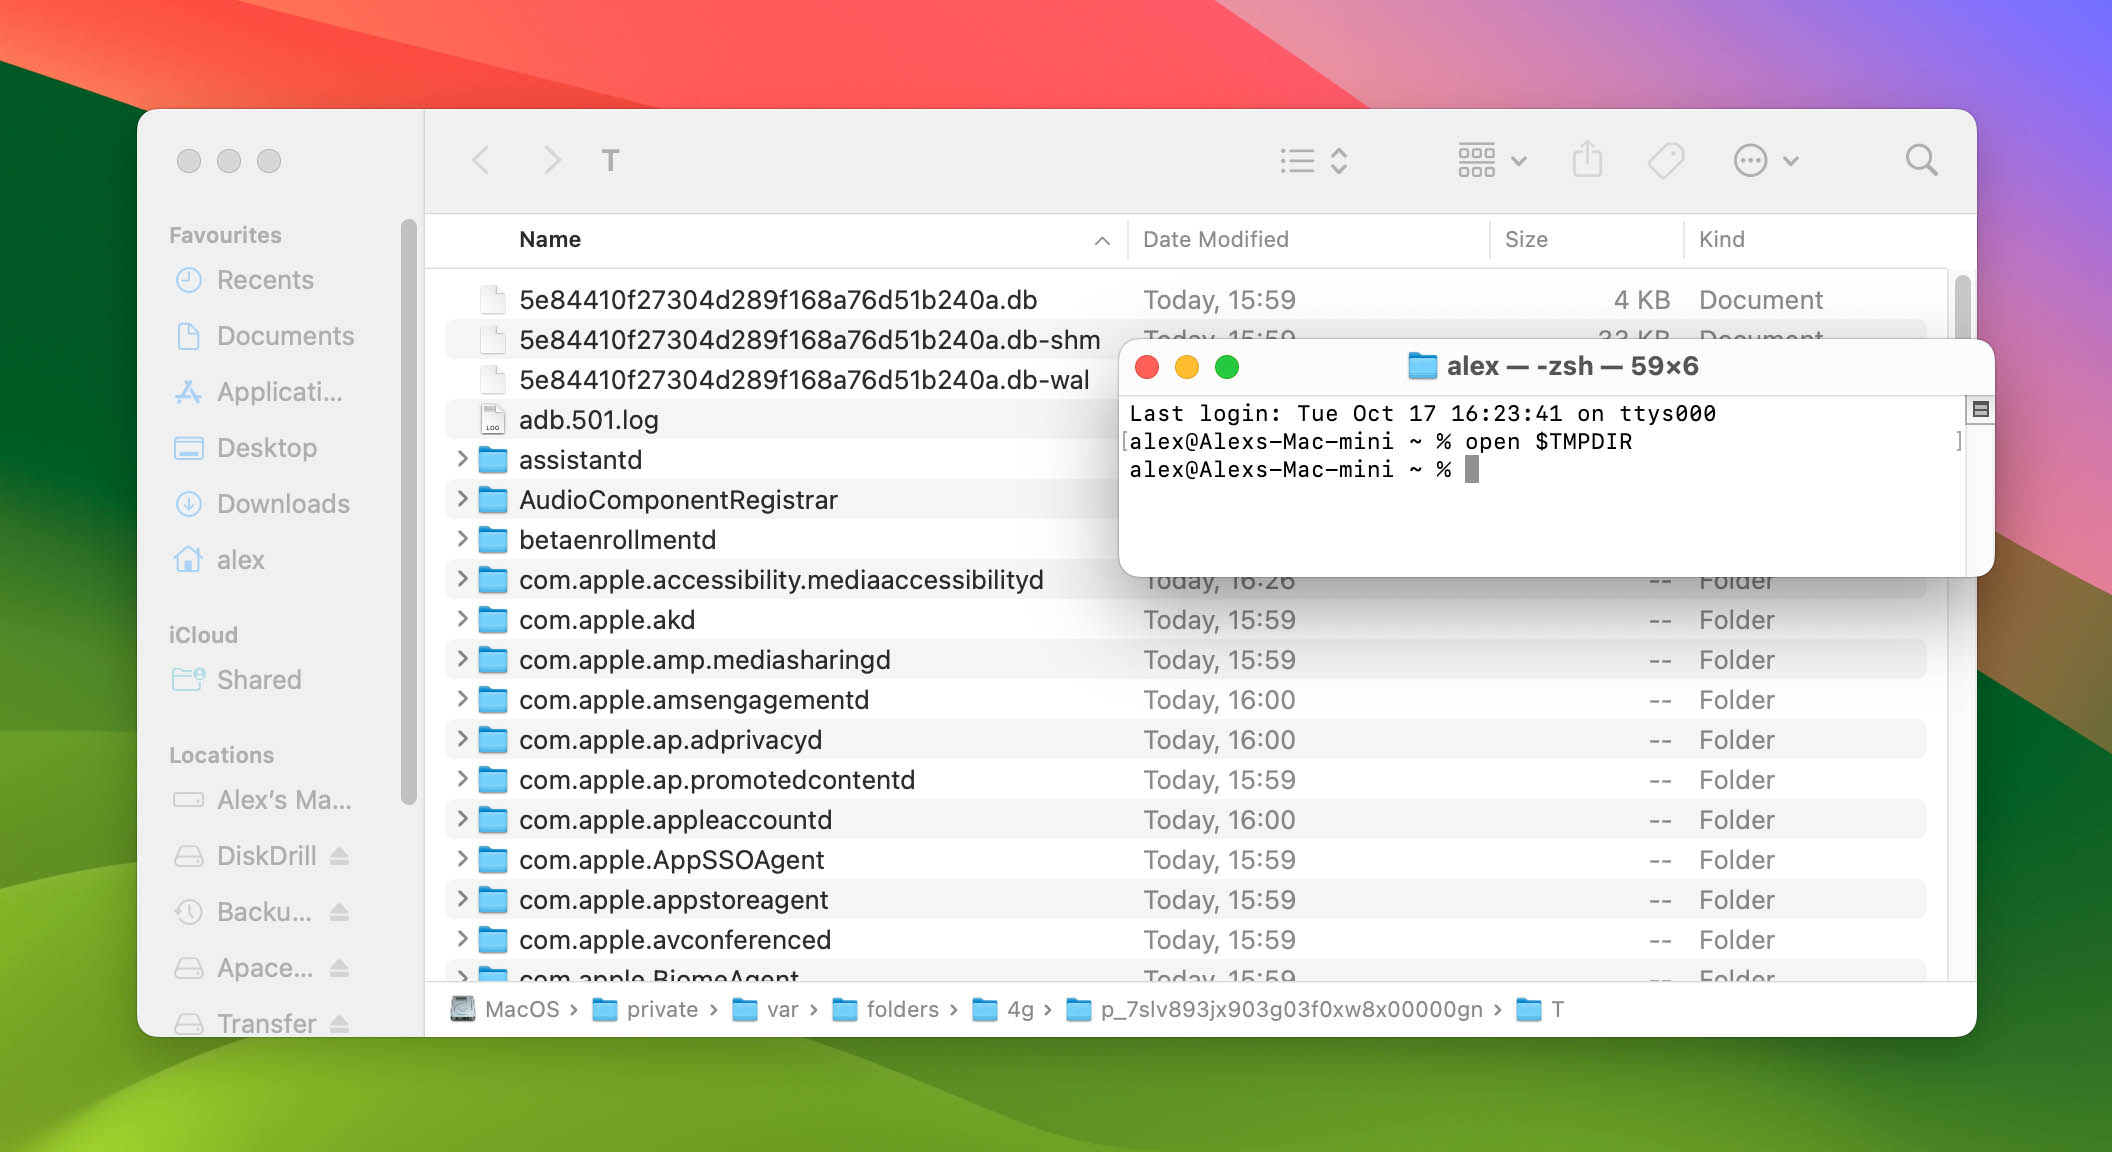 Whether you’ll get anything useful out of those folders depends on what types of files you lost, and how you were originally working on them. The main idea here is that some applications store temporary versions of currently opened files in those folders, so you might be able to recover at least some of your work, perhaps a few versions older than the last one you had.
 - Time Machine. The integrated backup solution for macOS, Time Machine, can occasionally prove useful when you need to recover deleted files from an SD card on Mac. However, this relies on several factors which you can’t change retroactively. First, you must have specifically added the SD card as a backup source in Time Machine’s settings. Second, the card must be in your computer at all times for the program to regularly pick up changes and create backups of it. If you’ve enabled backups for this card in the past, it’s definitely worth checking out Time Machine, as it may save you from having to go further with any additional tools.
 Also, you should not always have high hopes for this method because the SD card must be HFS, HFS+ or APFS to add it to backups, and most people don’t use such cards because they won’t work for devices other than Macs.
 - Professional Data Recovery Services. If your data is really valuable to you and you can’t afford to make any mistakes, it may be best to leave things in the hands of professionals. There are companies out there which provide professional SD card recovery for Mac, and will utilize all modern tools and approaches in an attempt to recover your data. It’s also not a 100% guaranteed solution, like everything we described above, but if that fails, you can rest assured that there was nothing you could have done yourself in the first place. Keep in mind that these services can be quite expensive, and can take a long time to retrieve your data (several weeks, even months).


FAQ
Conclusion
Recovering deleted files is not impossible, but it does take a combination of the right tools, some patience, and a bit of luck. If you do things right and react in time, you should be able to get most of your data back, or at least bring it to a workable state from where you can proceed with additional recovery steps. And if the data is valuable enough, it’s never a bad idea to consider a professional recovery service.