

Table of Contents
If you’re anything like me, at some point you deleted some files, only to discover—at a later date—that you still need them. Or maybe storage drive-related gremlins like bad sectors, partition loss, or accidental formatting wiped out some, or all of your files. This happened to me, and—just like that Twenty One Pilots song—I wished I could turn back time to the good old days (when my files existed). Fortunately, I discovered more than one way to restore my Mac to an earlier date. I describe all these recovery methods in the sections below.
Simplest Method: Restore Mac to Previous Date Using Time Machine
What better way to go back in time on your Mac, than using a feature called Time Machine? If enabled, Time Machine periodically (hourly, daily, and weekly) backs up your files, apps, music, pictures, and documents. Depending on how you set up Time Machine, backups are usually stored on external, or network drives.
In addition to full backups, Time Machine also creates local snapshots of your files, allowing you to restore different versions of these files. These snapshots are created hourly and saved on the same drive as the original files, for up to 24 hours, or until the disk space is required.
To restore your Mac to a previous date using Time Machine, you first need to boot into Recovery Mode. The steps for this differ, depending on whether you’re using you’re using an Intel, or Apple Silicon (M1, M2, M3, etc.) device.
Boot into Recovery Mode on Intel Macs
- Ensure the drive used to set up Time Machine is connected to the Mac.
- Click on the Apple menu in the top-left and choose Restart.
- Hold the Command + R keys until you see the Apple logo. Wait for macOS to finish booting into Recovery Mode.
- Log in to your user account.
Boot into Recovery Mode on Apple Silicon Macs
- Ensure the drive used to set up Time Machine is connected to the Mac.
- Click the Apple menu and choose Shut Down.
- Press and hold the Power button until you see the system volume and Options button.
- Select the Options button and click Continue.
- Select your user account and click Next.
- Type in your password and click Continue.
Restoring Your Mac Using Time Machine
Once you’ve booted your Mac in Recovery Mode, here’s how to restore it to a previous date using Time Machine:
- Select the Restore From Time Machine Backup option and click Continue.

- Read through the Time Machine info and click Continue.

- Select the Time Machine drive from the Select a Source screen. If you stored the Time Machine backup on a server, click on Other Server and type in the server address. Click Continue.

- Select the appropriate backup, depending on the data you wish to restore your Mac to. Click Continue.

- Choose where you wish to restore the Time Machine backup to. Most likely, it’ll be your Mac’s internal HDD or SSD. Click Continue.
- You’ll see a confirmation prompt that reminds you that restoring the backup erases the destination disk. Click on Erase Disk to proceed.
- If the Time Machine backup is encrypted, you’ll need to enter the password.
- Mac will begin restoring the backup.


You can’t use Time Machine to revert your Mac to an earlier date, if you didn’t already set it up before losing your data. Although—as described in the next sections—you can restore your Mac to a previous date without using Time Machine, none of the other methods are as convenient. Therefore, I recommend you set up Time Machine anyway, to help you out in the future.
| ✅ Pros of Using Time Machine | ❌ Cons of Using Time Machine |
|
|
Additional Ways to Restore Mac to an Earlier Date
Unable to restore your files from a Time Machine backup? Fear not, I’ll describe three other ways you can potentially undo data loss and revert your Mac to a previous date, without using Time Machine.
Method 1: Using Data Recovery Software
In most cases, the primary goal of restoring a Mac to an earlier date is to undo any data loss. Besides contacting an expensive professional data recovery service, the only other way to restore your files is to use a third-party data recovery tool.
A quick Google search reveals there are innumerable data recovery tools, all claiming to be the best. To narrow down my options, I used this list of the 10 best data recovery apps for macOS.
Finally, after extensive comparison, reading several reviews, and consulting my team members, I decided to go with Disk Drill. Primarily, it was the simple UI, proven track record, and advanced data recovery algorithm that convinced me to choose Disk Drill over its competitors. Additional features like data protection, file preview, and S.M.A.R.T. monitoring were the cherry on top.
The built-in tutorials ensure you’re never clueless about what the various options mean and how to perform data recovery.
Here’s how to restore your files and effectively restore your Mac to a previous date:
- Download Disk Drill and install it. I recommend you do this on an external storage drive.
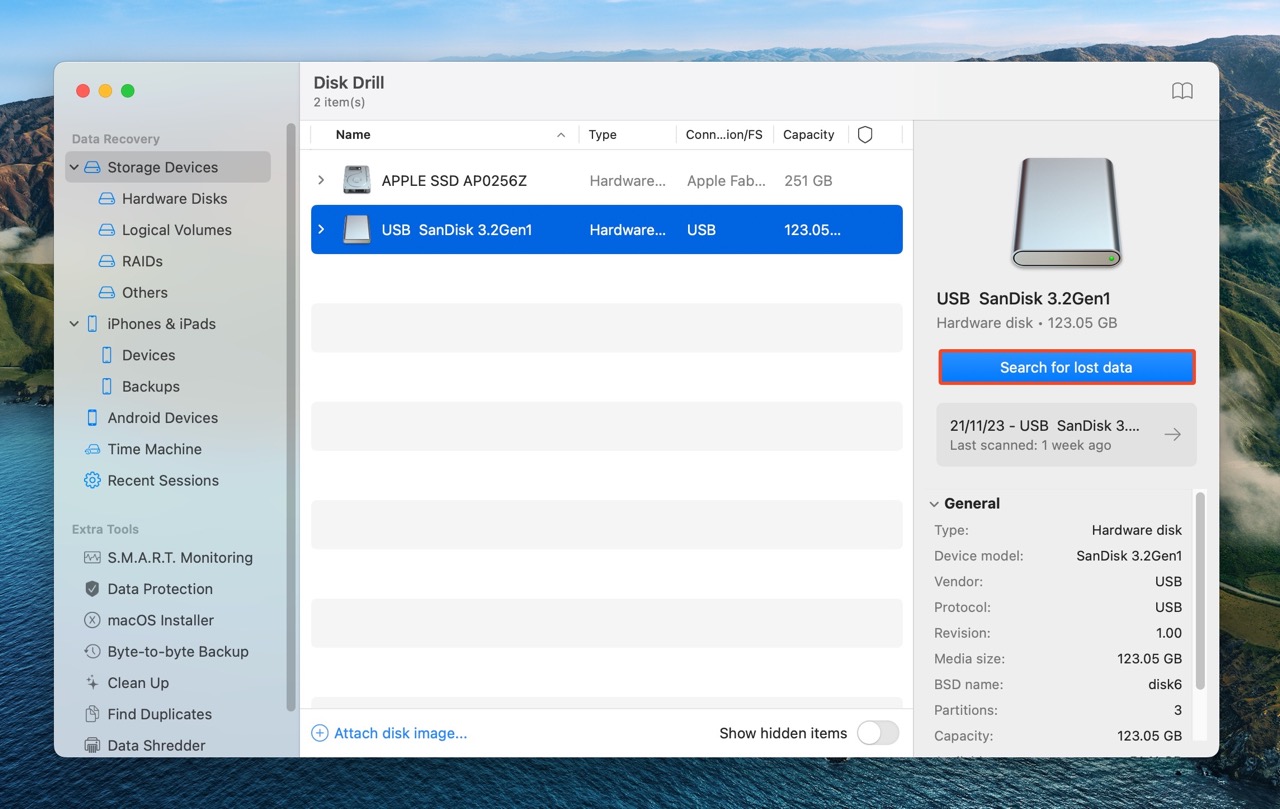
- Open Disk Drill, select the drive you wish to recover files from, and click Search for lost data.
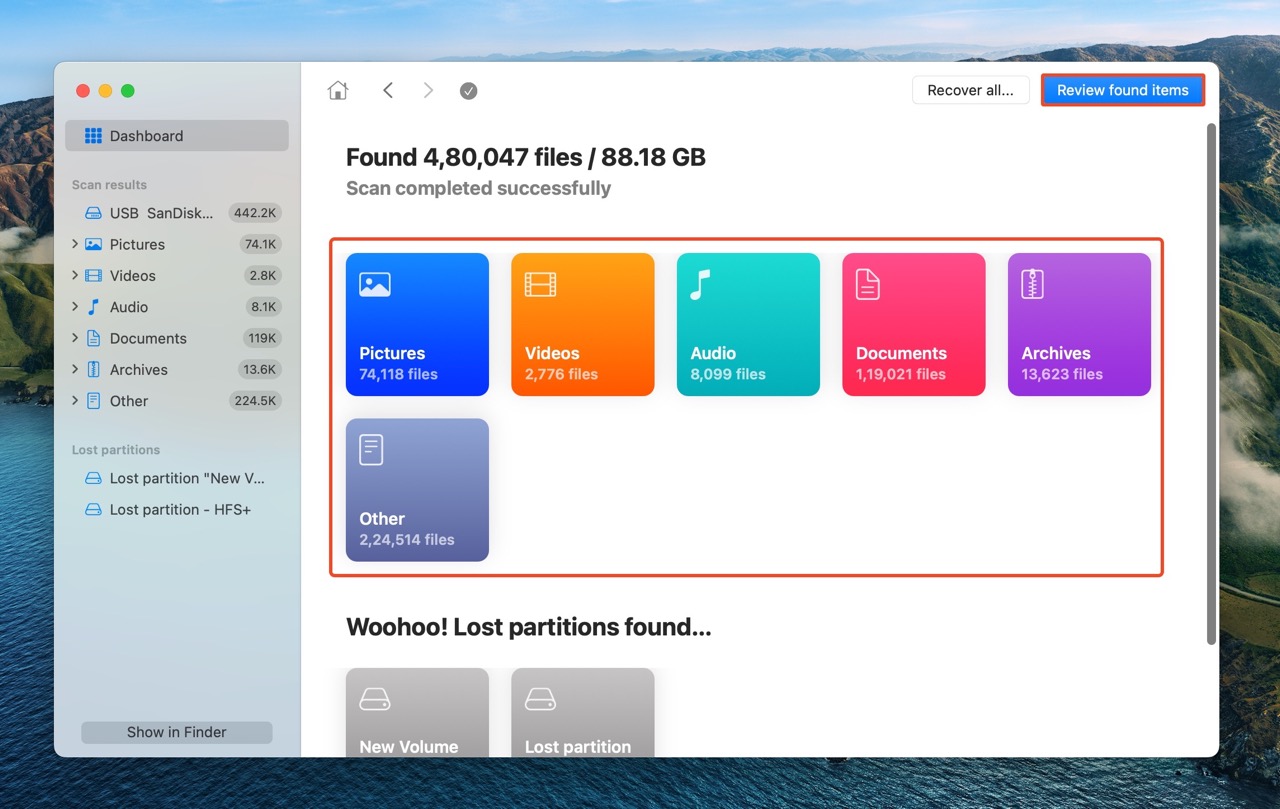
- Click on Review found items to view all recoverable files. To only see a specific file type, click on the relevant file type tile—Pictures, Videos, Audio, Documents, Archives, and Other.
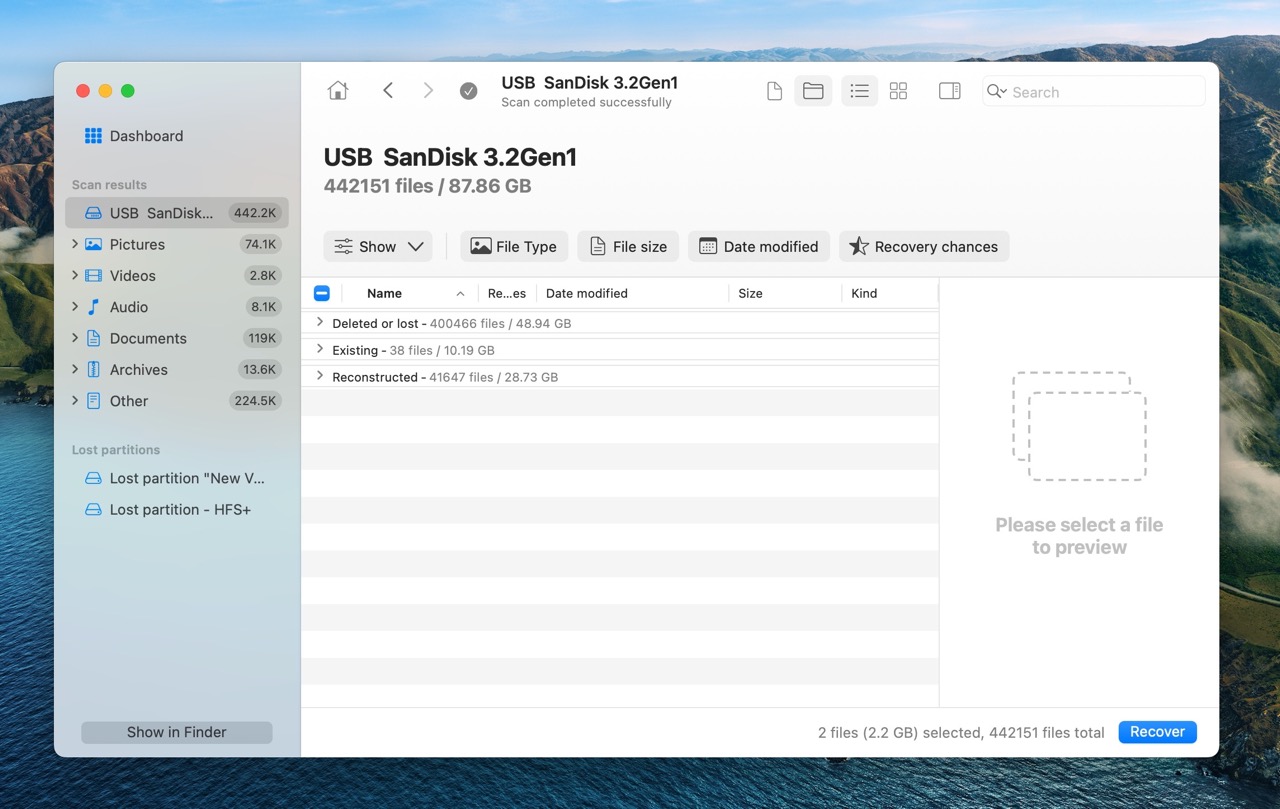
- Expand the Deleted or lost and Reconstructed sections.
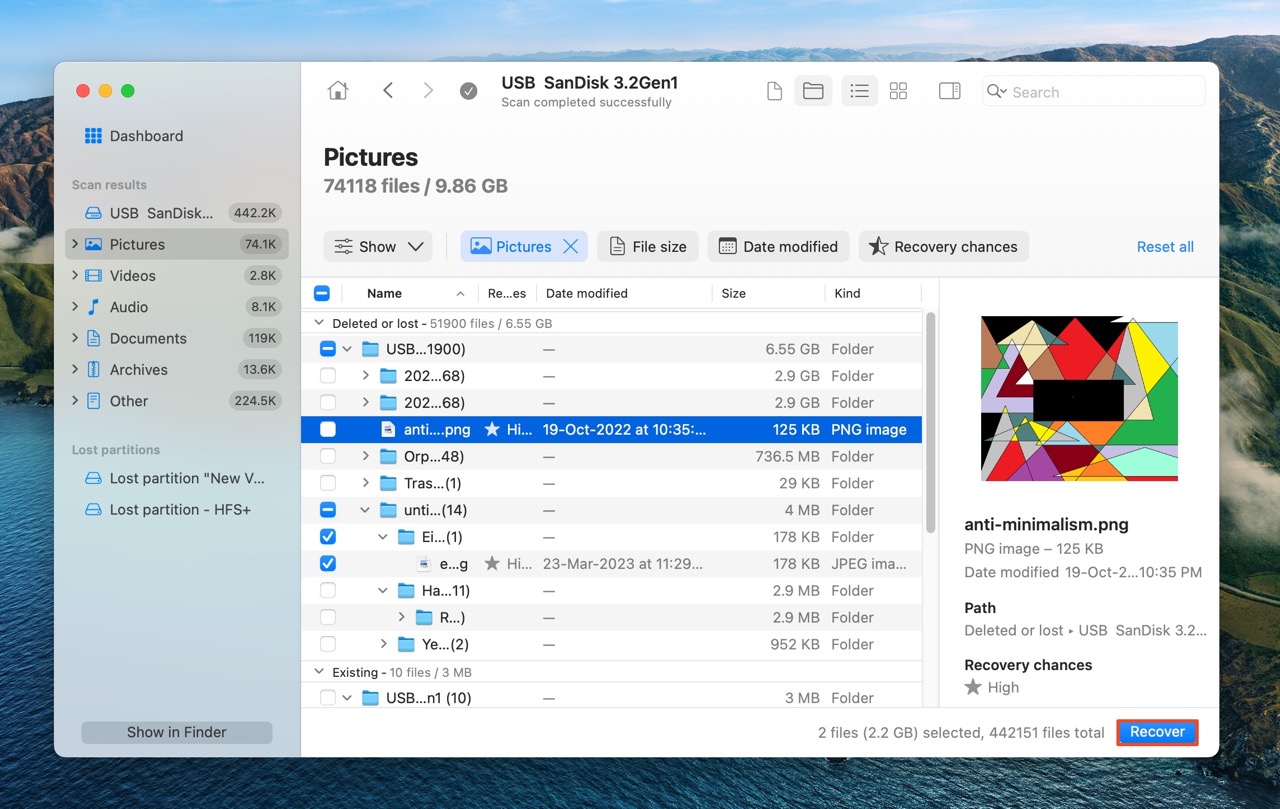
- Select the files you wish to recover. Disk Drill displays a preview of the currently selected file, but you can manually preview any file by clicking the eye icon next to its filename. Click Recover after confirming your selection.
- Choose a recovery destination for the files and click Next.
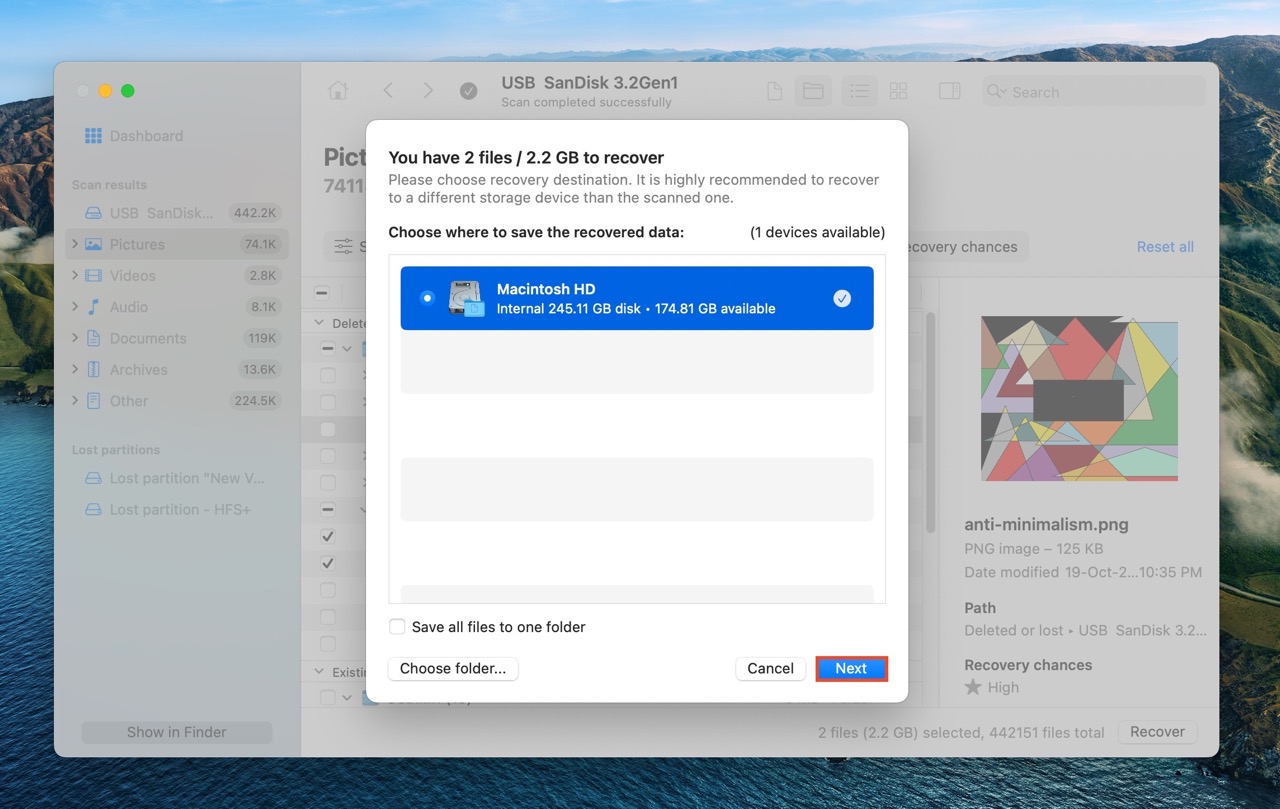
- Disk Drill will recover the selected files.
While Disk Drill can help recover your files, it won’t perform a full-fledged restore like a Time Machine backup would. You will need to reorganize the recovered files. Additionally, files recovered from the Reconstructed section will have illegible filenames that you’ll need to rename. Unlike Time Machine, you can’t restore your OS using a data recovery tool.
| ✅ Pros of Using Disk Drill | ❌ Cons of Using Disk Drill |
|
|
Method 2: Using Disk Utility
Apart from Time Machine, I found restoring a previously created disk image, the most convenient method to revert my Mac to an earlier date. I did this, using macOS’ Disk Utility. This method is especially useful if you performed a clean install of your Mac, and you have a disk image of your system instead of a Time Machine backup. Keep in mind, that for this method to work, you require a disk image that was created before data loss occurred.
Here’s what restoring a disk image in Disk Utility looks like:
- Open Disk Utility on your Mac. I simply searched for “disk utility” in Spotlight Search (Command + Space).
- Ensure the drive containing the disk image is connected to your Mac.
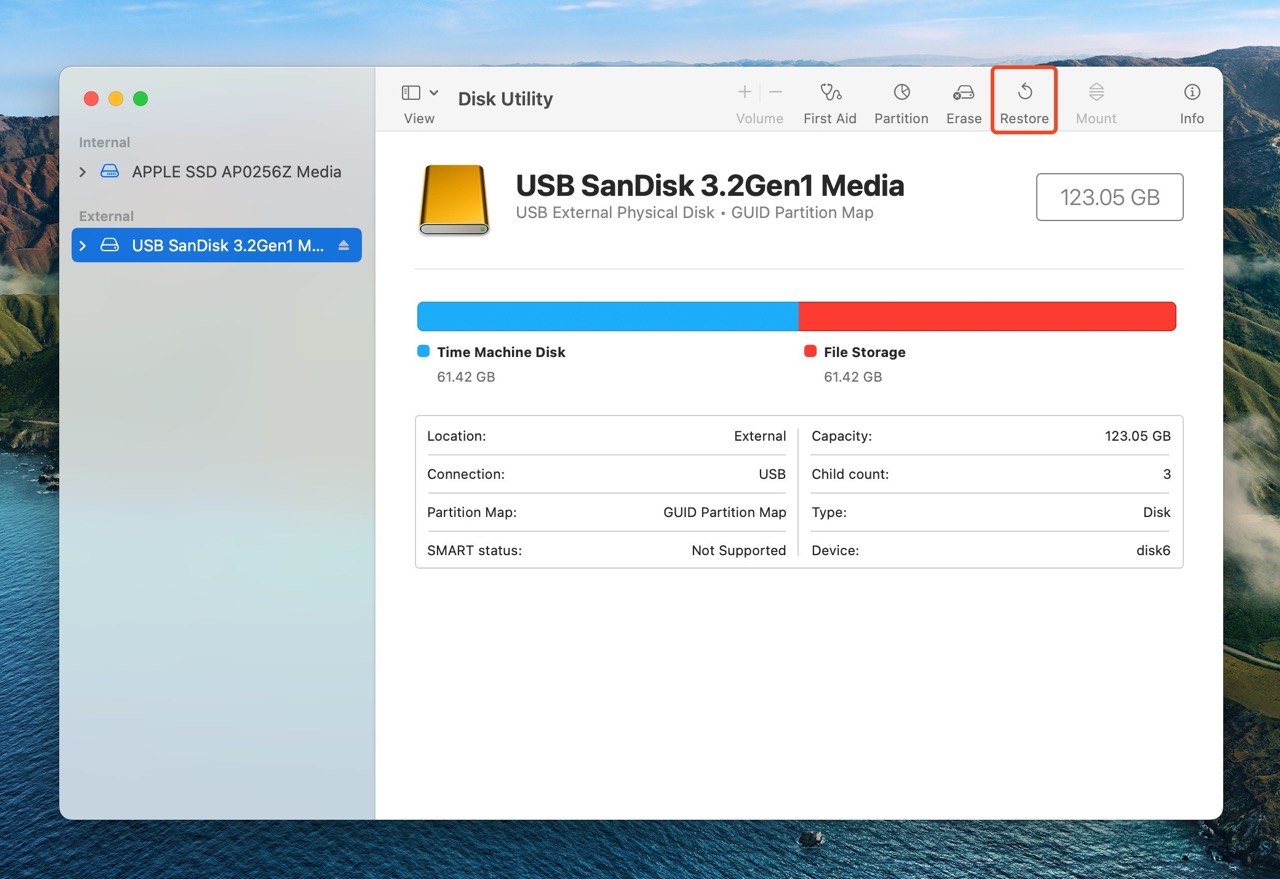
- In Disk Utility’s left navigation bar, click on the drive you wish to restore the disk image to. This is the drive that’ll be erased and become exactly like the disk image.
- Click the Restore button.
- Click Image in the Restore prompt.
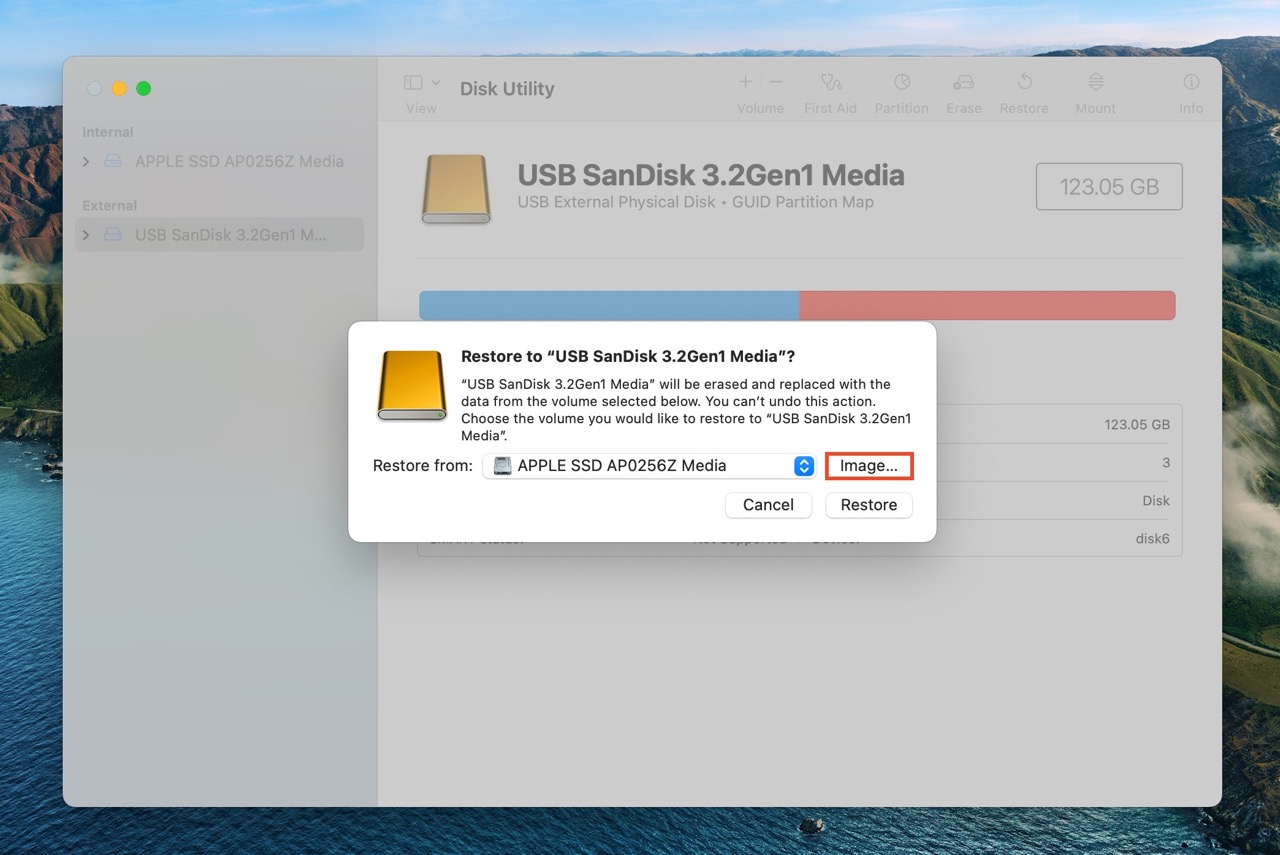
- Navigate to the disk image you wish to restore, and double-click on it.
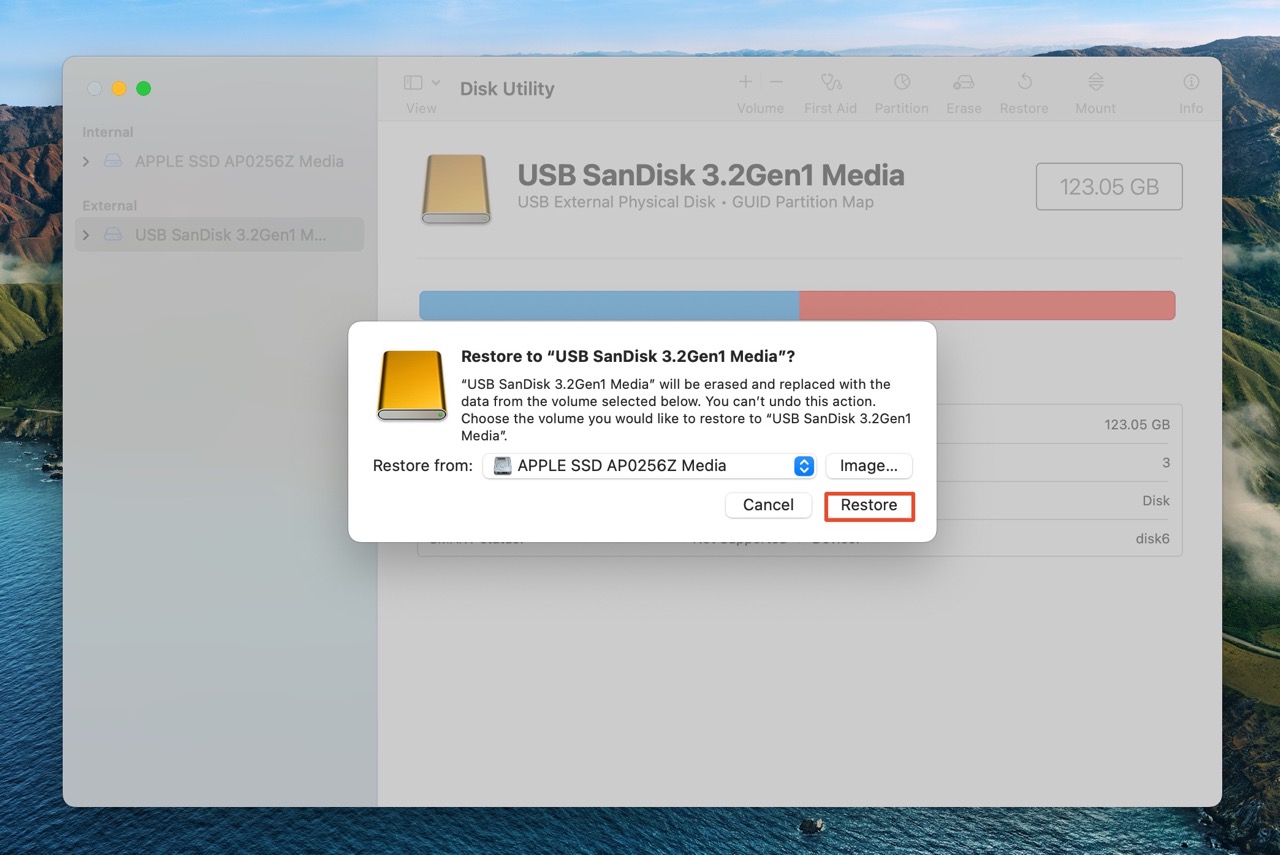
- Click on Restore.
Important: I observed that Disk Utility wouldn’t allow me to restore a disk image to the internal SSD (startup disk). If you wish to restore a disk image to your startup disk, you need a disk image of the startup disk. If you have the disk image, boot your Mac in Recovery Mode, and open Disk Utility. Then, follow the aforementioned step-by-step instructions to restore the disk image.
| ✅ Pros of Using Disk Utility | ❌ Cons of Using Disk Utility |
|
|
Method 3: Using Migration Assistant
The macOS Migration Assistant—while not strictly designed for this purpose—can help restore your Mac to a previous date using a Time Machine backup, startup disk, or another Mac. I found it useful in scenarios like failed updates requiring a fresh reinstall (upgrading from macOS Ventura to macOS Sonoma, etc.), moving data from one Mac to another, and restoring files to a reformatted internal drive.
Using Migration Assistant to revert your Mac to a previous date is simple:
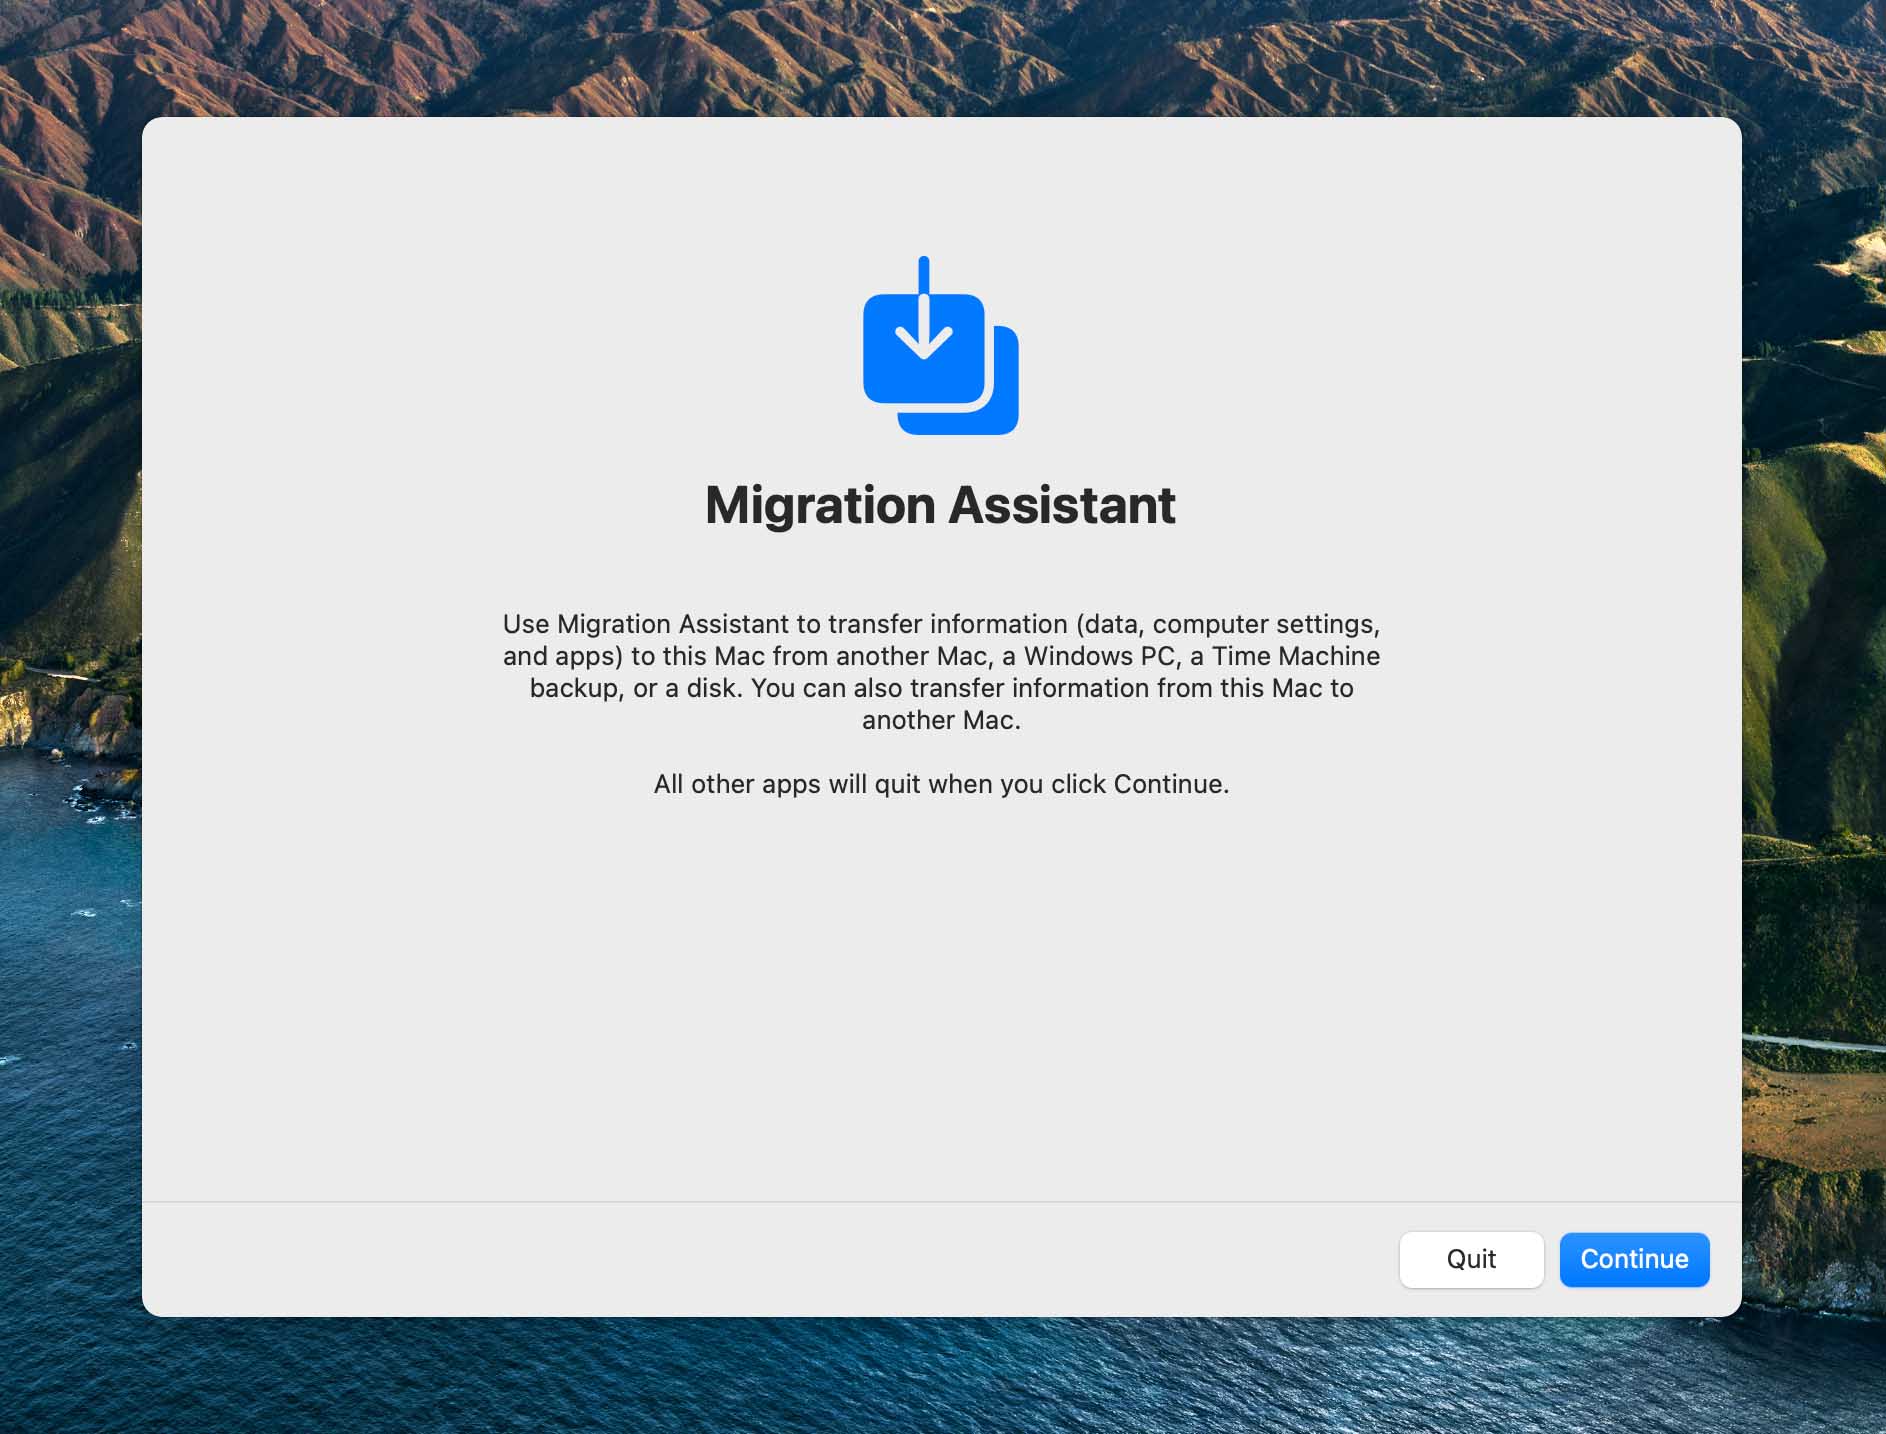
- Search for “Migration Assistant” in Spotlight Search (Command + Space) and open it.
- Click on Continue. This closes all other apps and readies your Mac for the process, so ensure you don’t have any unsaved data.
- Ensure the drive containing your Time Machine backup or startup disk is connected to your Mac.
- Tick the From a Mac, Time Machine backup, or startup disk option and click Continue.

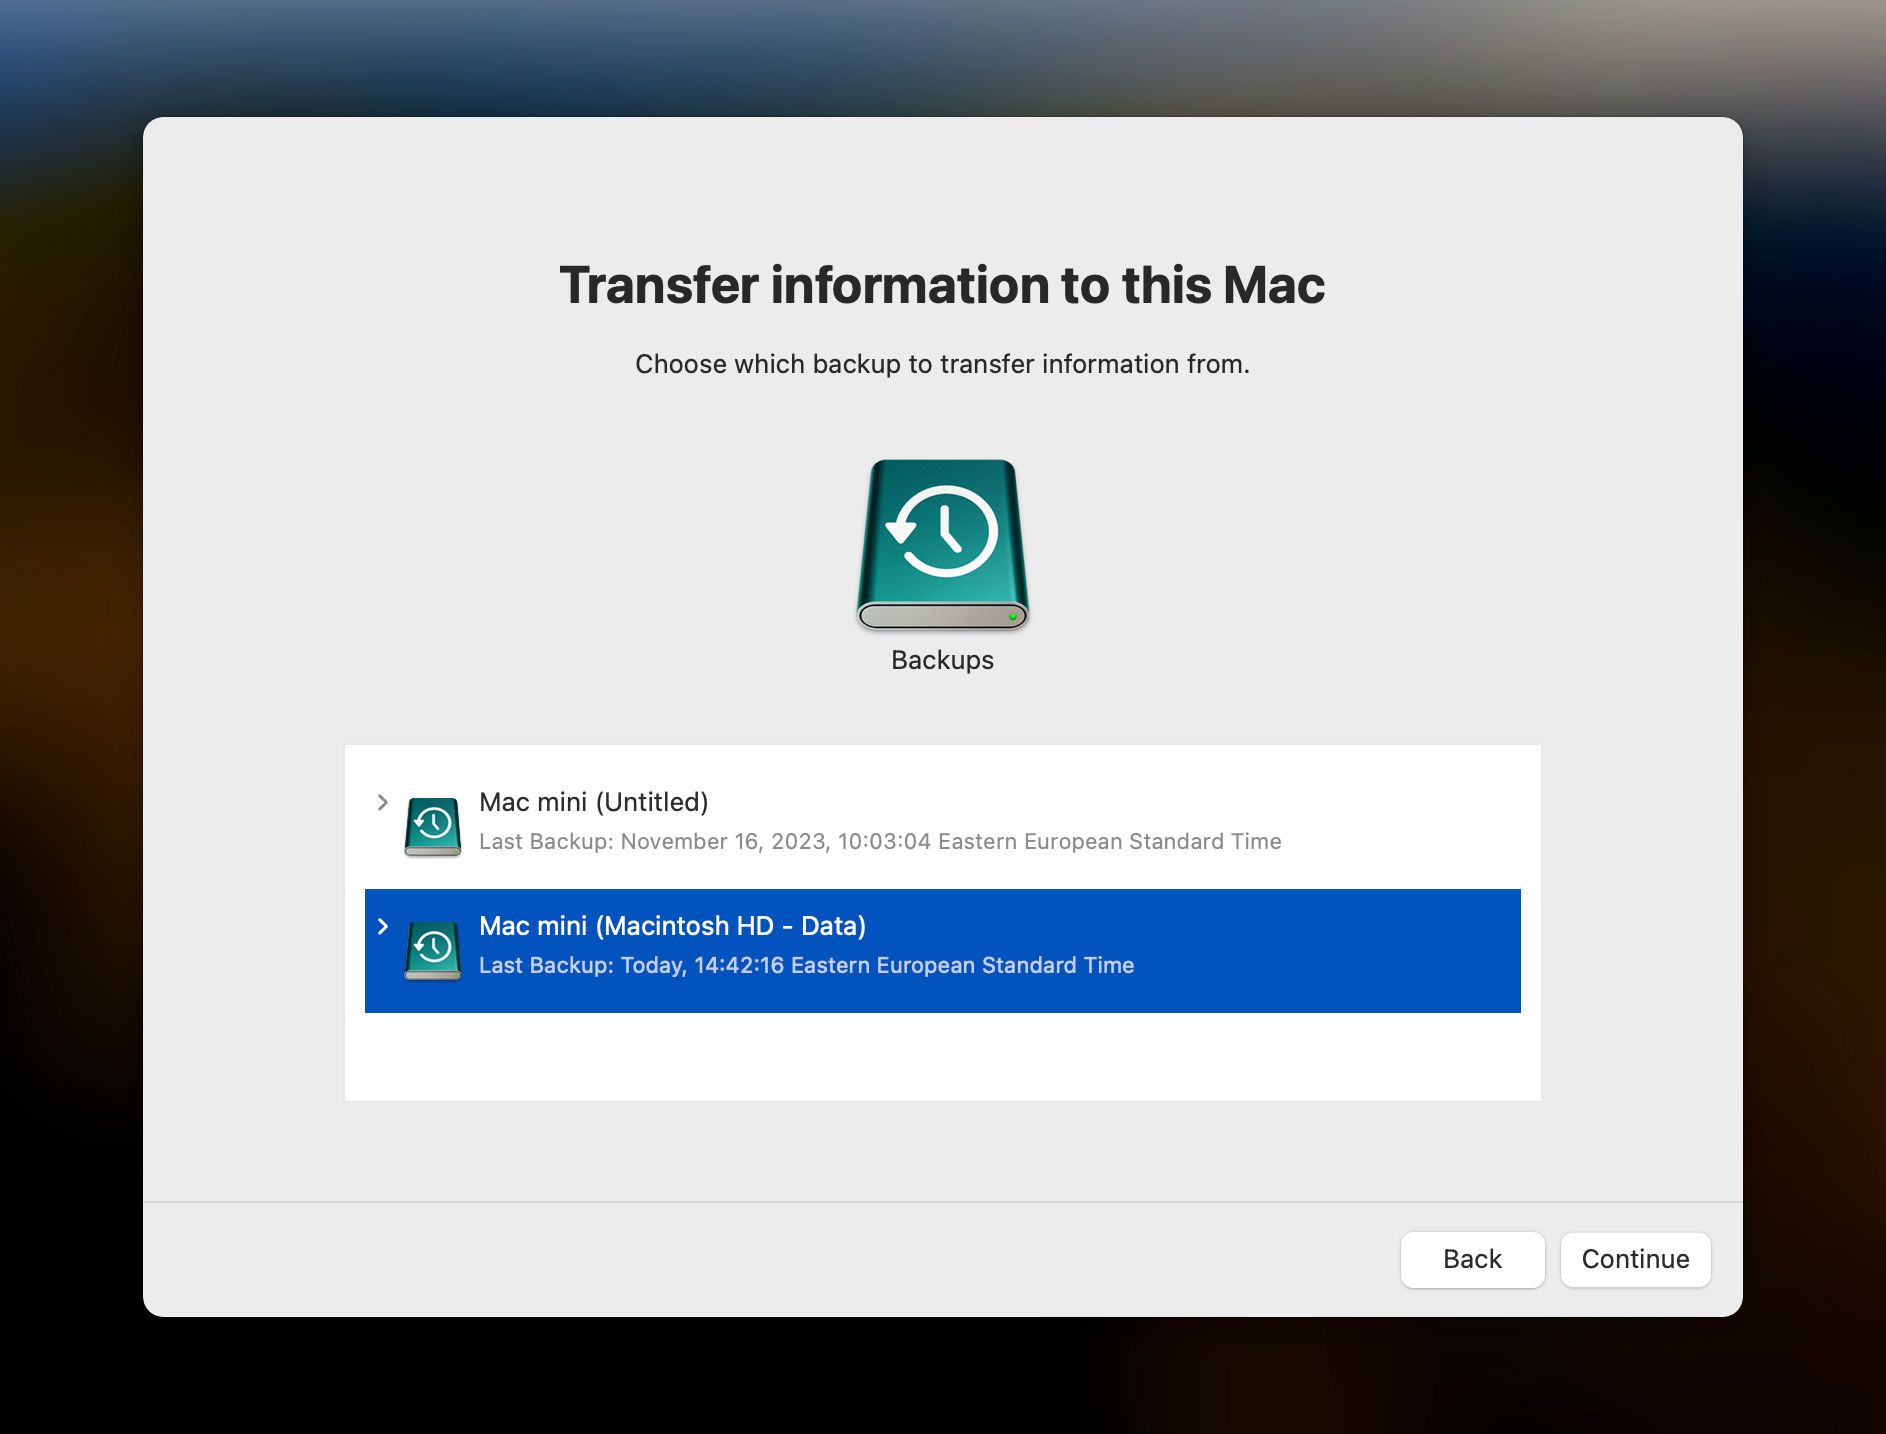
- Select Time Machine Backup and click on the specific backup you wish to restore.
- Tick the type of data you wish to restore and click Continue to begin the migration process.


The steps above outline how to restore data from a Time Machine backup using Migration Assistant. If you wish to transfer data from one Mac to another, here’s a video that details how you can do that.
| ✅ Pros of Using Migration Assistant | ❌ Cons of Using Migration Assistant |
|
|
FAQ
There are several ways you can restore your Mac to an earlier date. Here are some of them:
- Use macOS’ Time Machine to restore a previous backup. This is the recommended method.
- Recover your files using data recovery software to essentially restore your Mac to a previous date.
- Use your Mac’s Disk Utility to restore a previously created disk image if you have one.
- Use the macOS Migration Assistant to restore your Mac using a Time Machine backup, startup disk, or another Mac.
Here are some ways to restore a MacBook Air/Pro to a previous date without using the Time Machine feature:
- Use the macOS Disk Utility to restore an older disk image
- If your goal is to recover deleted files, use a data recovery program to restore them.
- Use the macOS Migration Assistant to restore your Mac to a previous date using a startup disk, or another Mac.
Yes. A Time Machine backup stores system files as well as your personal data and settings, unless it was configured otherwise.
Here’s how to restore your OS using a Time Machine backup:
- Connect the Time Machine backup drive to your Mac.
- Boot your Mac in Recovery Mode.
- Click on Utilities > Restore From Time Machine Backup.
- Select your Time Machine backup drive and then select the specific backup you wish to restore.
- Select the destination drive (usually the internal SSD) and click Continue.
- Click on Restore.
Conclusion
I found Time Machine backups to be the most user-friendly way to restore a Mac to a previous date. However, many of you may not have a Time Machine backup. Here, if it’s just deleted files you’re after, use a good data recovery program like Disk Drill. If you wish to stick with in-built macOS utilities, use the Disk Utility, or Migration Assistant. But keep in mind, except the data recovery program method, all other options require a prior backup of your data—either in the form of a disk image, a startup disk, or a Time Machine drive.