

Table of Contents
Macs and MacBooks are incredible devices that allow us to store thousands of digital photos. The new operating systems like Monterey, Ventura and Sonoma offer users incredible functionality. Unfortunately, it can be easy to accidentally delete pictures with the click of a button. This can result in permanently deleted or lost photos.
If you have accidentally deleted important photos, don’t worry. There are multiple ways to get your lost photos back. We’re going to show you some methods of recovering deleted photos on your Mac that use native OS functionality as well as third-party recovery software.
Can I Recover Photos that I Permanently Deleted?
When photos are permanently deleted from your Mac, the data is not physically removed from its storage device. macOS deletes the logical links that make the photos available and marks the space they occupy as free for future use. Until the space is overwritten, the deleted photo can be recovered.
There are many reasons for photo loss; the most common ones are listed below:
- ❌ Accidental deletion: We have all been there at least once. This is possibly the most common reason for photo loss.
- ✏️ Deletion as a result of photo editing: Macs have plenty of photo editing apps. Sometimes users make the mistake of editing original images instead of copies. If the application crashes, the original photo can be corrupted. You should always edit a copy of the original image rather than the original.
- 🦠 Virus or malware infection: Macs can be affected by malware and virus attacks. Although virus infection is less common with Macs than on other platforms, users can lose important data and photos if infected.
- ✂️ Hard drive formatting: Photos can also be lost due to incorrect formatting. Sometimes Mac device installations and system updates cause unexpected formatting, which results in important data loss, including the loss of photos.
By considering the reasons for the loss of your photos and the additional factors that affect the chances of photo recovery on a Mac, you can gain a better understanding of your odds and select the most suitable method for recovery.
Estimating the Chances of Successful Mac Photo Recovery
The probability of a successful recovery is influenced by several key factors. In this section, we will delve into these critical considerations, each of which can significantly impact your chances of regaining those cherished images. Understanding these factors is essential for enhancing your chances of successful photo recovery on your Mac.
| Factors to consider | Impact on recovery |
|---|---|
| Time since deletion | As time passes and new data is written to the storage device, it becomes more likely that the deleted photos will be overwritten. |
| Type of storage | The type of storage medium (e.g., SSD, HDD, USB drive) can impact the success of recovery. SSDs, which use wear leveling algorithms, may overwrite data more quickly than HDDs |
| File fragmentation | If the deleted photos were fragmented (split into pieces across the storage medium), recovery can be more complex. Fragmented files are harder to recover in their entirety. |
| Backup availability | If you have a backup of your photos, your chances of successful recovery are higher. Regular backups ensure that you have a copy of your data in case of accidental deletion or data loss. |
| Data recovery software capabilities | The effectiveness of the data recovery software you use also plays a role. Some software tools have more advanced algorithms and better success rates than others. Using reputable and well-reviewed software can increase your chances. This rule also applies to the types of file systems and image formats supported. |
How to Recover Permanently Deleted Photos on Mac
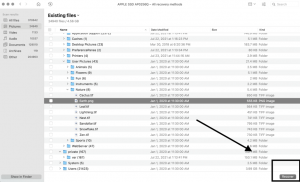
Data Recovery Software for Mac is the best recovery solution if your deleted images are no longer in the Trash or the Photos app. There are many Mac photo recovery software applications online that you can use to recover deleted pictures on a Mac. We recommend Disk Drill. Disk Drill is one of the most preferred solutions for data recovery. It is a user-friendly data recovery Mac tool that can restore images that can’t be recovered from the Photos app or the Trash.
- Download the application, install it, and grant two Disk Drill permissions to allow it to function properly.

- Launch Disk Drill, select the storage devices and click the Search for lost data button to start scanning the device.

- When the scan has finished, select all the photos that you want to recover. You can even preview the photos before recovering them by clicking the Preview button.
- Finally, click the Recover button, specify the recovery destination, and then begin the recovery process.
- You should see a window that will allow you to view your recovered images in Finder.


If you’re having trouble with permissions, watch this video to learn how to enable Disk Drill’s System Extension on MacOS. You might need to restart your Mac for the application to work properly.
How to Recover Deleted Photos on Mac Using Native Methods
In this section, we will explore four practical methods for recovering deleted photos on your Mac, utilizing the native features of macOS. Whether you’ve accidentally deleted images or need to restore specific photos, these methods provide effective solutions. We’ll guide you through each method step-by-step to ensure a successful photo recovery.
- Recover deleted photos from the Photos app.
- Restore recently deleted photos from the Trash.
- Restore accidentally deleted photos via Time Machine.
- Retrieve your backed-up photos from iCloud.
Method 1: Recover Deleted Photos From the Photos App
First, if you have deleted your photos from your Photos app, make sure to check your “Recently Deleted” folder.
- Go to Photos and tap “Recently Deleted” in the Utilities section.

- When you see the missing photo or video, select the photo and click “Recover”. The photo should return to your Library.
 Alternatively, you can also click and then drag the photo to move it back to your Library.

 Alternatively, you can also click and then drag the photo to move it back to your Library.
Method 2: Restore Recently Deleted Photos From the Trash
This is one of the easiest methods for recovering your photos. If you’ve deleted your photos and they are still in the trash, you can easily retrieve the photos using the Put Back option.
- Open the Trash by clicking its icon in the Dock.
- Select the photos that you want to recover.
- Right-click on each photo you want to recover and select Put Back.

- The photos will be recovered to their original location.

Method 3: Restore Accidentally Deleted Photos via Time Machine
Time Machine is an application that comes installed on every MacBook. It is a fantastic local backup tool and can be useful for recovering photos from your older backups.
If you have previously activated Time Machine and configured it to back up your photos in the background, then you can recover your photos easily.
- First, you need to open the folder where your photos were stored, using Finder.
- Then click the Time Machine icon located in the menu bar and choose Enter Time Machine.
- Use the arrows on the right to go back in time until you see the deleted photos you want to restore.

- Select the photos and click Restore to put them back to their original location.
Please keep in mind that depending on the size of your library, it may take some time for the photo library to be recovered.
Method 4: Retrieve Your Backed-up Photos from iCloud
The last one method we will suggest is using iCloud. iCloud is Apple’s cloud backup service. It can be used to store your photos and synchronize them across your Apple devices. When you’ve deleted a photo from iCloud, it disappears from all your devices. The good news is that while your photos might appear to be deleted, you can still find and recover them from your Recently Deleted folder.
- Sign in to your iCloud account and go to Photos.

- In Photos on iCloud, click the “Recently Deleted” album in the sidebar.

- Select the photos or videos that you want to recover, and click “Recover”.


Please note that you can also recover photos and videos that you have deleted in the last 30 days from the “Recently Deleted” folder. You can find the folder on the Photos app on any Apple device that has iCloud Photos turned on.
FAQ
You can recover permanently deleted photos from your Mac using these five methods:
- 🖼️ Recover photos using the Recover Deleted Photos tool from the Photos app. If you have deleted your photos from Photos within the past 30 days and they have not been deleted from the “Recently Deleted” folder, you can recover them from there.
- 🗑️ Restore recently deleted photos from the Trash. You can also restore your photos from the Trash, if the Trash has not been emptied, using the “Put Back” tool.
- 💽 Recover permanently deleted photos using data recovery software. Your deleted photos can also be recovered using data recovery software, such as Disk Drill. The application comes with a variety of data recovery tools that allow you to recover all kinds of lost data.
- ⌚ Restore accidentally deleted photos via Time Machine. Apple’s Time Machine application can also be used to access your photos from older backups.
- ☁️ Retrieve your backed-up photos from iCloud. Photos that have been deleted from your iCloud library can be retrieved from the “Recently Deleted” folder.
Yes, it is possible to recover deleted photos from your Mac after 30 days.
However, this method can work only if you have not emptied your Trash in that time. Or if you have a Time Machine backup of your photos. Please see methods 2 and 4 above.
Firstly, to recover permanently deleted photos from iCloud on Mac, you will need to sign in to your iCloud account and then go to Photos.
From there, click on the “Recently Deleted” album in the sidebar.
You will be able to see all your recently deleted photos on iCloud from the past 30 days.
Select the photos you wish to recover and click “Recover.” The photos should return to your iCloud Album.
Conclusion
Accidentally deleting photos can happen at any time. It can leave us feeling quite anxious and troubled. Especially if those photos are important to us.
There are several ways to recover your valuable photos. This article contains a variety of methods that you can attempt to recover photos that you might have accidentally lost or deleted from your Mac. Luckily, it’s not impossible to recover deleted pictures on Mac.
If you follow the methods mentioned above, you’ll probably be able to get your valuable photos back again. We hope you have found these methods helpful.