Table of Contents
Creating a bootable USB for Windows on a Mac might seem like a challenging task, but it’s a straightforward process that allows Mac users to install Windows on their machines. This capability is particularly useful for those who need to run Windows-exclusive applications or games on their Mac. In this guide, we will walk you through each step of creating a Windows bootable USB on a Mac, ensuring compatibility and convenience for all users, regardless of their technical expertise.
Requirements
Before creating a bootable USB for Windows on a Mac, ensure you have the necessary components:
- USB Drive: Minimum 8GB storage to hold the Windows installation files.
- Windows ISO File: Download the ISO for Windows 10 or Windows 11 from Microsoft’s official website. Select the version that matches your target installation.
- Mac Computer: A Mac with administrative access to use Disk Utility and Terminal commands.
With these items ready, you can start the process of creating a bootable USB to install Windows on your Mac. The next step involves downloading the appropriate Windows ISO file.
Step 1: Downloading the Windows ISO File
To create a Windows bootable USB on a Mac, the first step is to obtain the Windows ISO file. This file contains the installation data for Windows. You have the option to download either Windows 10 or Windows 11, depending on your preference or requirements. Follow these steps to download the ISO file:
- Visit the Microsoft Software Download page.
- Choose between Windows 10 and Windows 11. Click the respective download page link.
- For Windows 10, click ‘Download tool now’ under the ‘Create Windows 10 installation media’ section. For Windows 11, navigate to the ‘Download Windows 11 Disk Image (ISO)’ section and select ‘Download’.
- Follow the prompts to select the edition, language, and architecture (64-bit or 32-bit) for your download. Most modern Macs will use the 64-bit version.
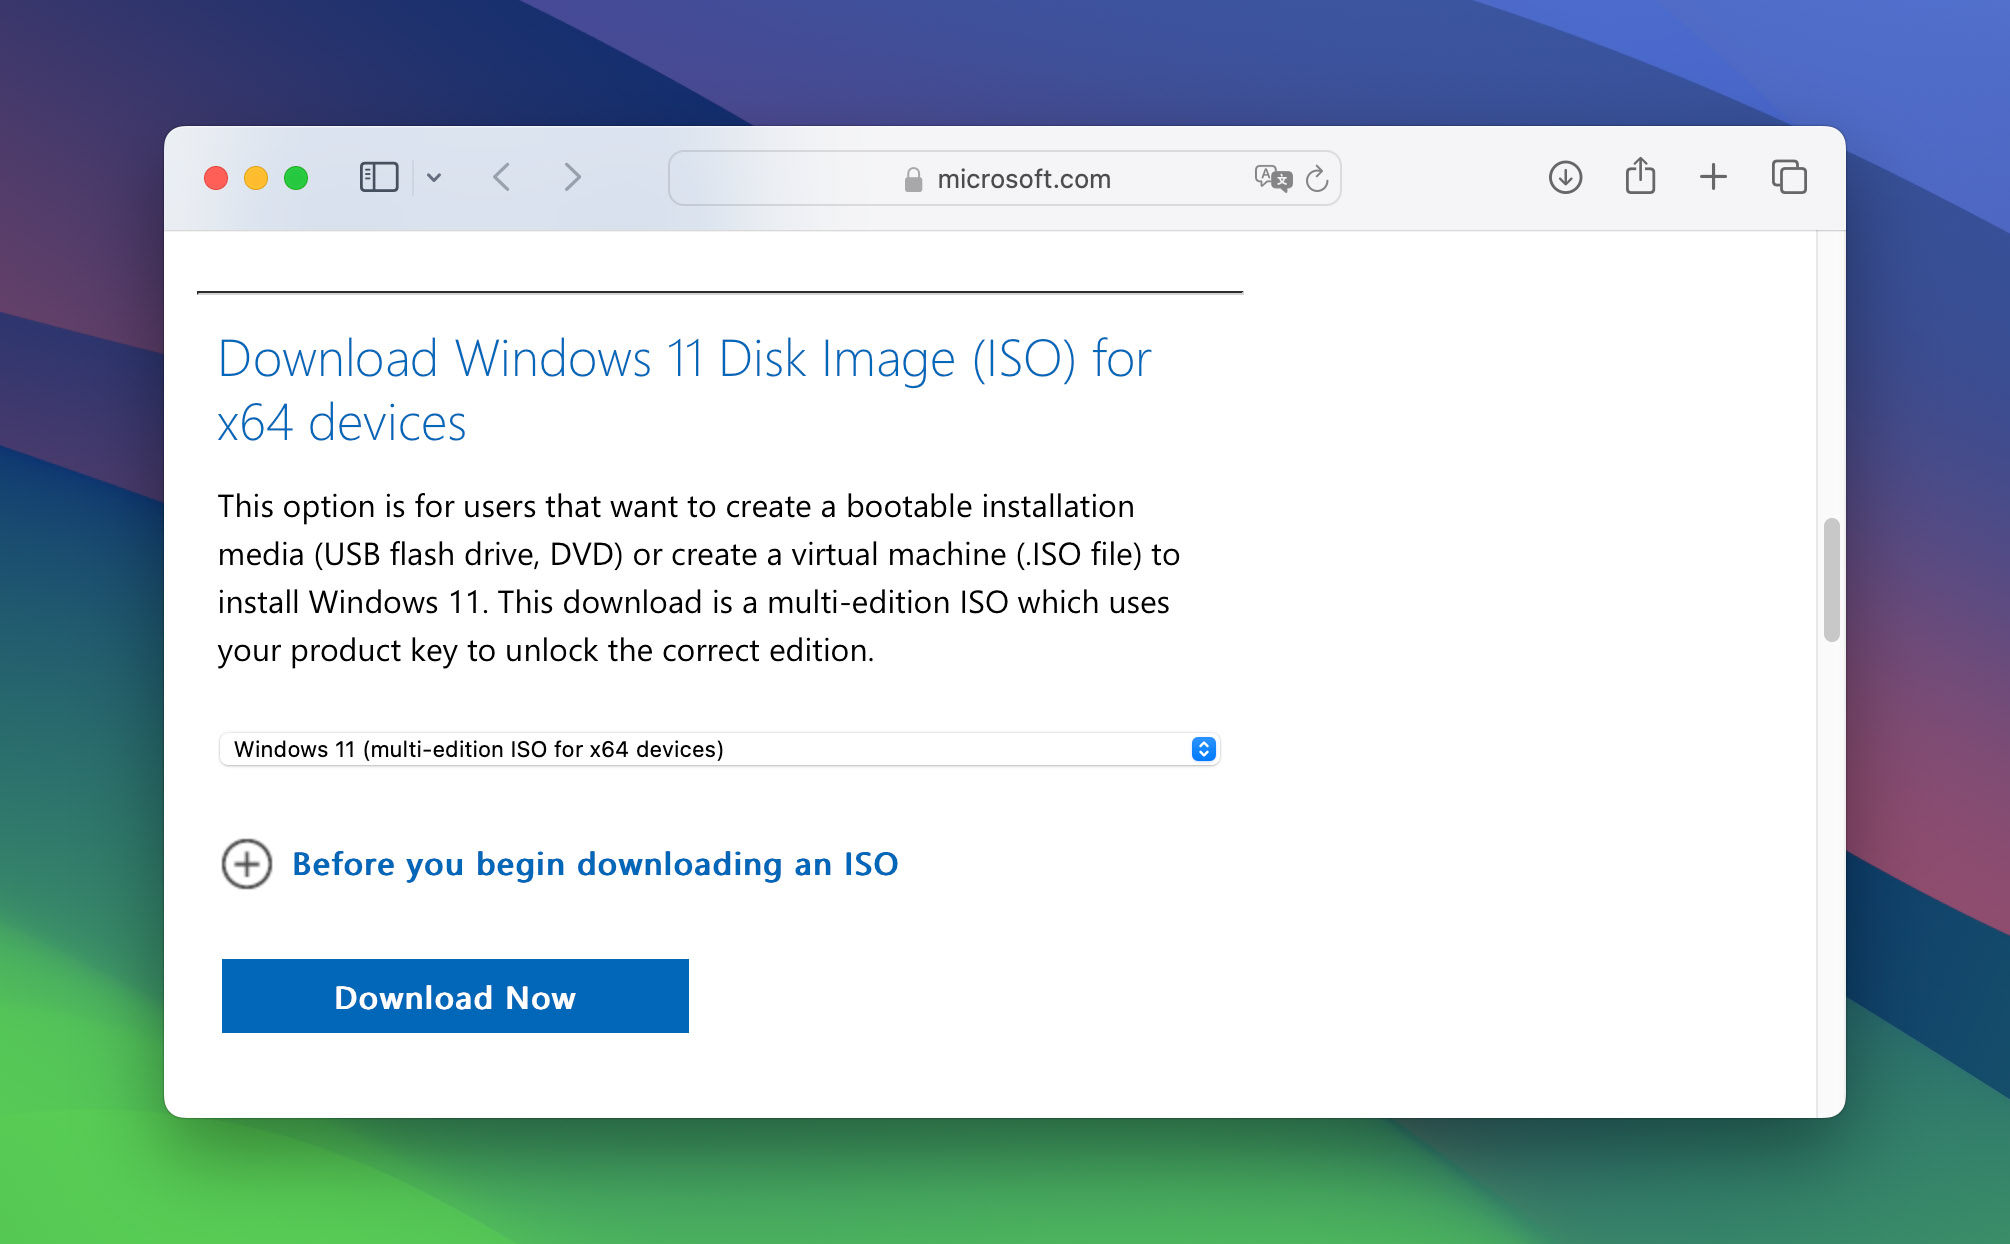
- Click ‘Confirm’ and wait for the download link to appear. Click ‘Download’ to start downloading the ISO file.
After downloading the ISO file, proceed to prepare your USB drive for the Windows installation. This involves formatting the USB and copying the Windows files onto it.
Step 2: Preparing the USB Drive
With the Windows ISO file downloaded, the next step is to format the USB drive and prepare it for the Windows installation files. Formatting the drive ensures it is set up correctly for booting Windows on a Mac. Follow these instructions to prepare your USB drive:
- Insert the USB drive into your Mac.
- Open Disk Utility from the Utilities folder in Applications.
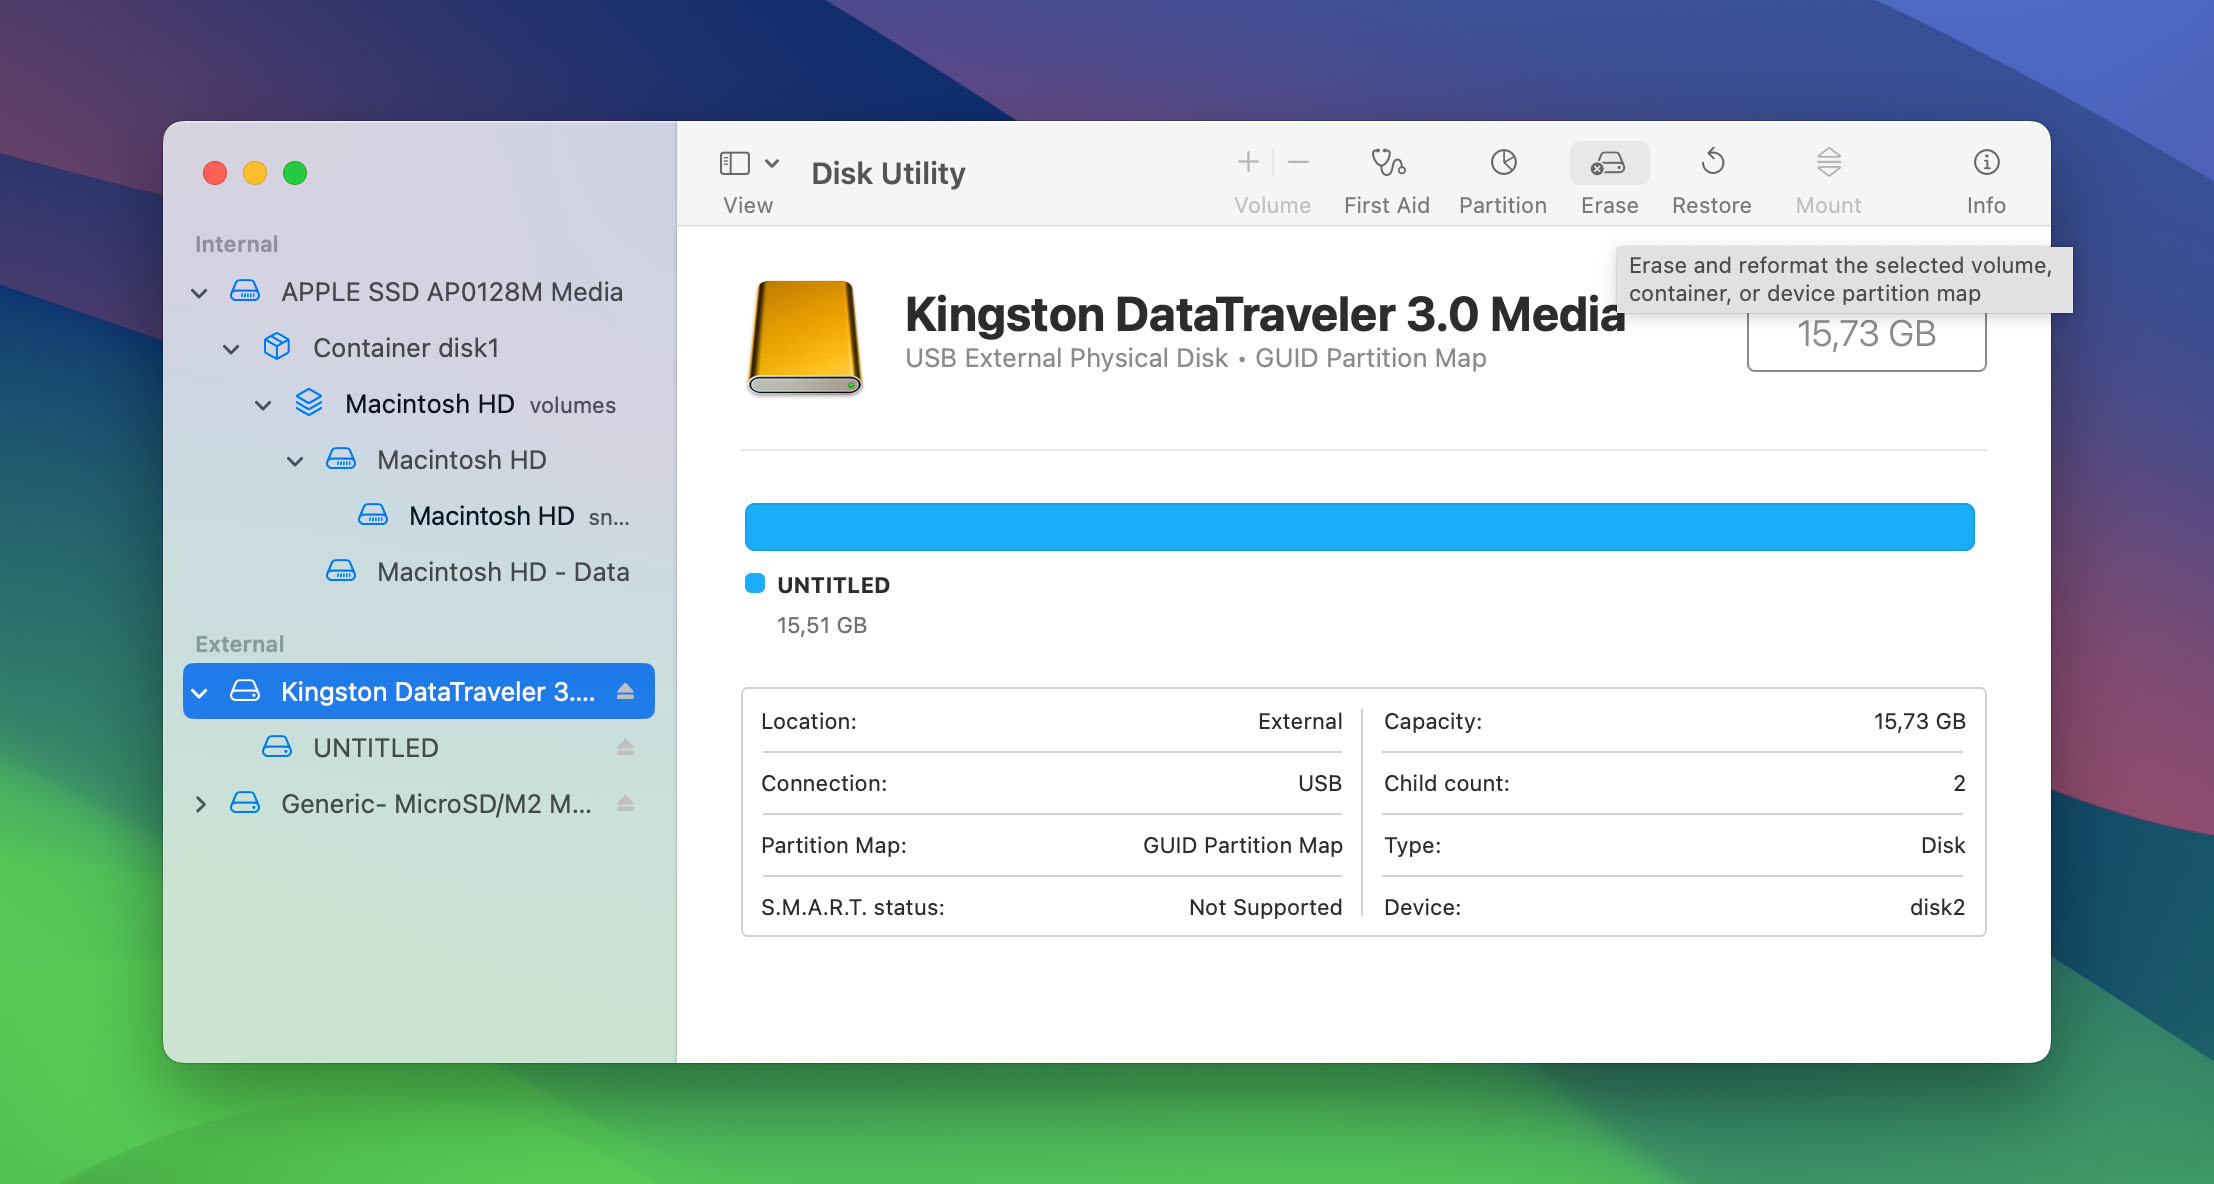
- Select your USB drive from the sidebar in Disk Utility.
- Click the Erase button at the top of the Disk Utility window.
- In the erase dialog, name the drive “WINDOWS10” or “WINDOWS11”, depending on the version you’re installing. Choose MS-DOS (FAT) for the format and GUID Partition Map for the scheme.
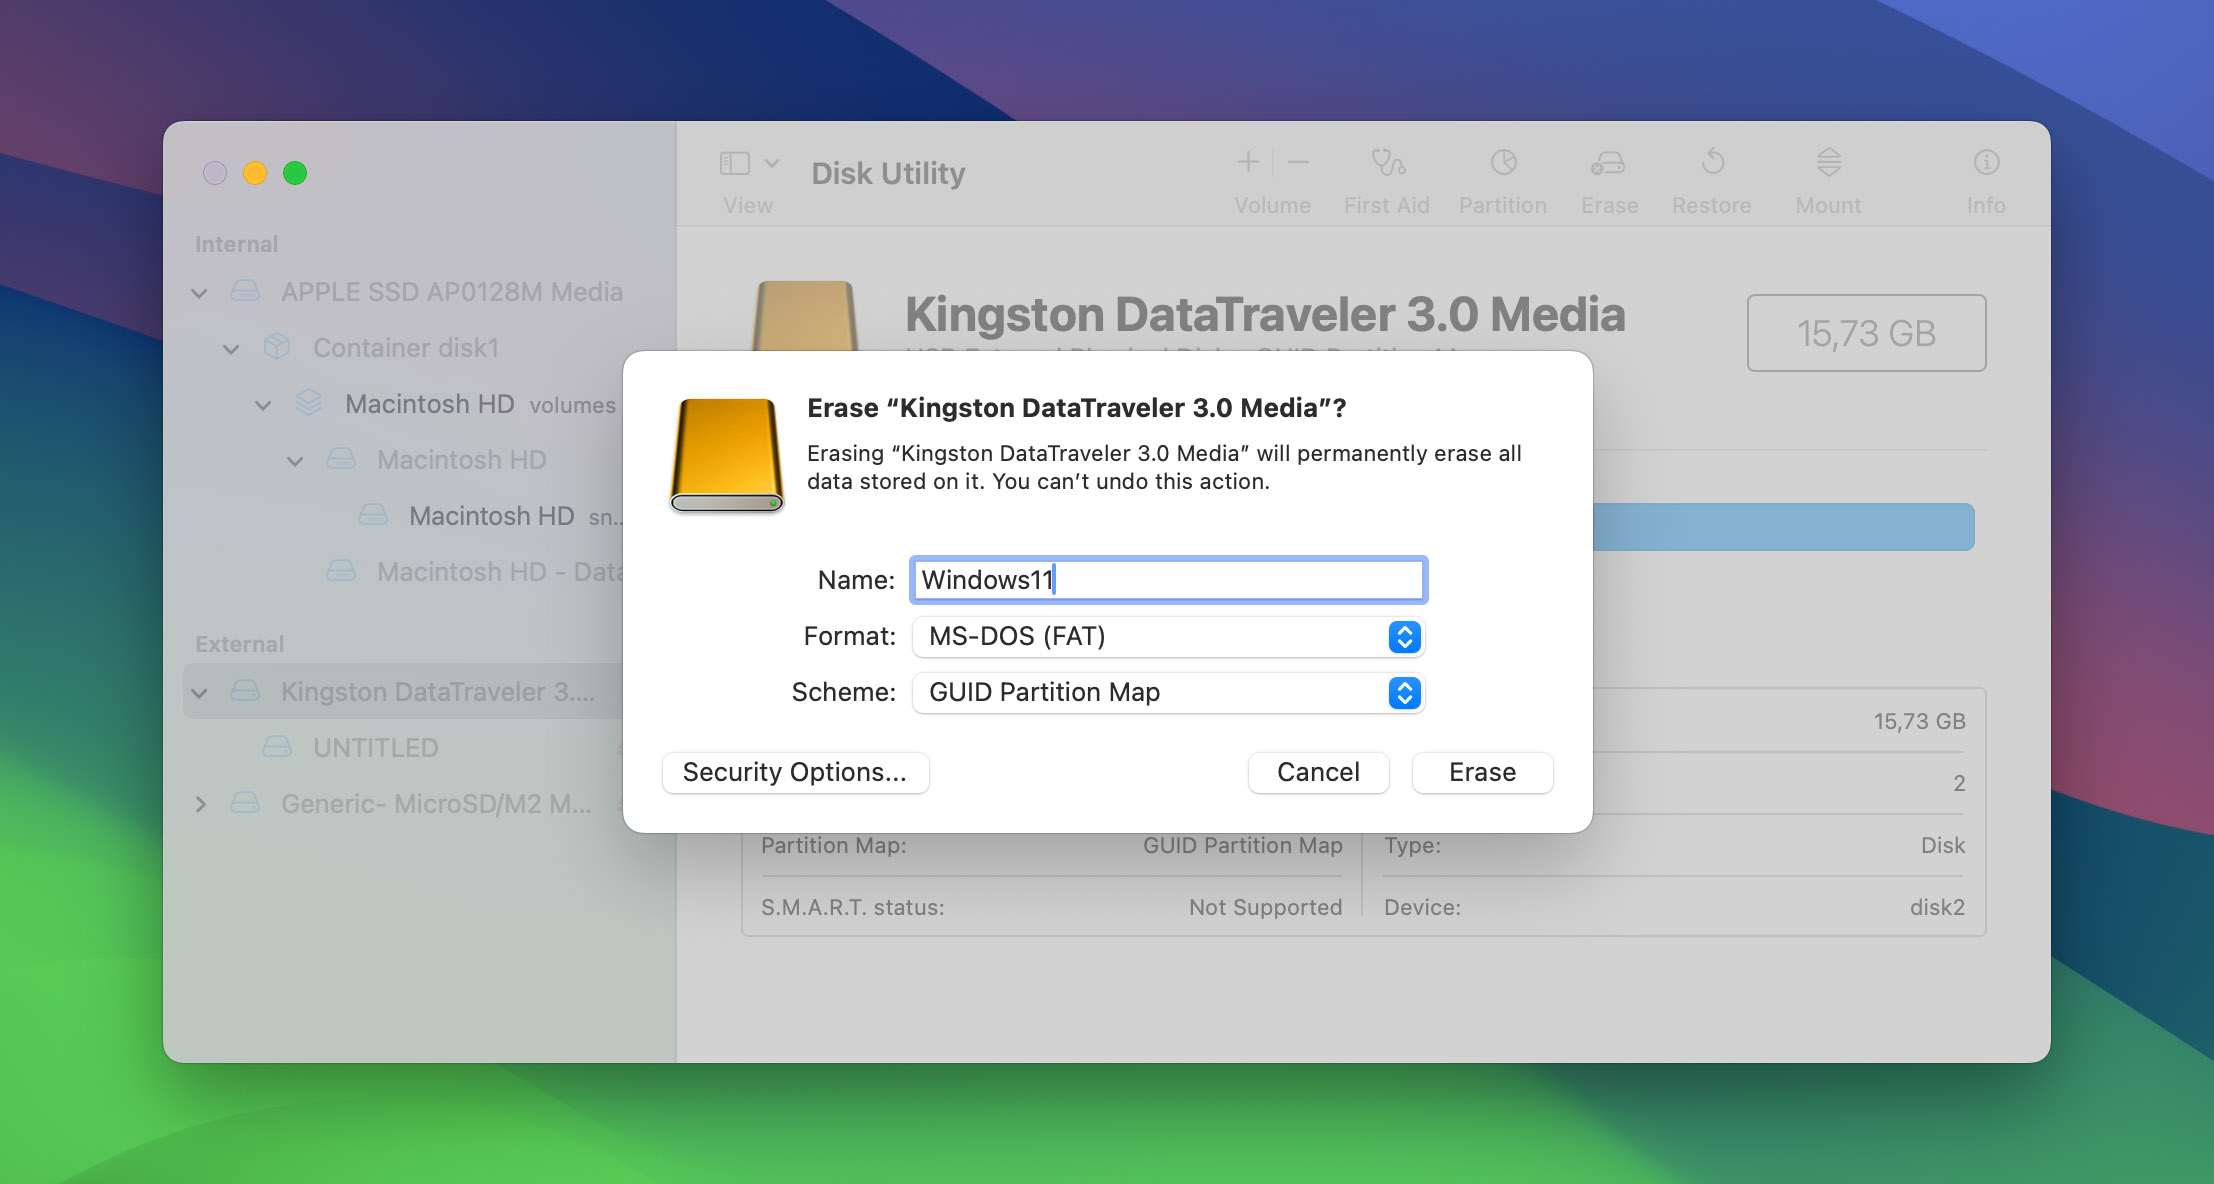
- Click Erase to begin formatting the drive. Wait until the process completes, then click Done.
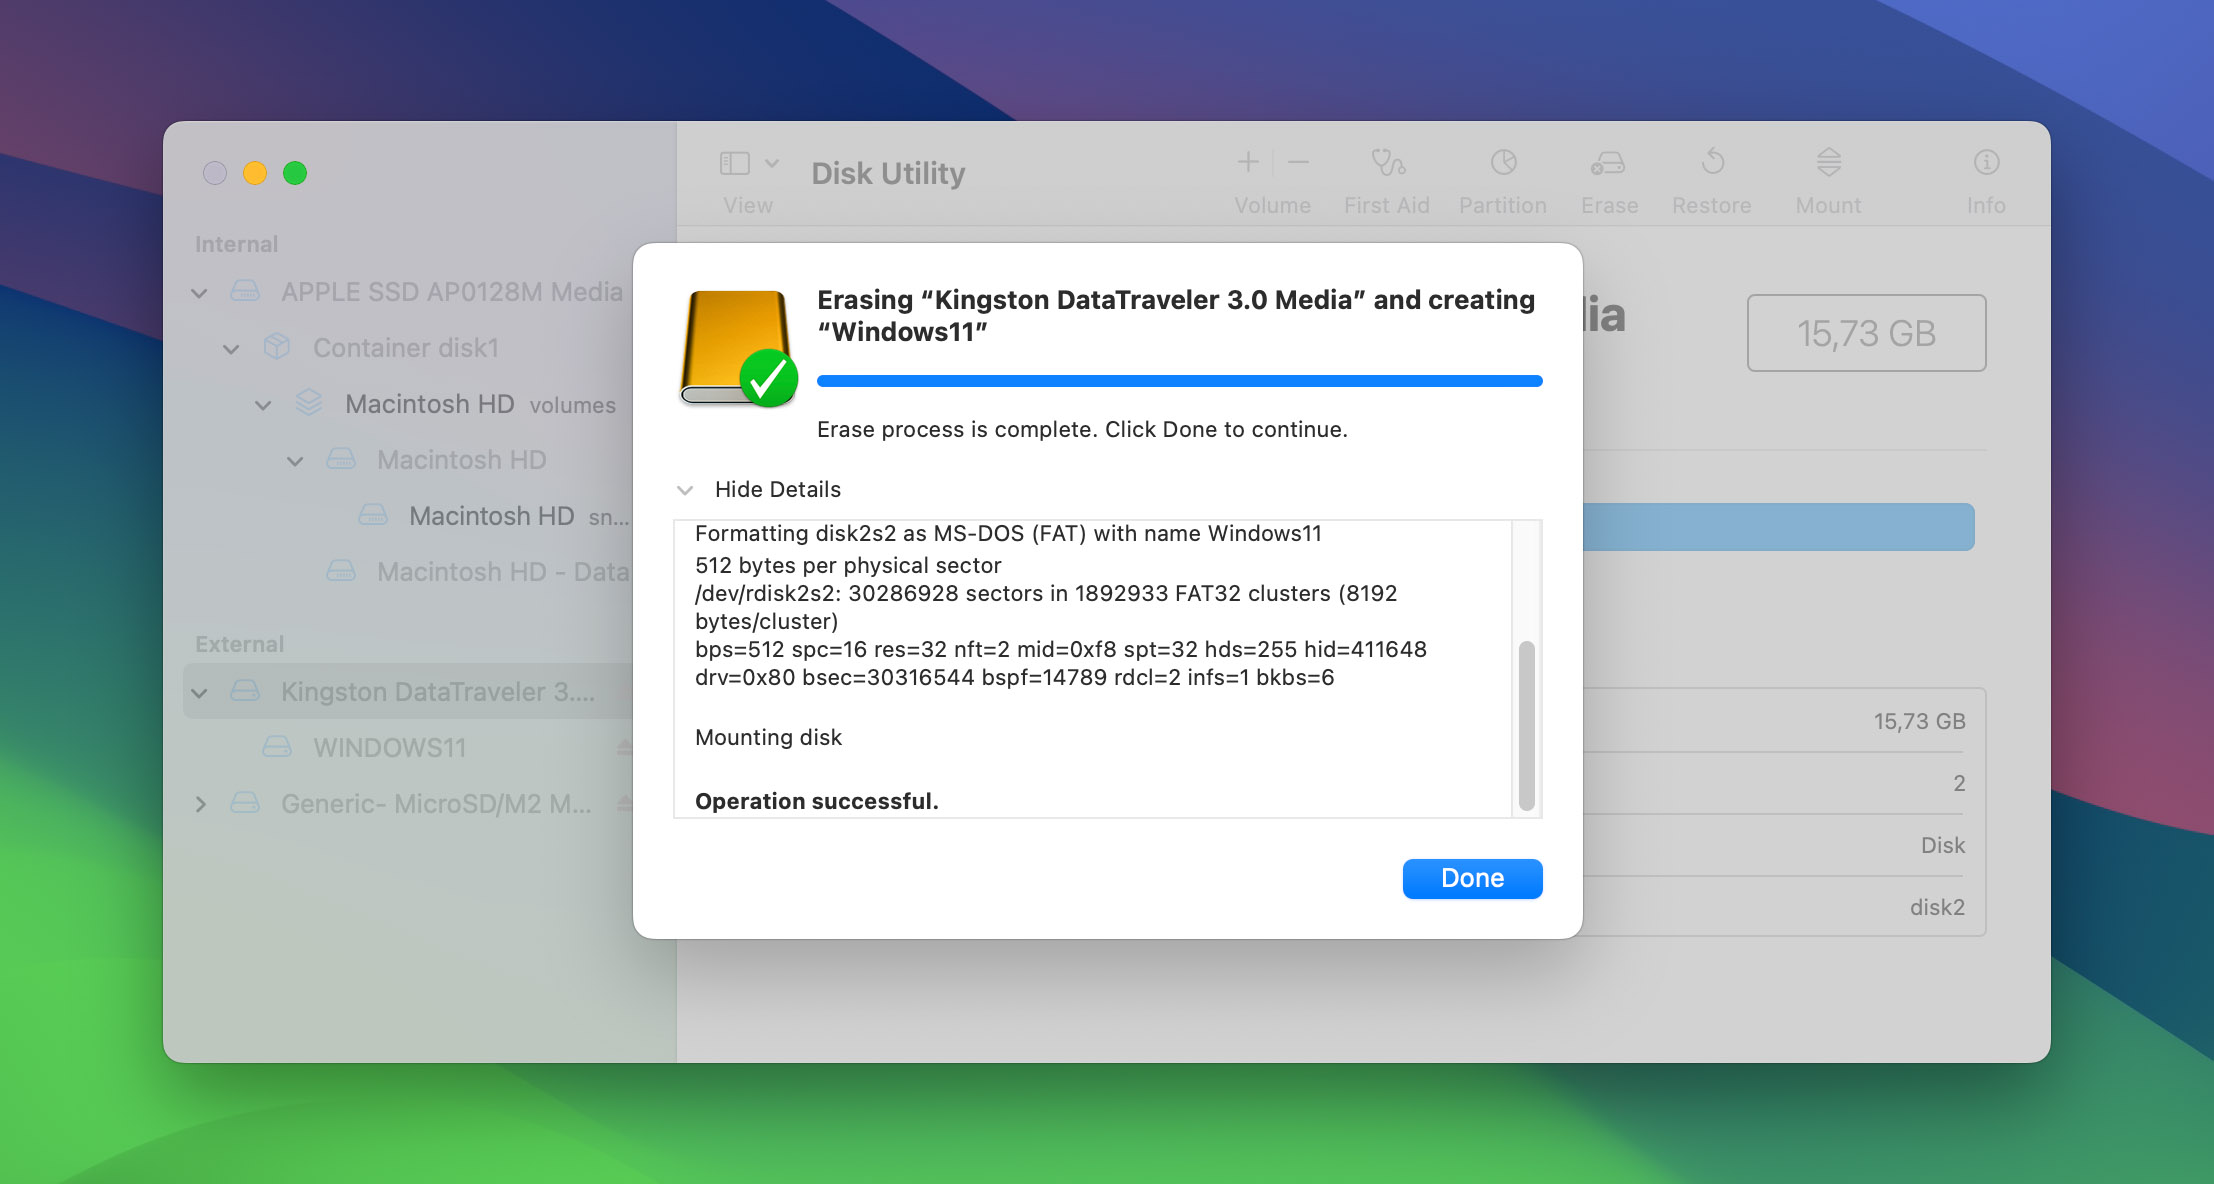
With your USB drive formatted, you’re now ready to transfer the Windows installation files onto it. This will transform the USB into a bootable device, allowing you to install Windows on a Mac.
Step 3: Mounting the ISO and Copying Files
After preparing your USB drive, the next step involves mounting the Windows ISO file on your Mac and transferring the necessary installation files to the USB. This process converts your USB drive into a bootable Windows installer. Here’s how to do it:
- Locate the Windows ISO file you downloaded earlier. Double-click on it to mount the ISO as a virtual drive. It will appear on your desktop or in the Finder sidebar.
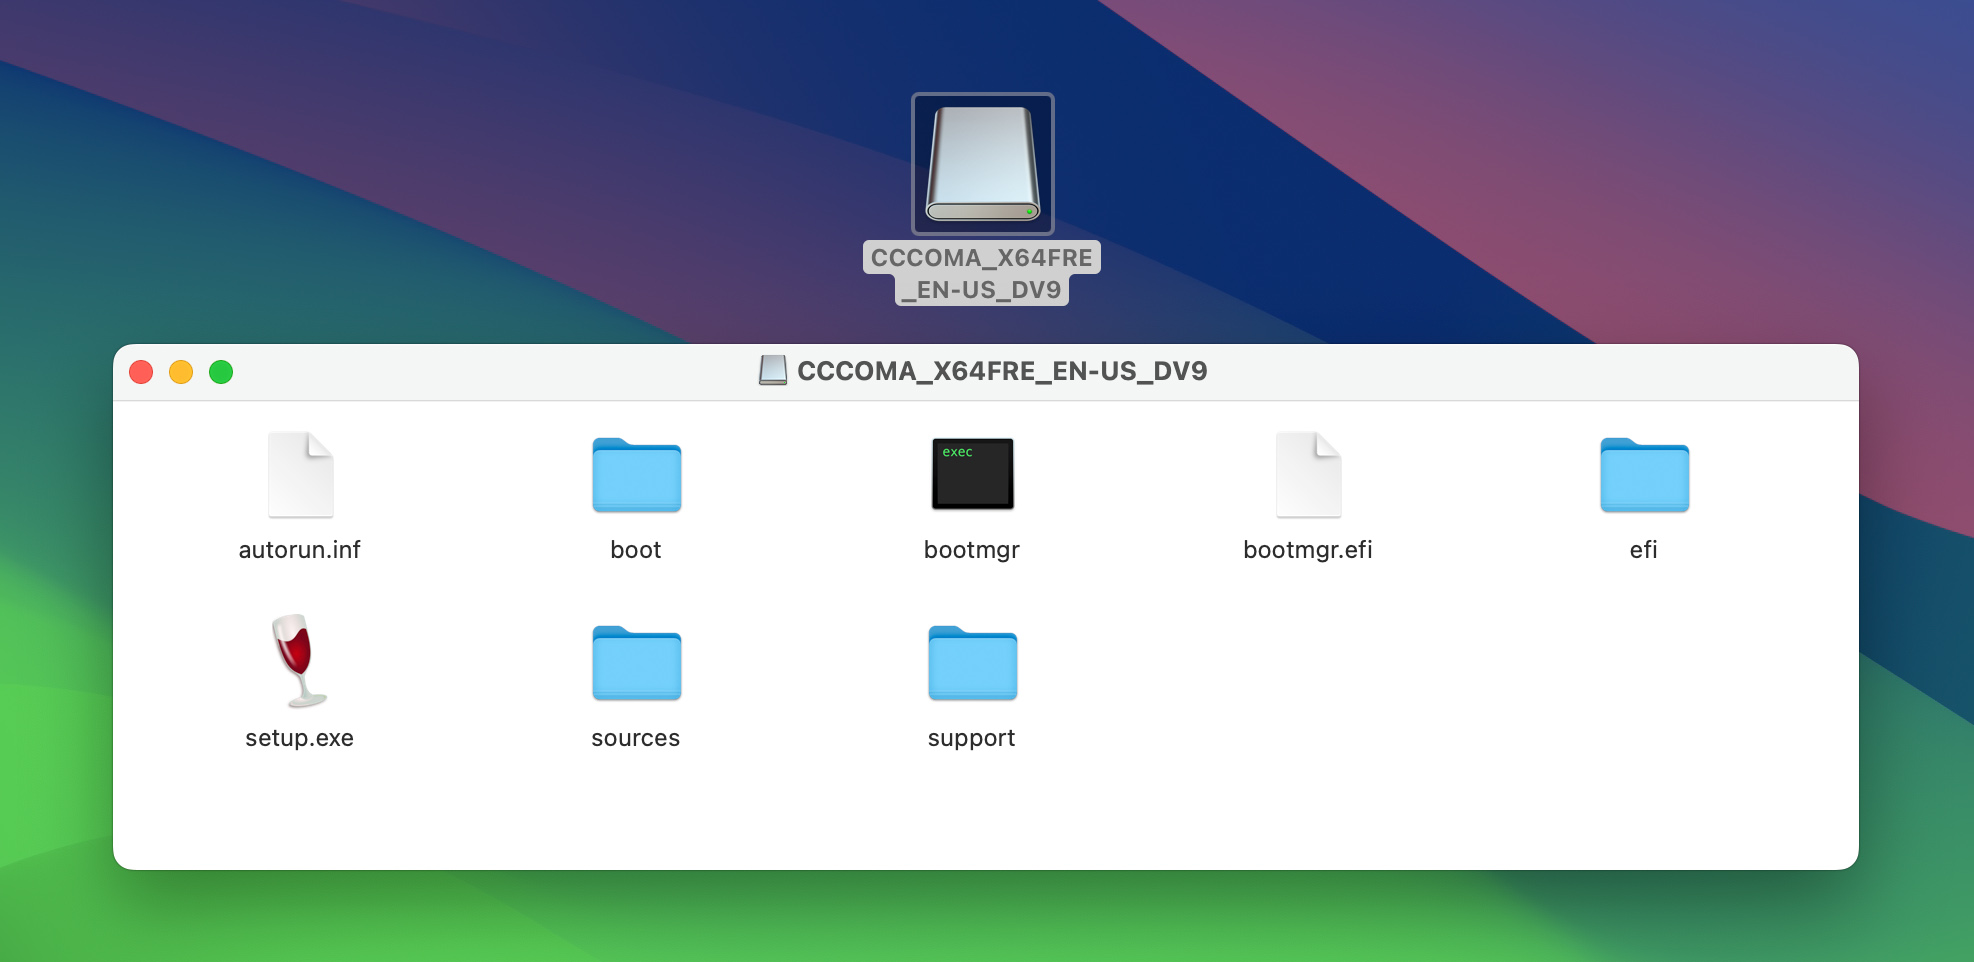
- Open a new Finder window and navigate to the mounted Windows ISO. You will see its contents displayed.
- Open another Finder window and navigate to your formatted USB drive.
- Copy all files from the mounted ISO to your USB drive. However, do not copy the sources folder at this stage.

- Once all files except those in the sources folder are copied, open the sources folder in the mounted ISO.
- In the sources folder, select all files except for the file named install.wim or install.esd, and then copy them to the sources folder on your USB drive. If the sources folder does not exist on your USB drive, create it.

By excluding the install.wim or install.esd file in this step, you prepare for the next stage, which involves handling this large file separately due to its size. Completing this process ensures that your USB drive contains all necessary Windows installation files, making it bootable.
Step 4: Handling the install.wim File
The install.wim file is typically too large to copy directly to a FAT32 formatted USB drive due to file size limitations of the format. To work around this, you’ll use a tool called Wimlib to split the file into smaller parts that can be transferred to the USB. Here’s how to handle the install.wim file:
- First, check if you have Homebrew installed on your Mac by opening Terminal and typing
brew -v. If Homebrew is not installed, install it by running/bin/bash -c "$(curl -fsSL https://raw.githubusercontent.com/Homebrew/install/master/install.sh)"in Terminal.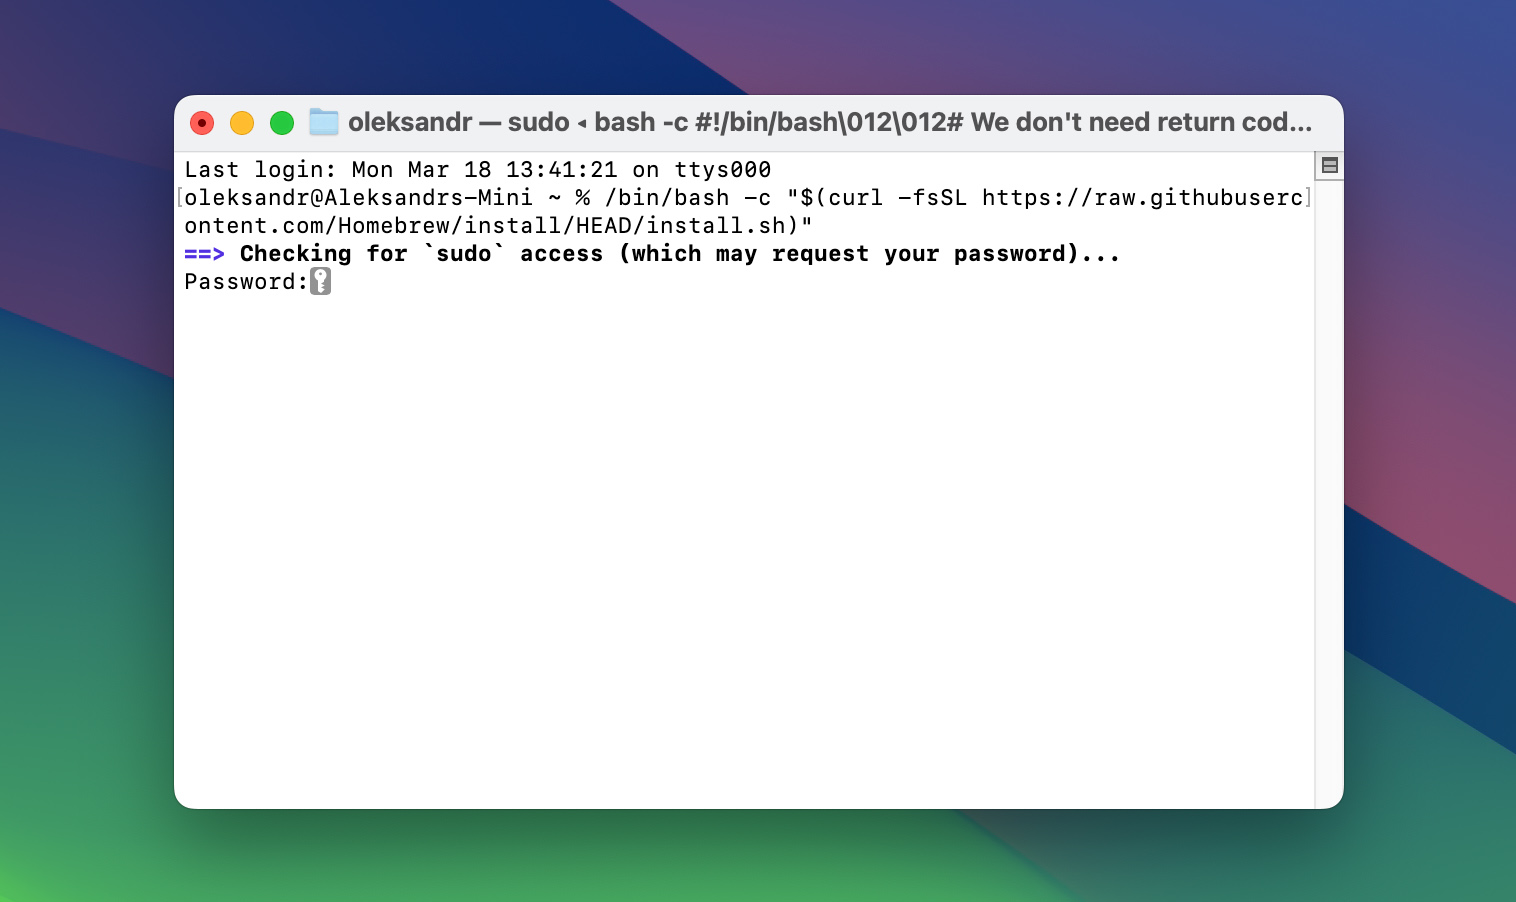
- With Homebrew installed, install Wimlib by typing
brew install wimlibin Terminal.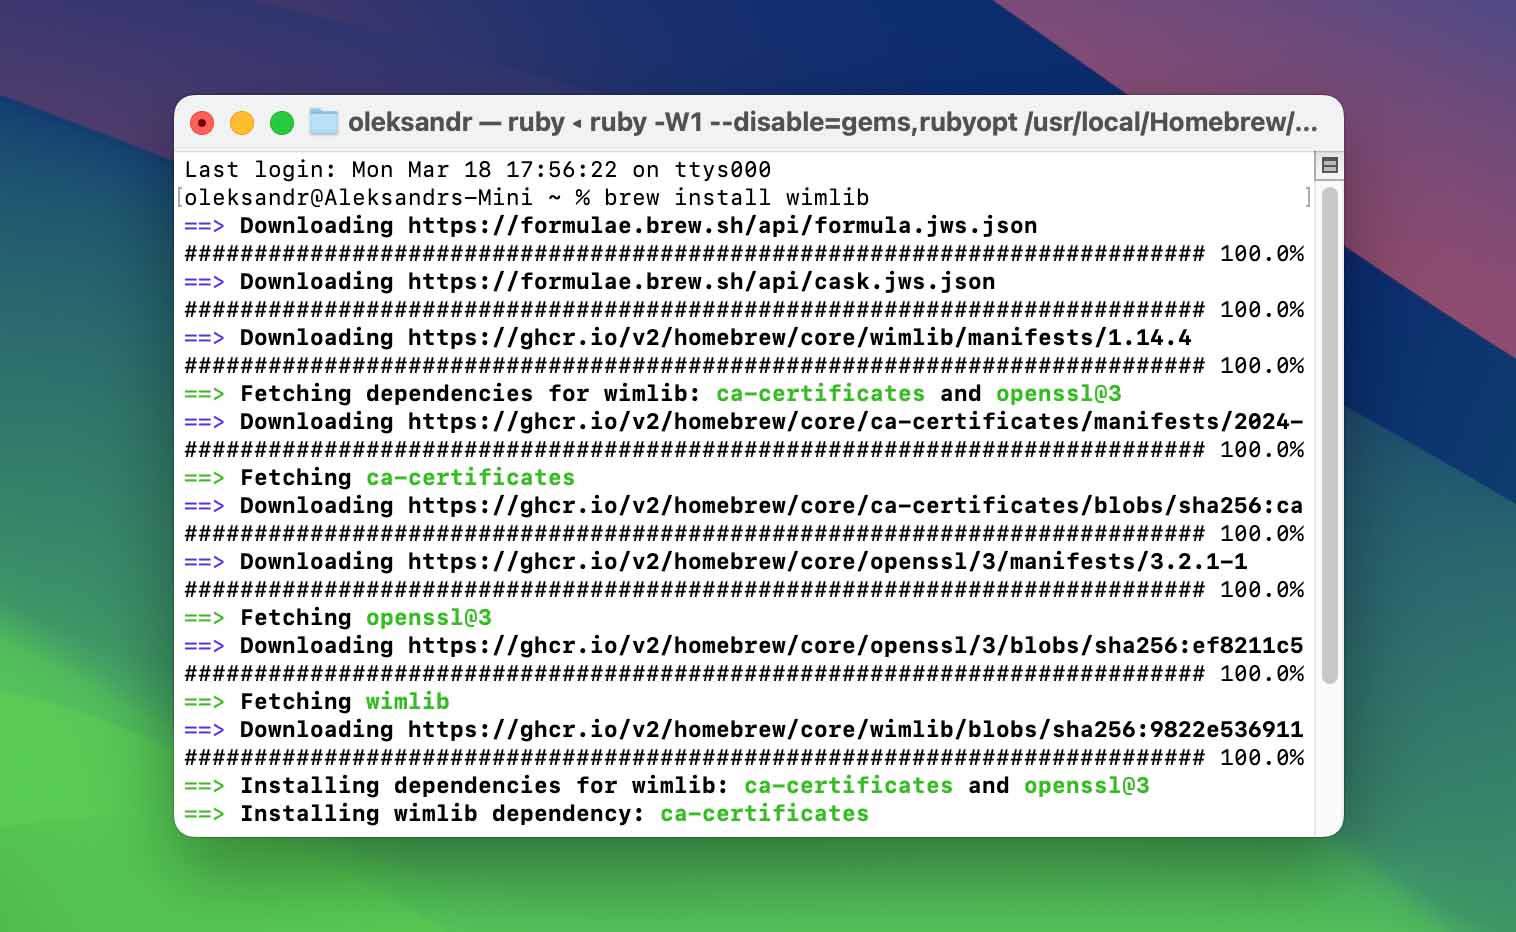
- Locate the install.wim file in the mounted ISO’s sources folder. Note the path to this file.
- In Terminal, navigate to your USB drive’s sources folder using the
cdcommand. - Use the Wimlib command to split the install.wim file into smaller segments that can be stored on the FAT32 drive. Type the command
wimlib-imagex split /path/to/install.wim /Volumes/YOUR_USB_DRIVE/sources/install.swm 4000, replacing/path/to/install.wimwith the actual path to your install.wim file andYOUR_USB_DRIVEwith the name of your USB drive.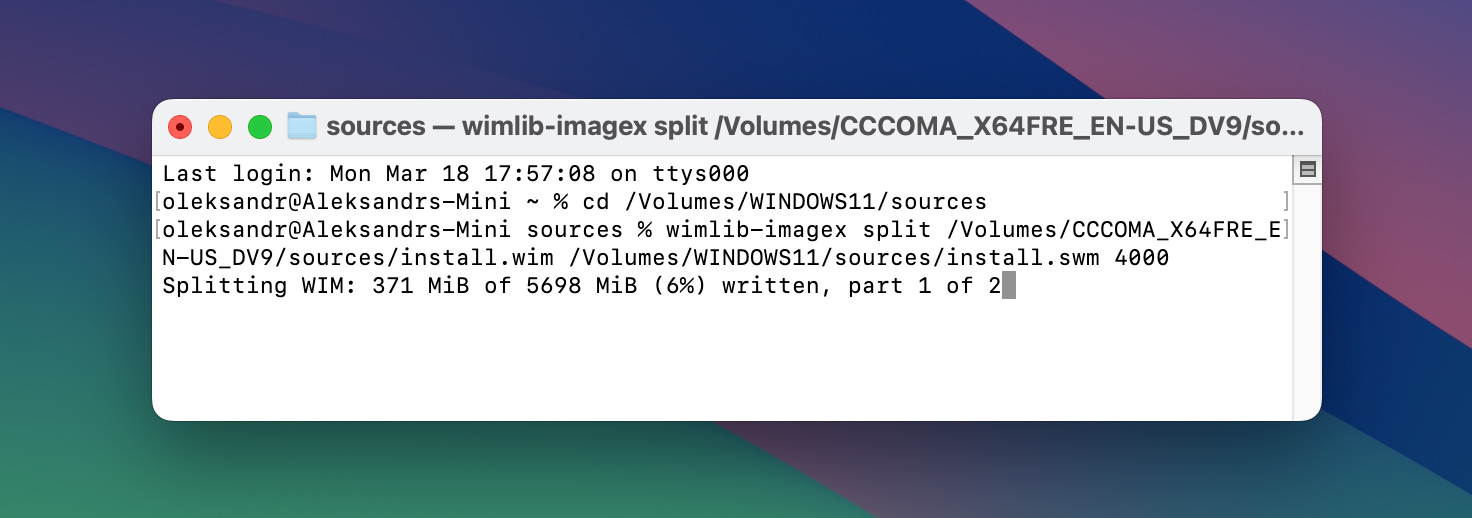
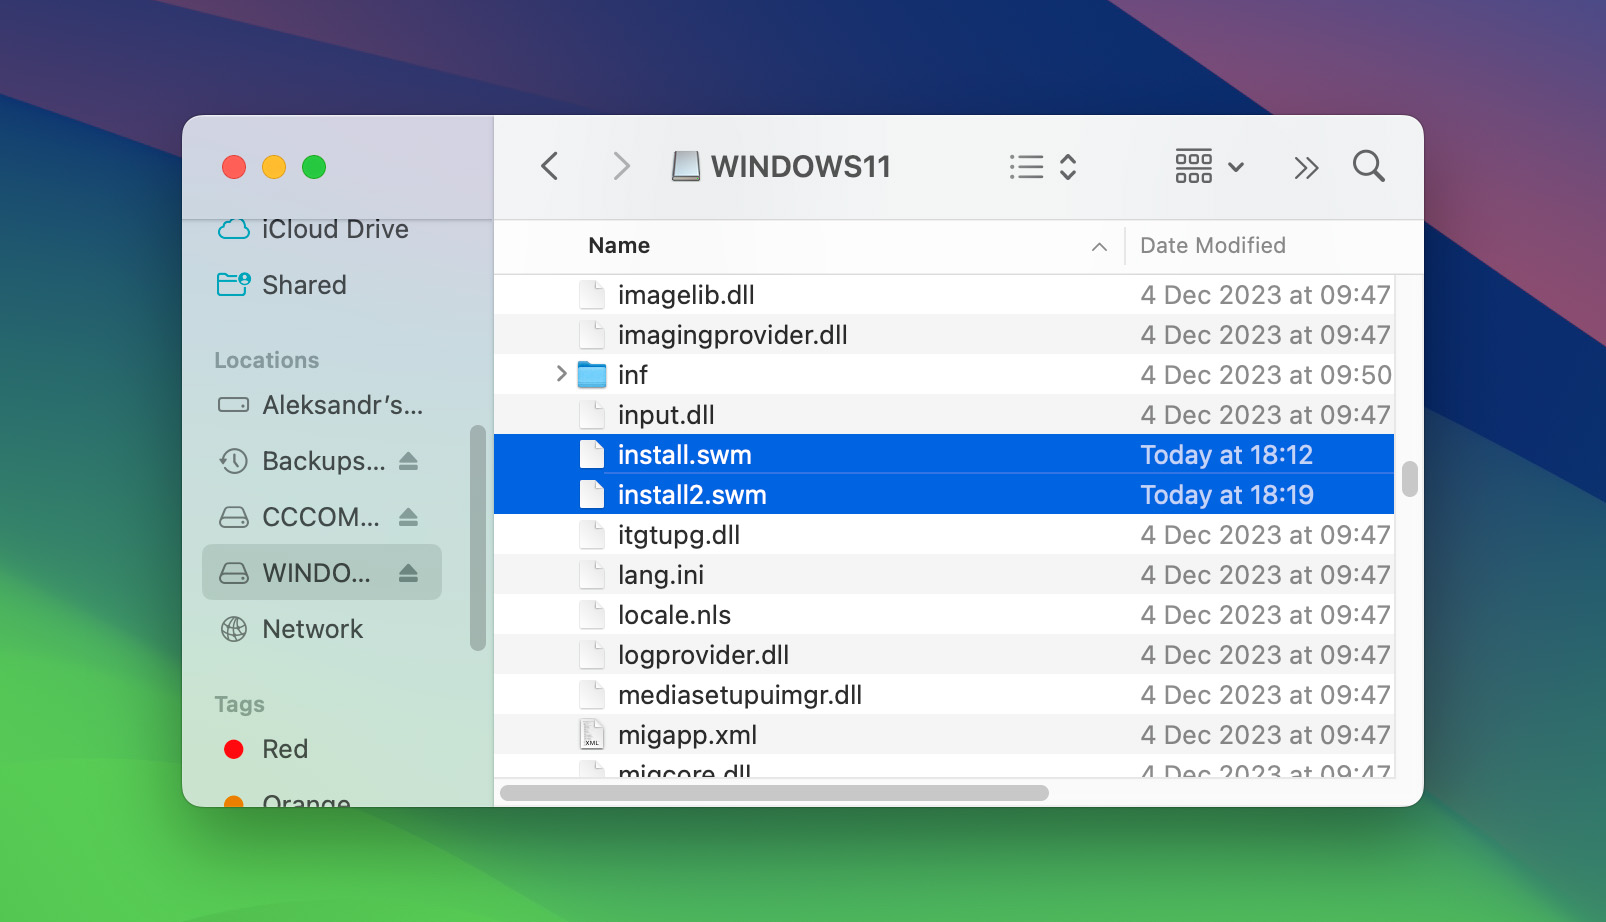
After completing these steps, the install.wim file will be split into smaller install.swm and install2.swm files, which are then copied to your USB drive. This modification ensures the USB drive bypasses the FAT32 file size limit and becomes a fully functional Windows bootable USB.
Step 5: Finalizing the Bootable USB
With the install.wim file successfully split and transferred to your USB, you’re almost ready to use it to install Windows on a Mac. The final step is to ensure that all files are correctly placed and the USB is safely ejected from your Mac. Follow these guidelines to finalize your bootable USB:
- Review the contents of your USB drive. Ensure that all files, including the newly created install.swm and install2.swm files, are present in the sources folder.
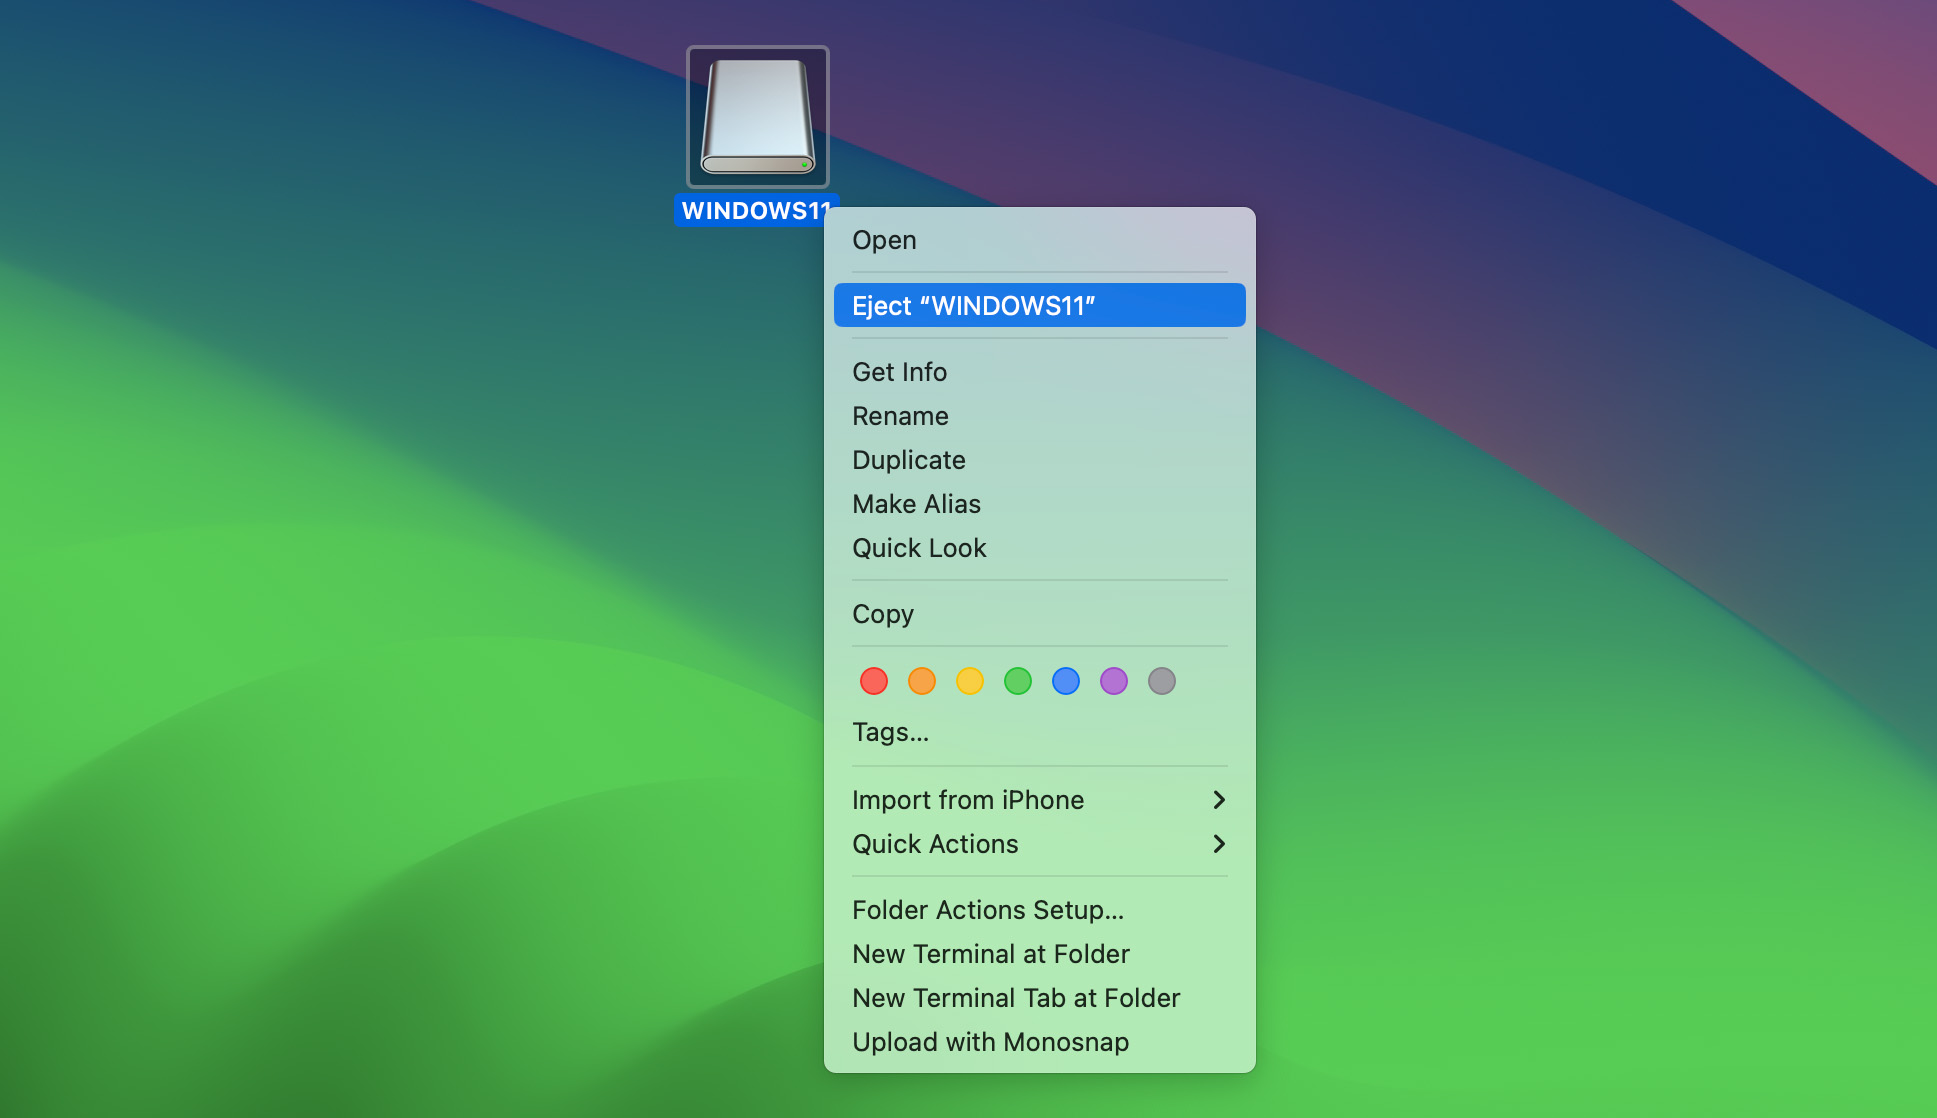
- If you haven’t already, safely eject the USB drive from your Mac by dragging the drive icon to the Trash, which turns into an Eject icon, or by right-clicking (or Control-clicking) on the drive and selecting Eject.
- Your USB drive is now a bootable Windows installer. You can use it to install Windows by inserting it into the target computer, restarting the computer, and following the on-screen instructions to boot from the USB drive.
This completes the process of creating a bootable USB for Windows on a Mac. With this USB, you can install Windows 10 or Windows 11 on a Mac or any compatible PC. The bootable USB allows for a smooth installation process, providing a straightforward way to run Windows on Mac hardware.
Troubleshooting and Tips
Creating a bootable USB for Windows on a Mac can sometimes present challenges. Here are some troubleshooting tips and additional advice to ensure a smooth process:
- USB not recognized: If your Mac doesn’t recognize the USB drive, try plugging it into a different port or restarting your Mac. Ensure the USB drive is properly formatted as MS-DOS (FAT) with a GUID Partition Map.
- Error copying Files: Should you encounter errors while copying files to the USB drive, verify that the drive has enough free space and is not corrupted. Reformatting the USB drive may resolve these issues.
- Install.wim file too large: If splitting the install.wim file using Wimlib does not work, ensure you have correctly installed Wimlib and are using the correct syntax in the Terminal command. Double-check the paths you provide in the command.
- Bootable USB not working: If the bootable USB does not work on another computer, check the computer’s BIOS settings to ensure it is set to boot from a USB device. Additionally, verify that the USB drive contains all necessary files, including the split install.wim files.
Additional Tips:
- Use a high-quality USB drive to avoid data corruption and ensure a faster installation process.
- Keep a backup of important data from your USB drive before formatting it, as the process will erase all existing data on the drive.
- Consider using a USB 3.0 drive and port for faster data transfer speeds during the file copying process.
By following these troubleshooting steps and tips, you can address common issues encountered during the creation of a Windows bootable USB on a Mac. This guide aims to streamline the process, but understanding how to navigate potential pitfalls is key to success.
Conclusion
Successfully creating a bootable USB for Windows on a Mac allows you to install Windows 10 or Windows 11 on Mac hardware. This guide has walked you through each necessary step, from downloading the ISO file to preparing the USB and handling large files with Wimlib. The result is a bootable USB that enables Windows installation.
With this tool, you’re now equipped to run Windows on your Mac, opening up new software and operating system testing opportunities. For further guides and technical assistance, stay updated with our latest posts.

