
Table of Contents
Is your Mac displaying the low storage space alert? Check your Mac’s storage settings, and you’ll notice a mysterious bunch of files, labeled “System Data,” taking up quite a bit of storage space. Fortunately, there is a way to clear up some of the System Data on your Mac and reclaim your precious storage space. The sections below outline what System Data is, and the most efficient methods to clean it up.
Step 1: Identify What Takes Up The Most Space
Before you clear the System Data on your Mac, you need to know what’s actually hogging up your Mac’s storage space, because it isn’t always clear.
Moving your enviable film and music collection to another storage device may not free up as much space as you expected. Because it’s often System Data—hidden files, app cache, browser cache, old backups, and temporary files—that takes up a surprising amount of storage space.
There are two methods to identify what’s taking up space on your Mac—using the storage information screen in macOS, and using third-party storage space analyzers. Your Mac’s built-in storage information screen gets the job done if you want a basic overview of what’s taking up space on your Mac. For more advanced analysis, I suggest using a third-party storage analyzer.
Here’s how to find out what’s taking up space on your Mac:
Method 1: Check Your Mac’s Storage Information
The built-in storage space analyzer in macOS neatly displays the file categories taking up storage space on your device. It also contains suggestions on how you can free up storage space on your Mac.
Accessing your Mac’s storage information is simple:
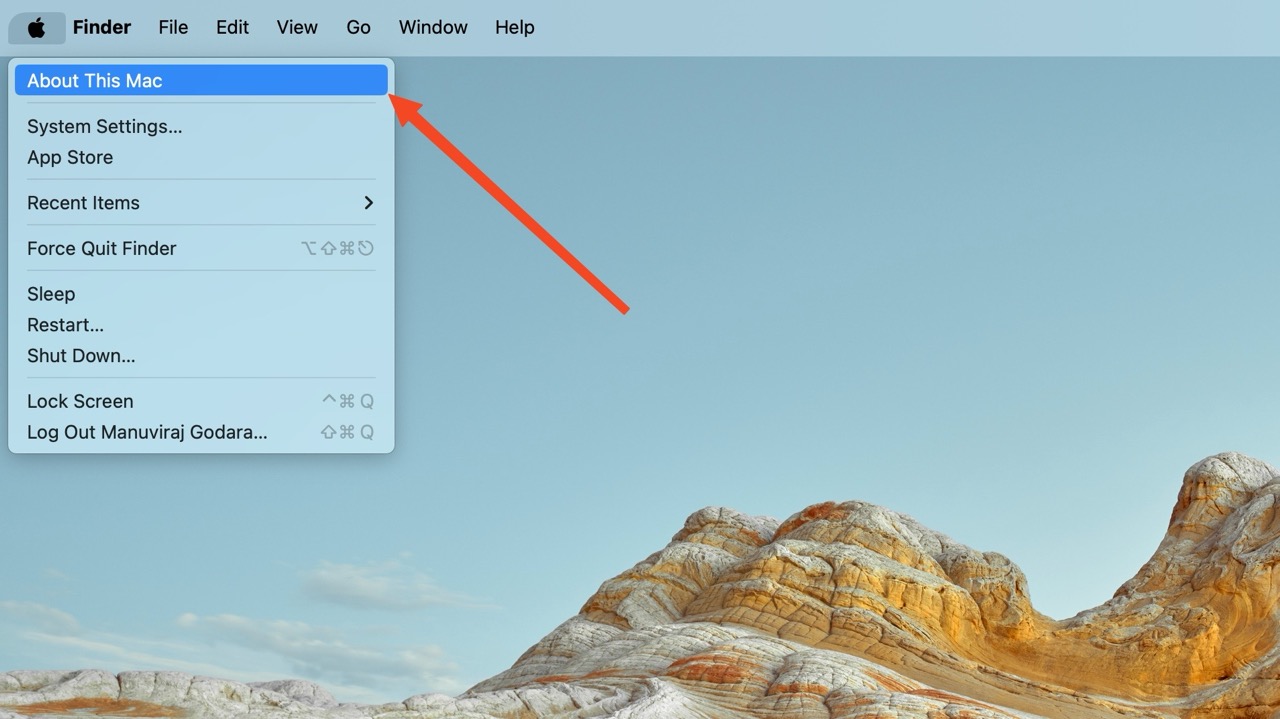
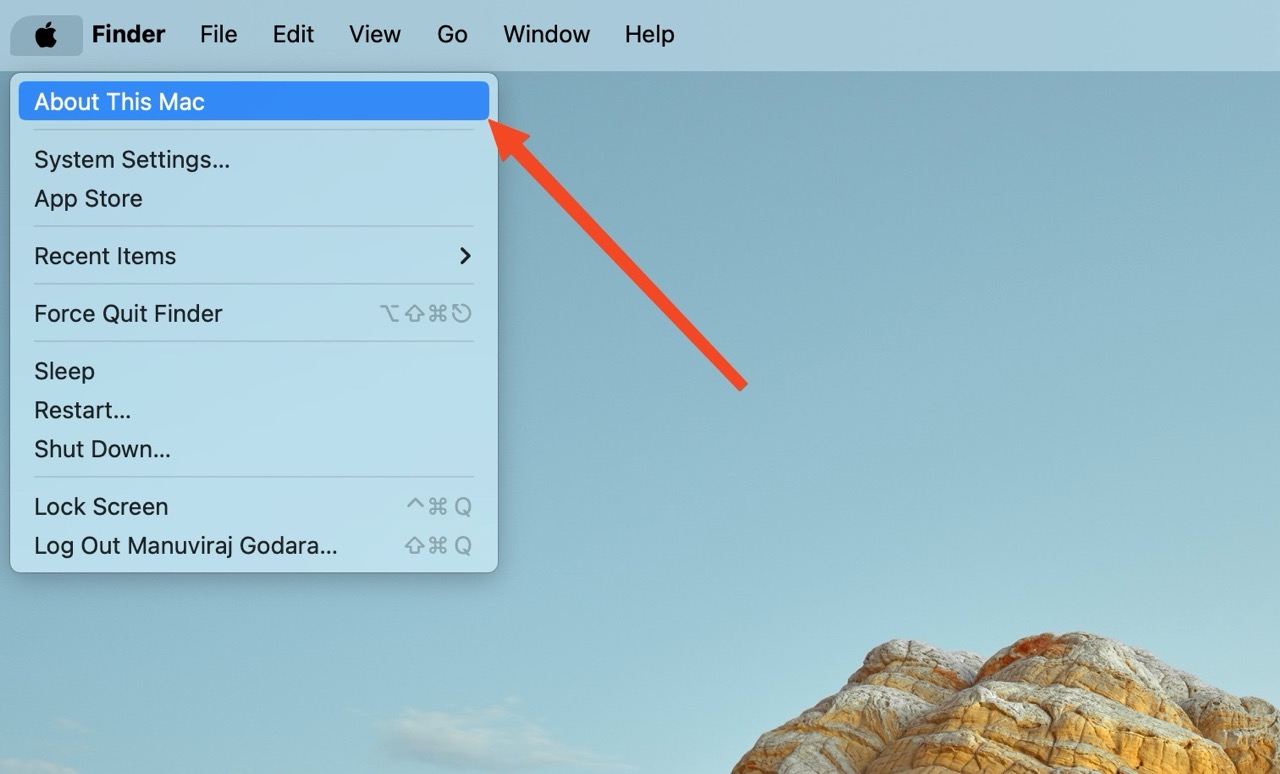
- Click on the Apple logo on the top-left corner of your screen, and select About This Mac.
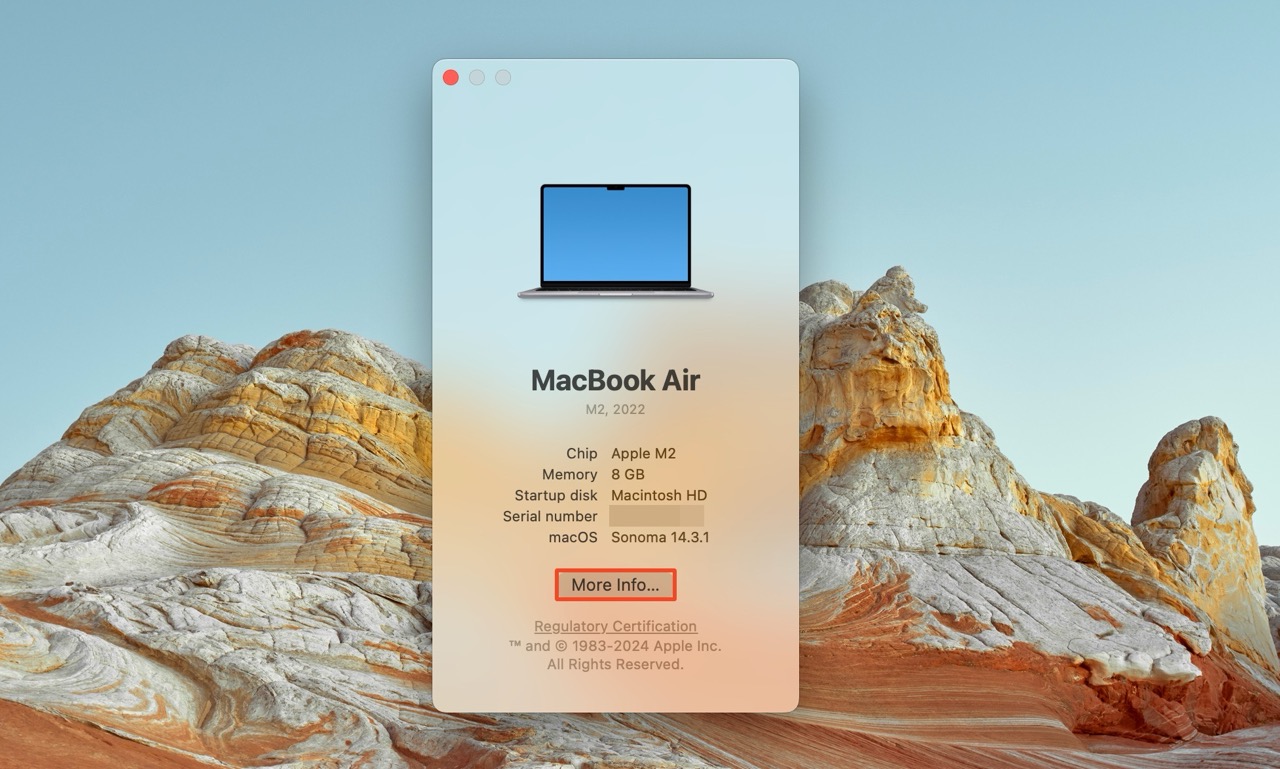
- Click on More Info.
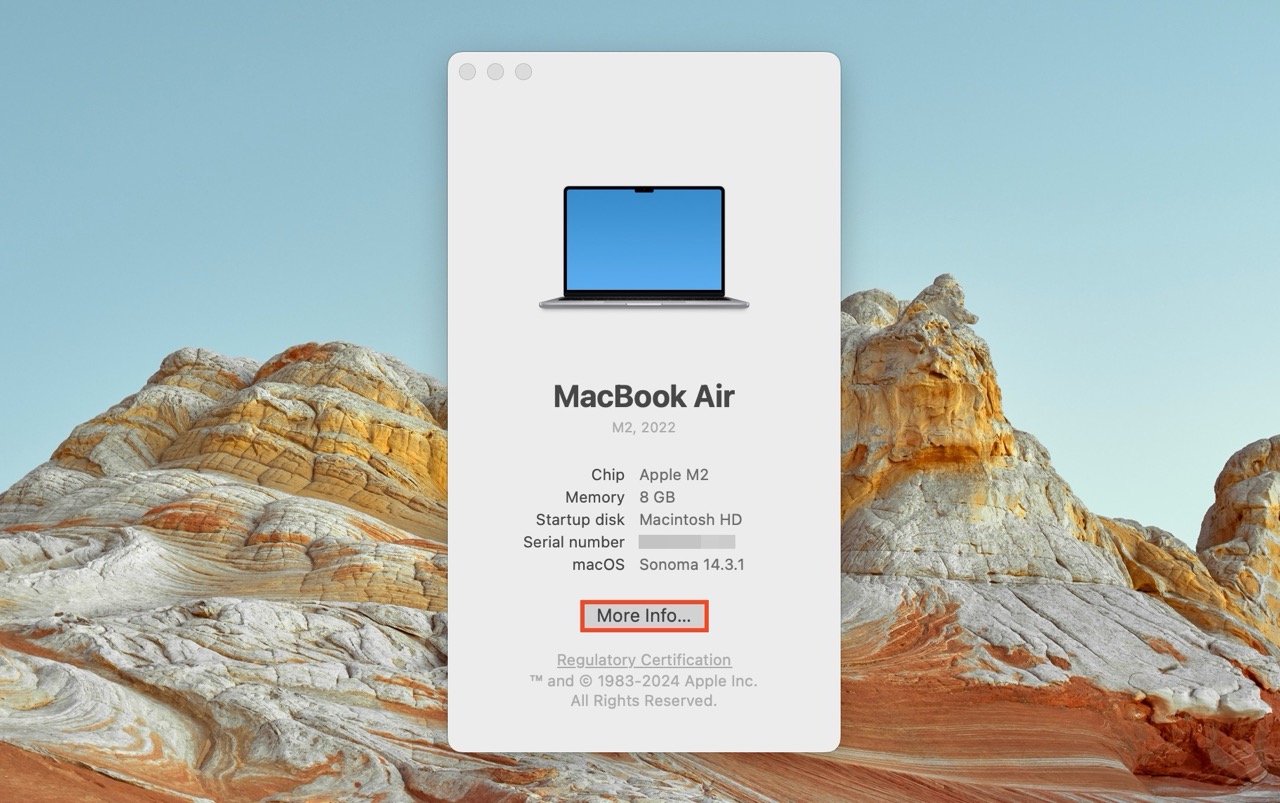
- Click on Storage Settings under Storage.

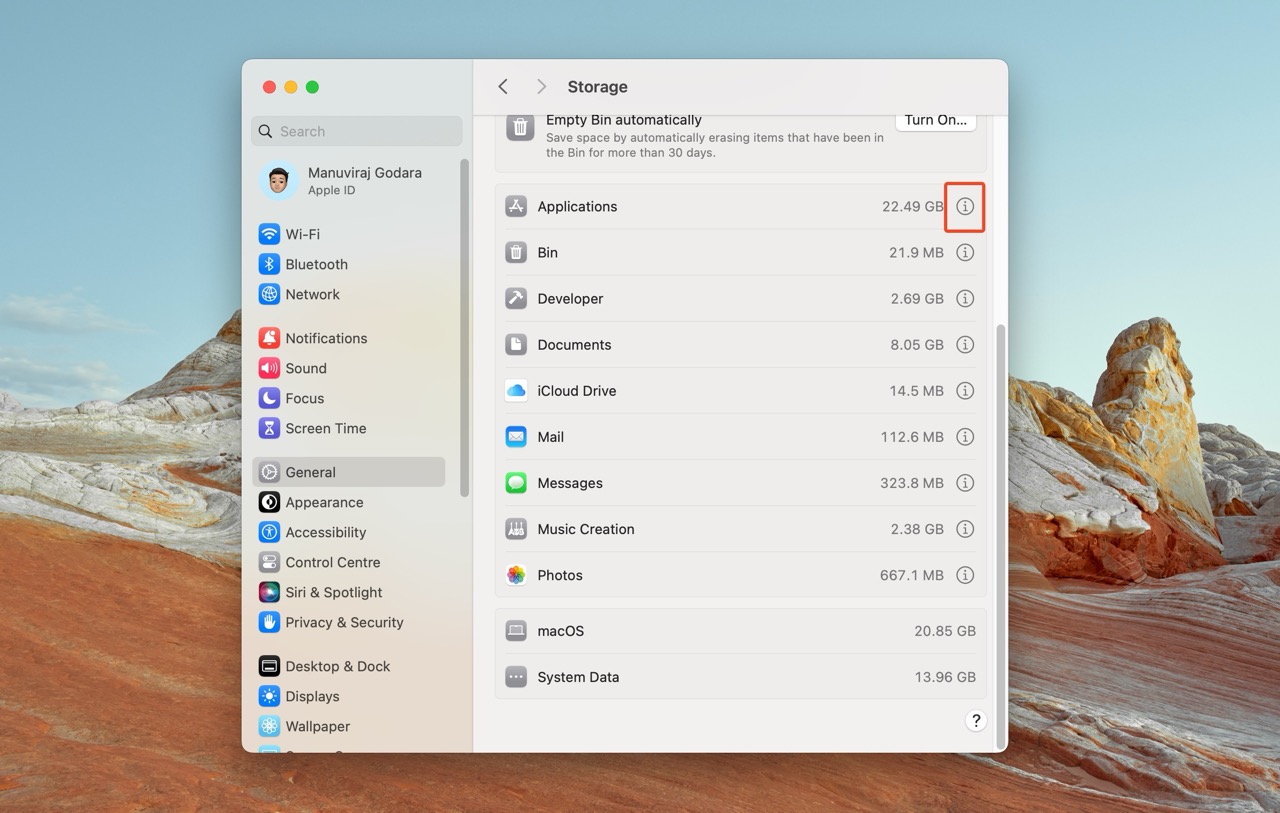
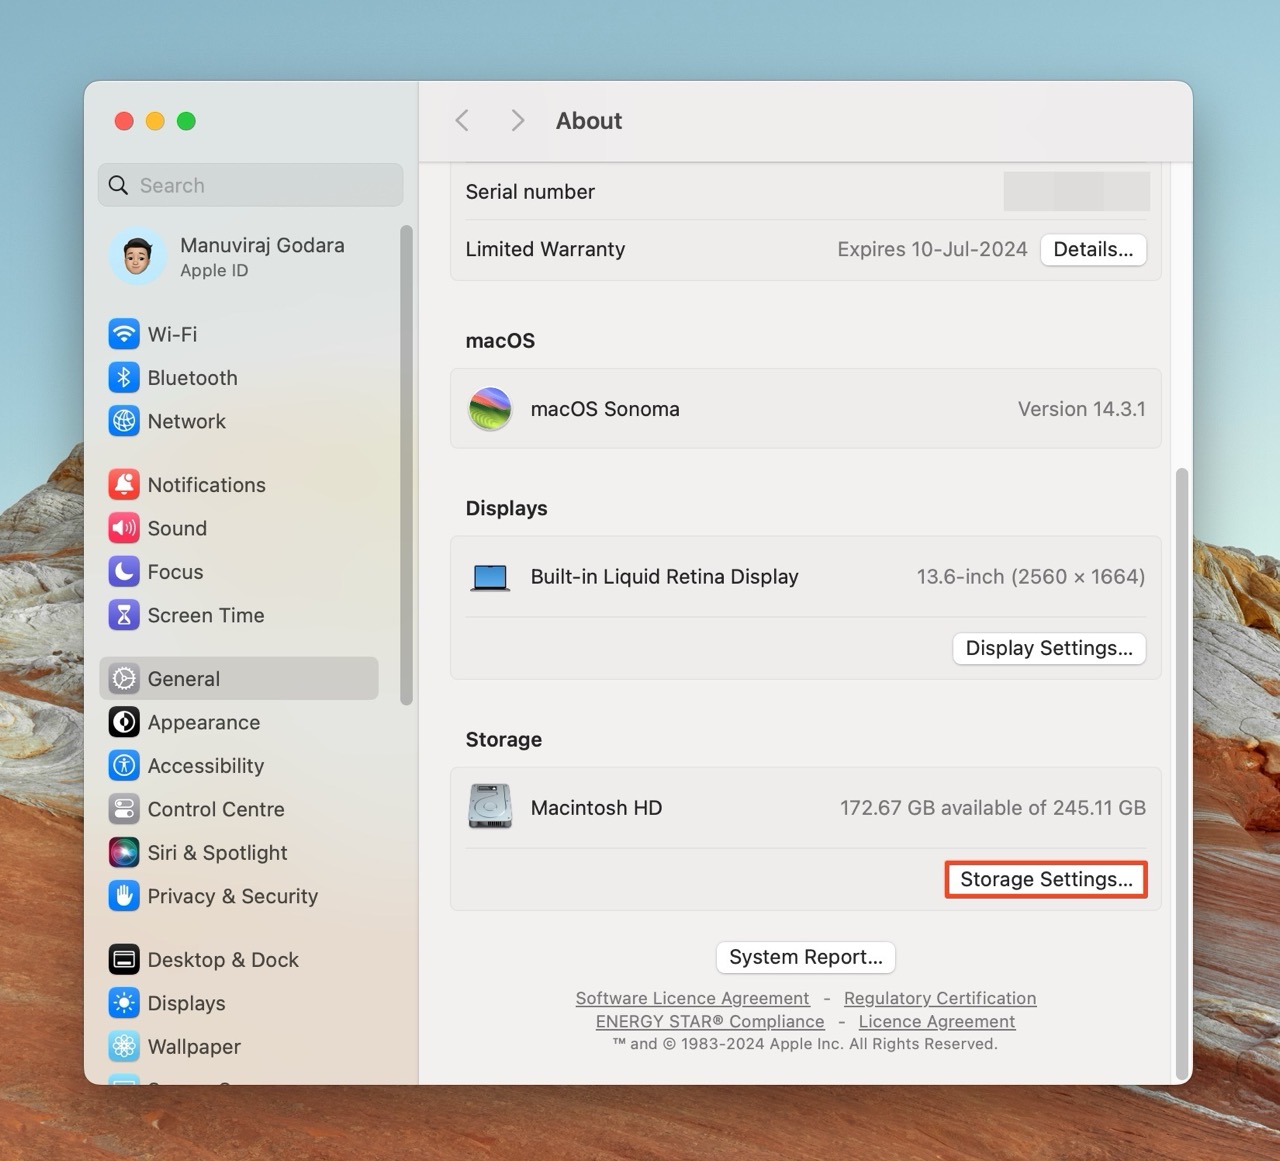
- You can now see what’s taking up storage space on your device. A dark gray bar denotes the space taken up by System Data. You can also scroll down towards the bottom of the screen to see exactly how much space System Data is occupying.
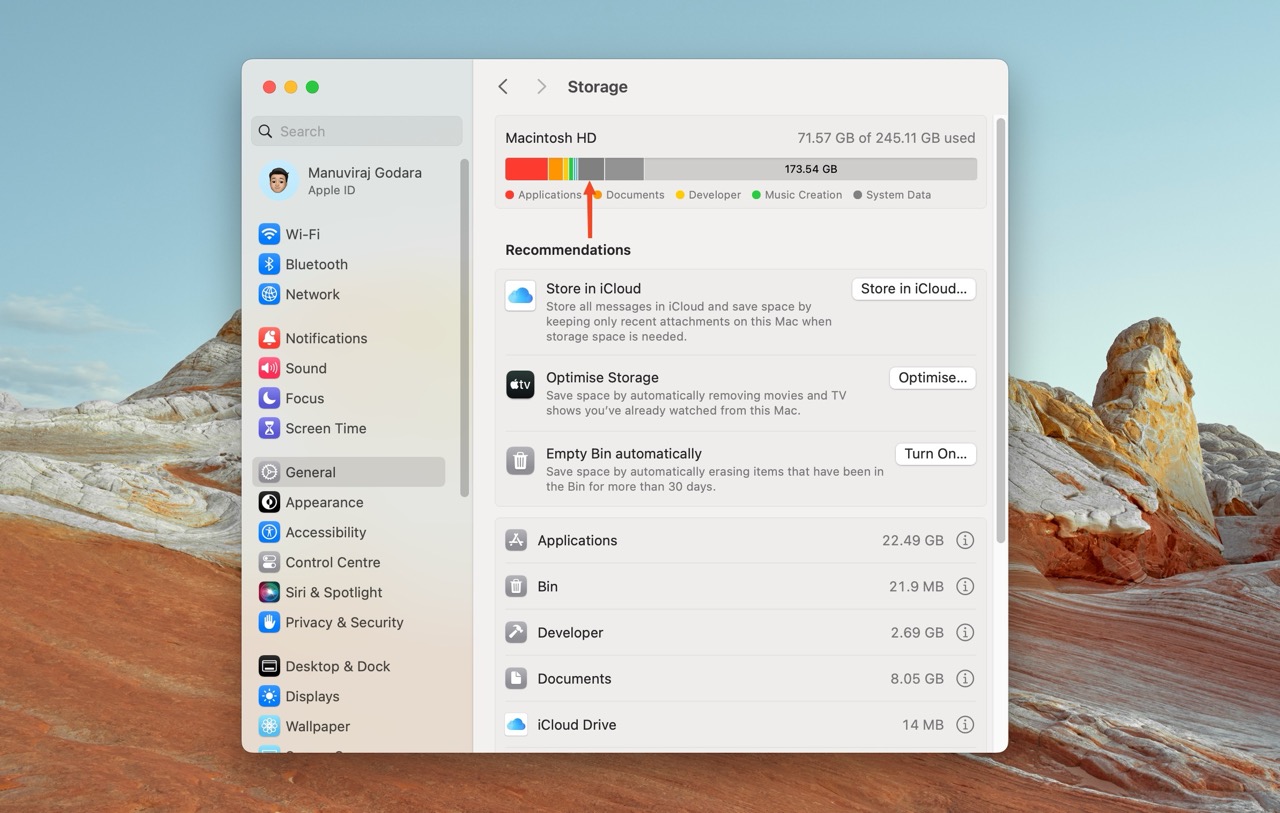
- (Optional) Click the i icon next to a category to view and delete individual files in that specific category. This option is unavailable for the System Data, and macOS categories.
Method 2: Use Third-Party Storage Analysis Tools
If, like me, you found Mac’s storage information screen lacking in detail, you can use third-party storage analyzers for a more in-depth analysis of what’s taking up space on your Mac.
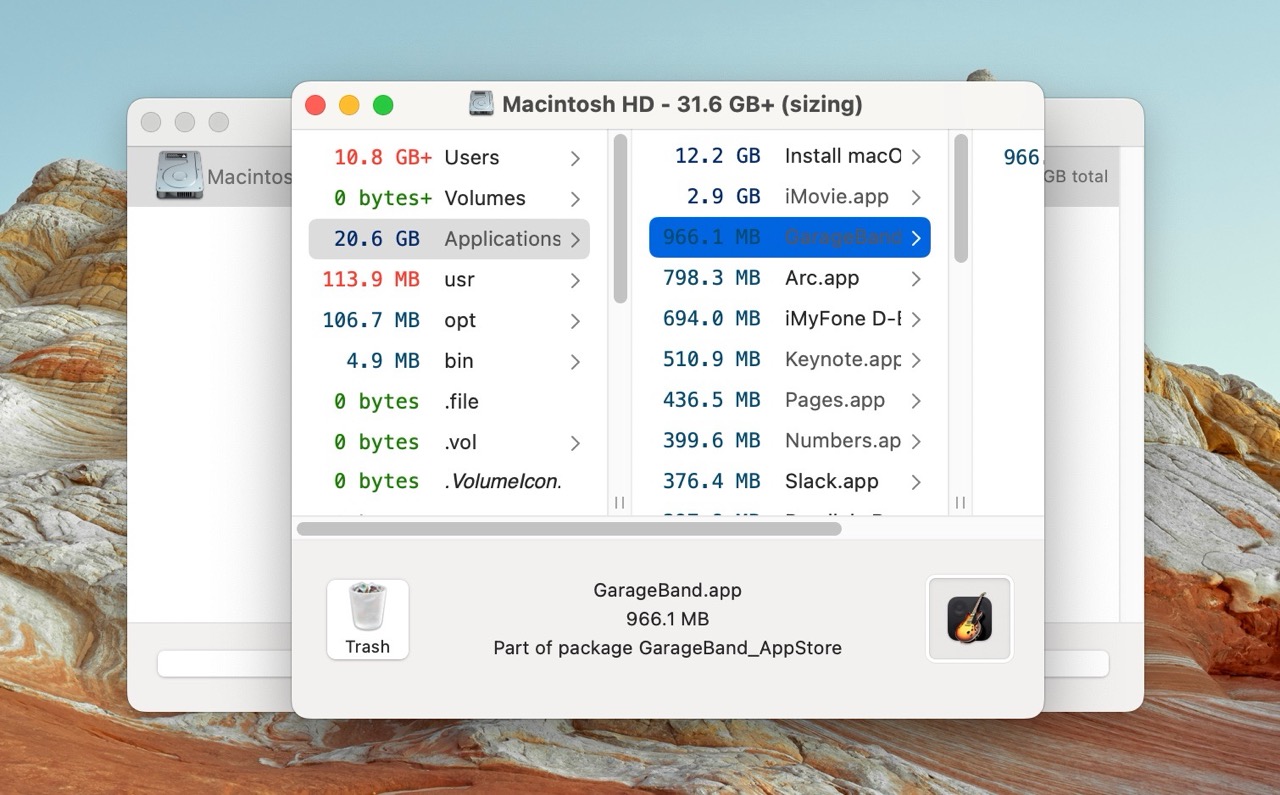
I didn’t wish to spend money on a fancy disk analysis and cleaning tool, so I ended up using OmniDiskSweeper to find out what files were taking up the most space on my M2 MacBook Air, running macOS Sonoma. However, you can take your pick from these third-party disk space analyzers.
Here’s how I used OmniDiskSweeper to analyze storage space on my Mac:
- Download and install OmniDiskSweeper.
- Open OmniDiskSweeper, and provide it with the necessary permissions to access your storage.
- Select your storage drive, usually “Macintosh HD,” and click the Sweep button.

- OmniDiskSweeper will list the directories on your disk (even the hidden ones), and the amount of space they’re taking. Be cautious, as many of these directories contain critical system files that shouldn’t be deleted or changed.
If you see media files, documents, and unused apps taking up excessive storage space on your Mac, move them to another device, or delete them.
Step 2: How to Delete System Data on Mac
Apple doesn’t explain clearly what “System Data,” contains, and why it’s occupying substantial storage space on your Mac.
So, I did some research, and here’s what I found.
System Data mostly comprises app-specific cache files, log files, temporary files, VM files, fonts, plug-ins, Time Machine backups, and iOS backups. Unless you actively clear app caches, orphaned files, and temporary files—System Data will increase in size as you use your device, install new apps, etc.
Here’s an excellent resource on what System Data contains.
Here’s what I did to reduce the size of System Data on my Mac:
Method 1: Remove Old Backups
Time Machine is macOS’ native backup and restore feature. Besides backing up your data to the separate Time Machine drive, Mac also creates local snapshots of your data. You can delete these local snapshots/backups to reduce System Data size on your Mac. In addition to Time Machine backups, there may be older, unrequired iOS backups taking up space on your Mac.
Here’s how to delete these old backups to clean up some of the System Data on your Mac:
Part A: Delete Old Time Machine Backups
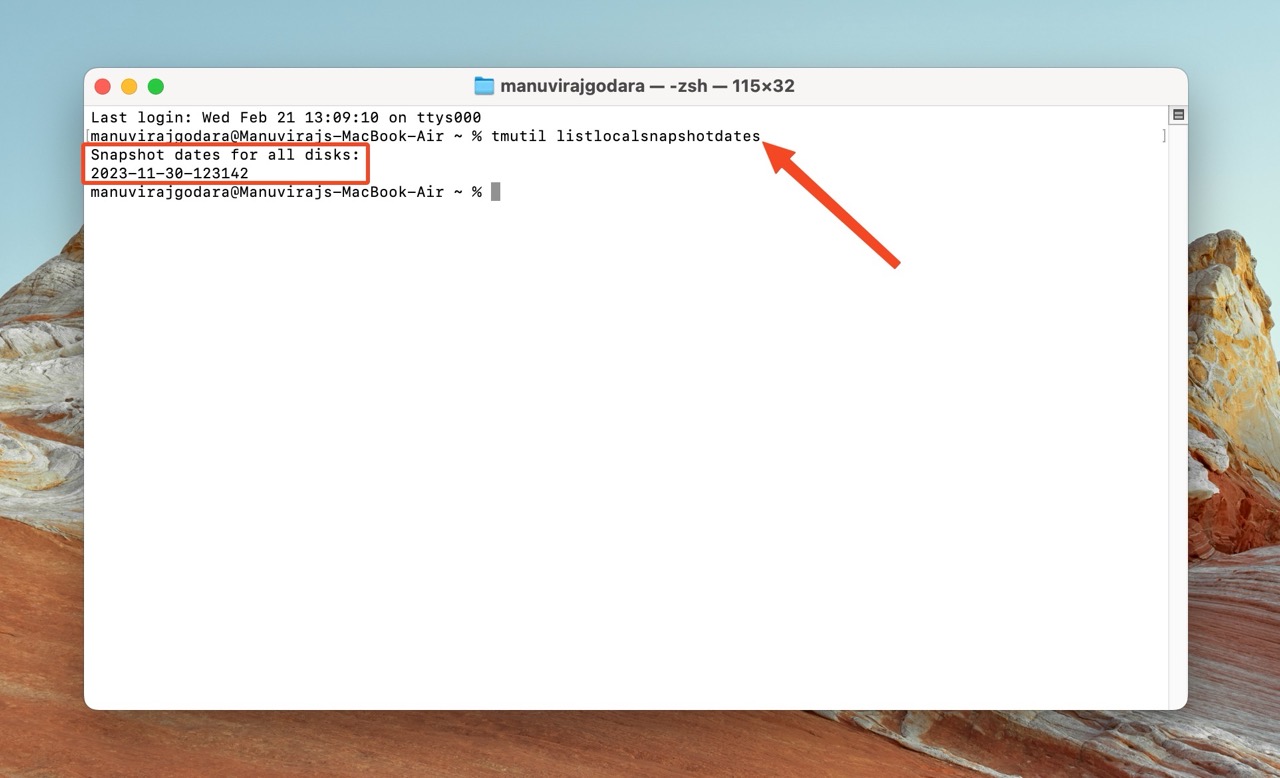
- Open Spotlight Search (Command + Space), type in “Terminal” and launch the Terminal app. You can also find it in Finder > Go > Utilities.
- Type in tmutil listlocalsnapshotdates and press Enter. You’ll see a list of all local Time Machine snapshots. Each snapshot will be named in this format: YYYY-MM-DD, followed by a numerical string. On my MacBook, there was just one local Time Machine snapshot, titled 2023-11-30-123142.
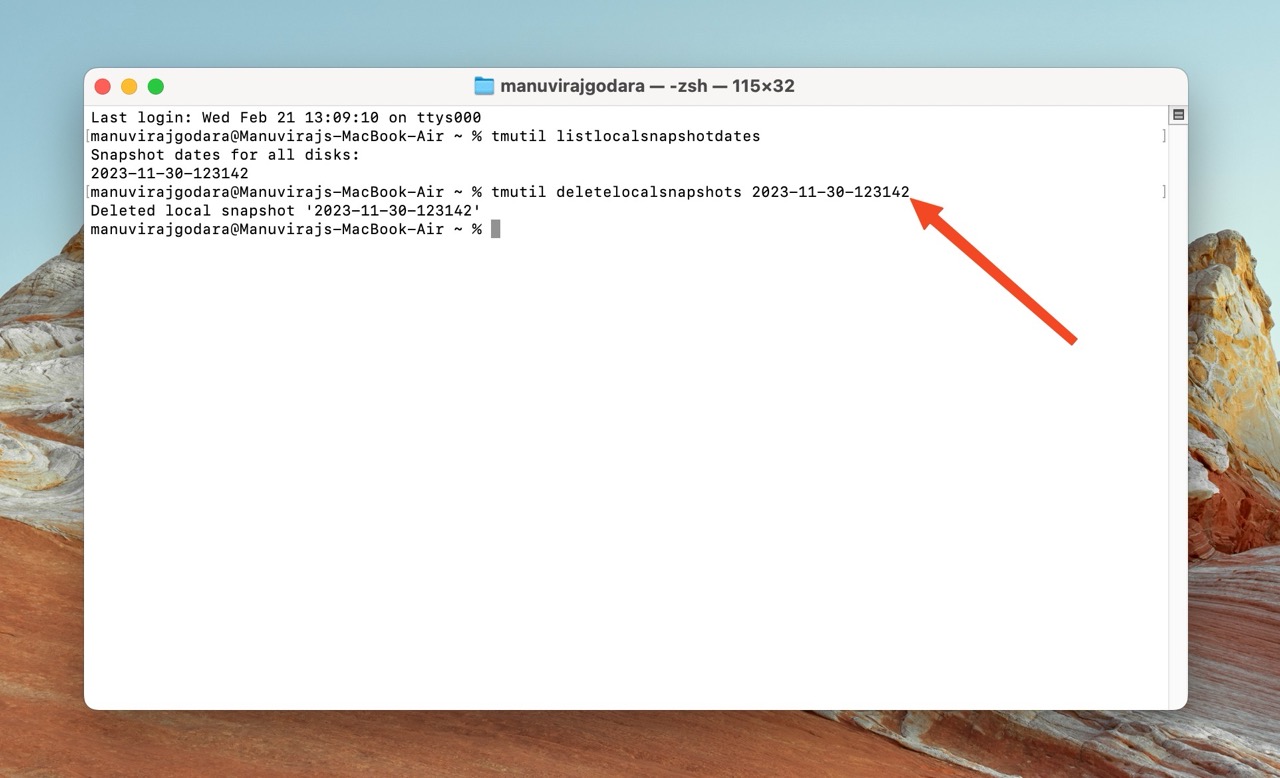
- Type tmutil deletelocalsnapshots XXXXX, where XXXXX denotes the name of the local snapshot you wish to delete. Press Enter. In my case, the command was tmutil deletelocalsnapshots 2023-11-30-123142.
- Repeat these steps for other local snapshots you want to delete.
Part B: Delete Old iOS Backups
If there are any iOS backups on your Mac, you can locate and manage them in Finder:
- Connect your iPhone to your Mac
- Open Finder.
- In the left navigation bar, click on your iPhone/iPad under Locations.

- Click on Manage Backups.

- Select the backup you wish to delete and click Delete Backup.
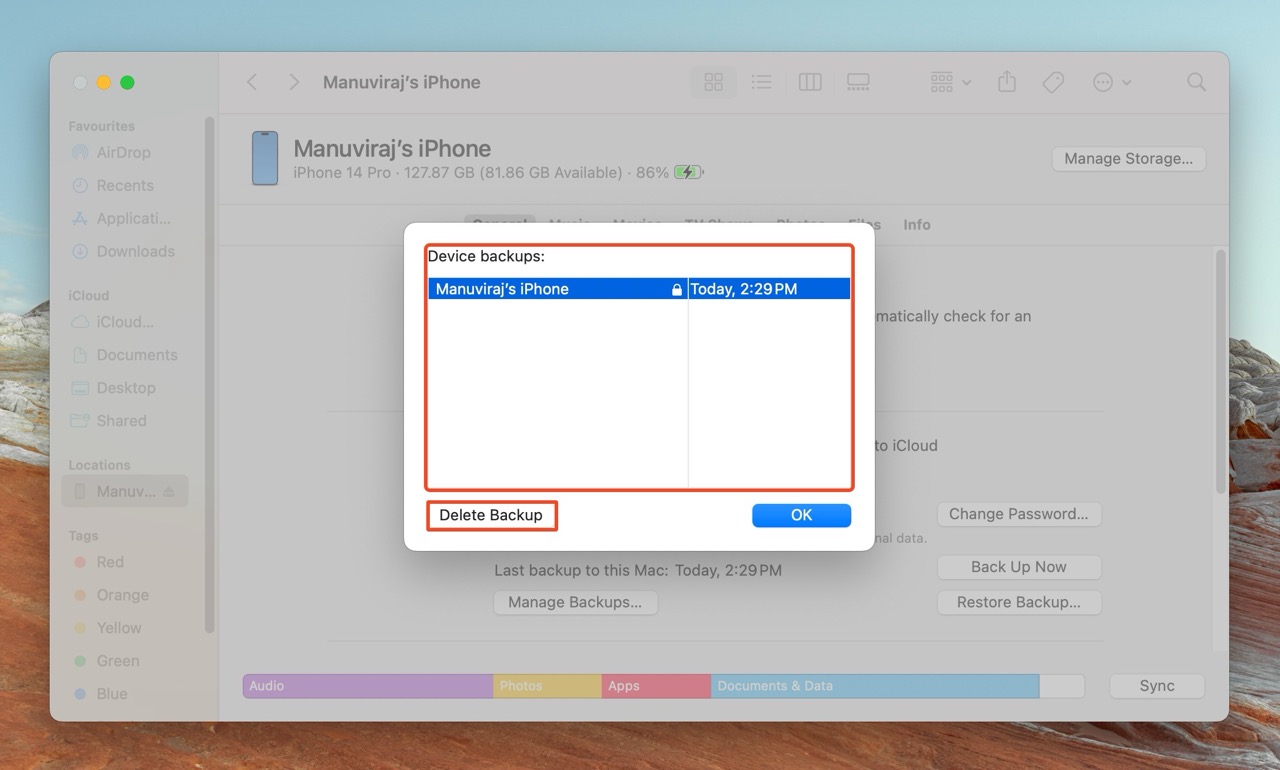
- Click Delete in the confirmation prompt.
iOS backups can also be located in ~Library/Application Support/MobileSync/Backups, if you don’t wish to connect your iPhone to the Mac.
Method 2: Delete Temporary Files
Third-party apps, and even macOS, create temporary files over time. These temporary files may include browser cookies, logs, document snapshots, and more.
An easy way to delete temporary files is to restart your Mac. No, this doesn’t mean simply closing the lid of your MacBook and re-opening it. You need to Shut Down your Mac, and power it on again. This forces active apps and system processes to quit and start again. Please save any unsaved projects before rebooting your Mac.
Here’s how to delete temporary files and consequently get rid of some System Data on your Mac:
- Click the Apple icon on the top-left corner of your Mac’s screen.
- Click on Shut Down.
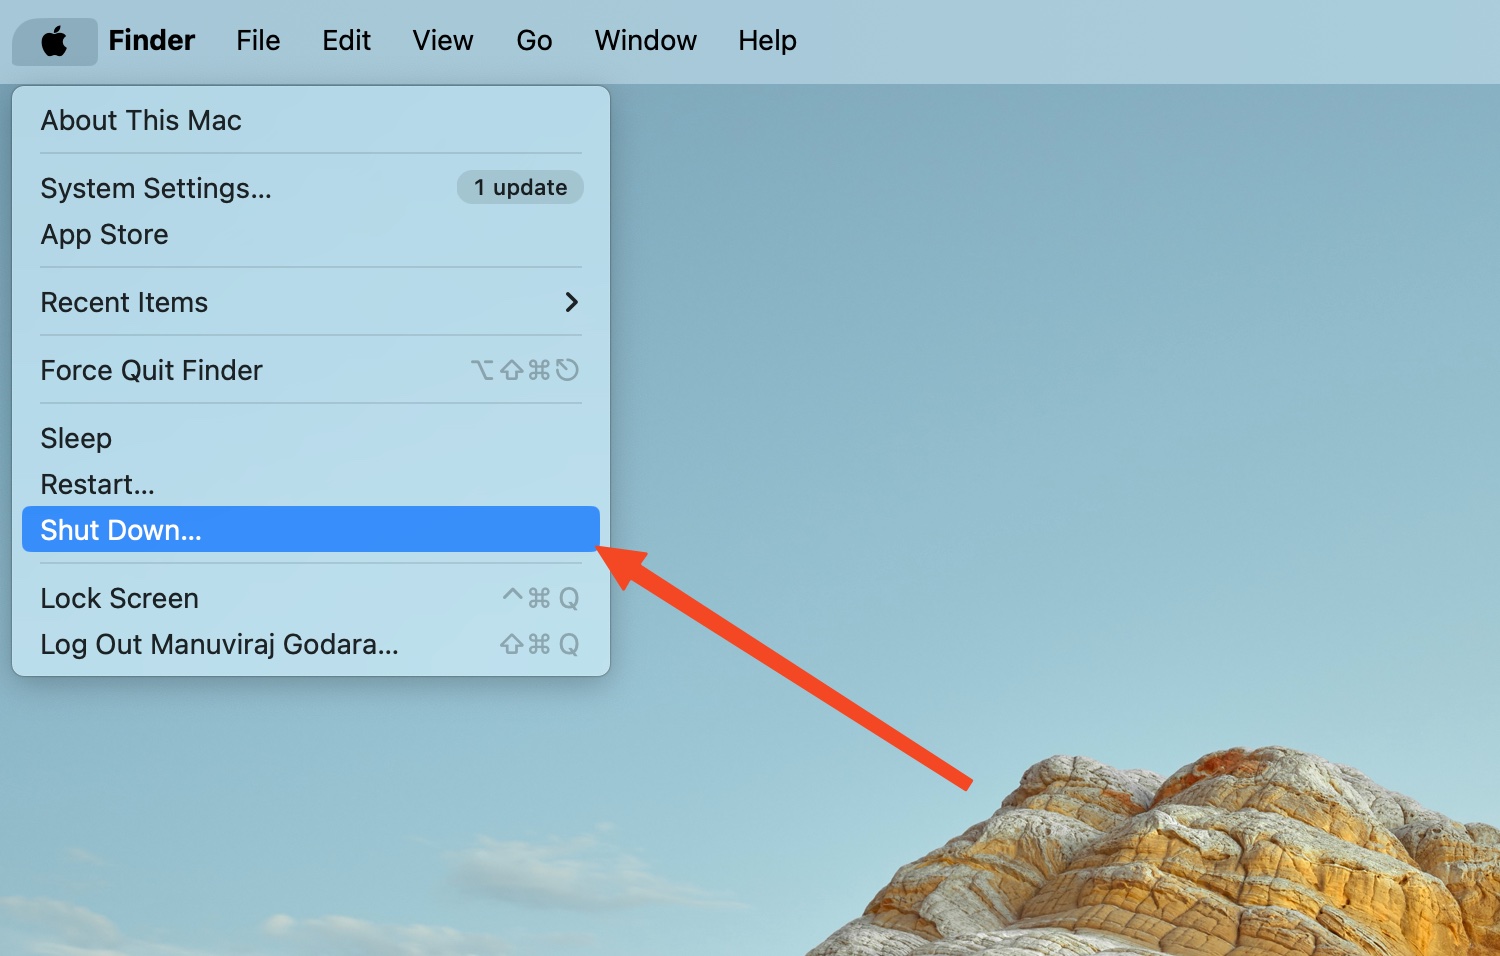
- Power On your Mac again.
Method 3: Clear Out System Data Caches on Your Mac
The ~/Library folder usually contributes most to large System Data on your Mac. It’s because the folder contains app-specific caches, log files, screen recordings, and more. Tread carefully when cleaning out files from this folder, as some of them could be important for apps to work properly.
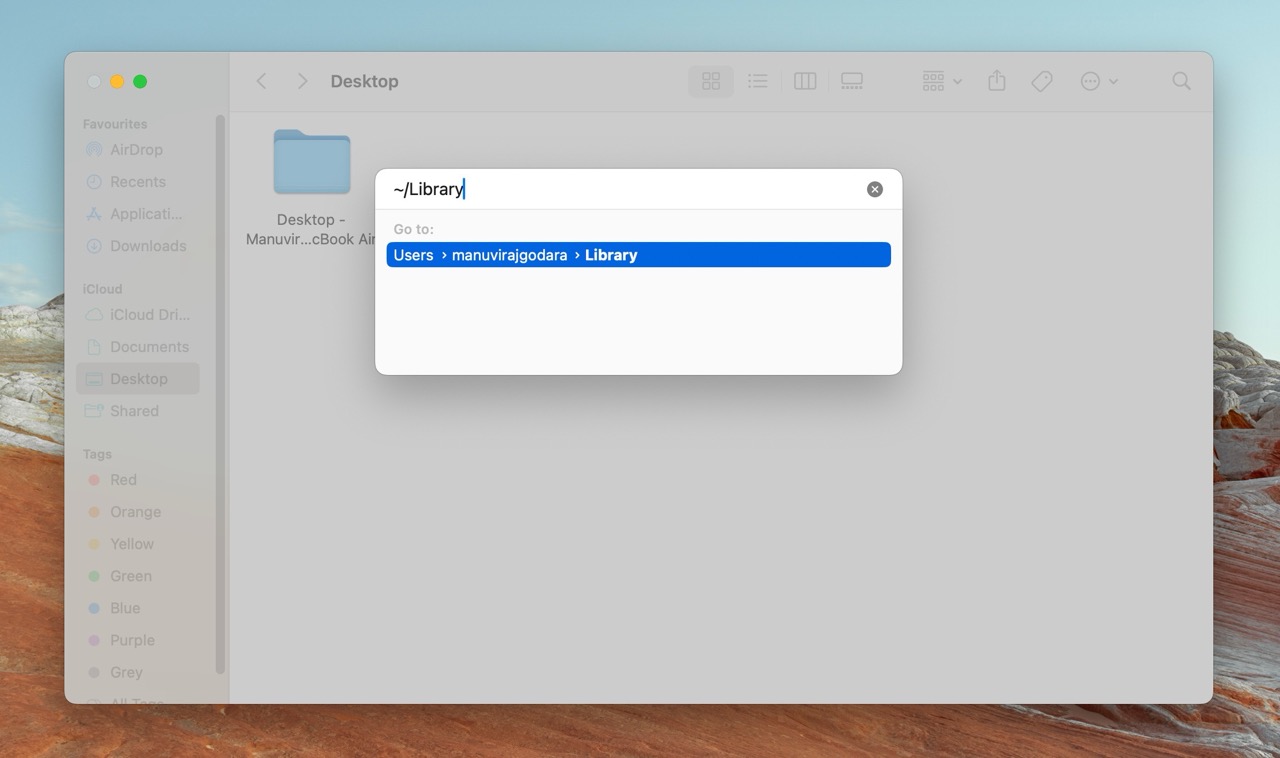
Follow this guide to know how to access, and what to delete from the ~/Library folder on macOS:
- Open Finder, and click on Go > Go To Folder.
- Type in ~/Library and press Enter.
- Open the Caches folder.
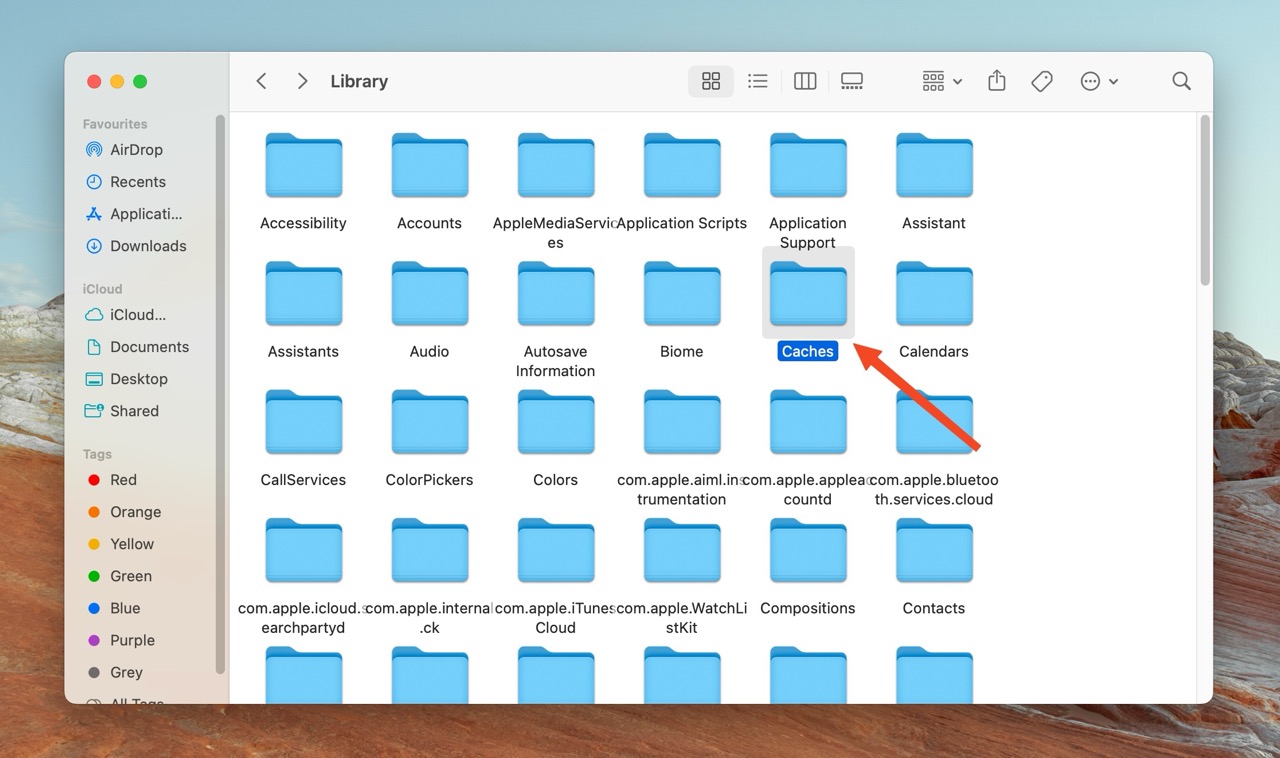
- Switch to List View to clearly see how much space is taken up by each cache folder.
- Find and open the app-specific folder you wish to delete the cache for, right-click all the folders in it, and click Move to Bin. In my case, I cleared the cache for Apple TV—-I opened the com.Apple.TV folder, and cleared its contents.

Additional pointers regarding app-caches:
- Often, uninstalled apps don’t remove their cache. Look for these orphaned cache folders when clearing out the ~/Library/Caches.
- Clearing out caches is usually a temporary measure, as most apps recreate the cache when you begin using them again.
- If there are no missing features, I recommend using web-based versions of apps. As an example, the Notion app on my Mac created a 1.2 GB cache, prompting me to use the web version of it because it is just as good as the native app. Of course, this tip is situation-specific.
Besides the Cache folder, there are some other folders you can safely clean up to reduce System Data size on your Mac:
- ~/Library/Containers/com.apple.mail
- ~/Library/Logs
- ~/Library/Screen Recordings (only if you haven’t recorded anything you need).
Method 4: Check Your Downloads Folder
The Downloads folder can become a huge data hog, really quickly. I had hundreds of obsolete documents, installers, videos, and other files lying around in my Downloads folder. Deleting these old Downloads freed up a lot of space on my Mac.
Here’s how I did it:
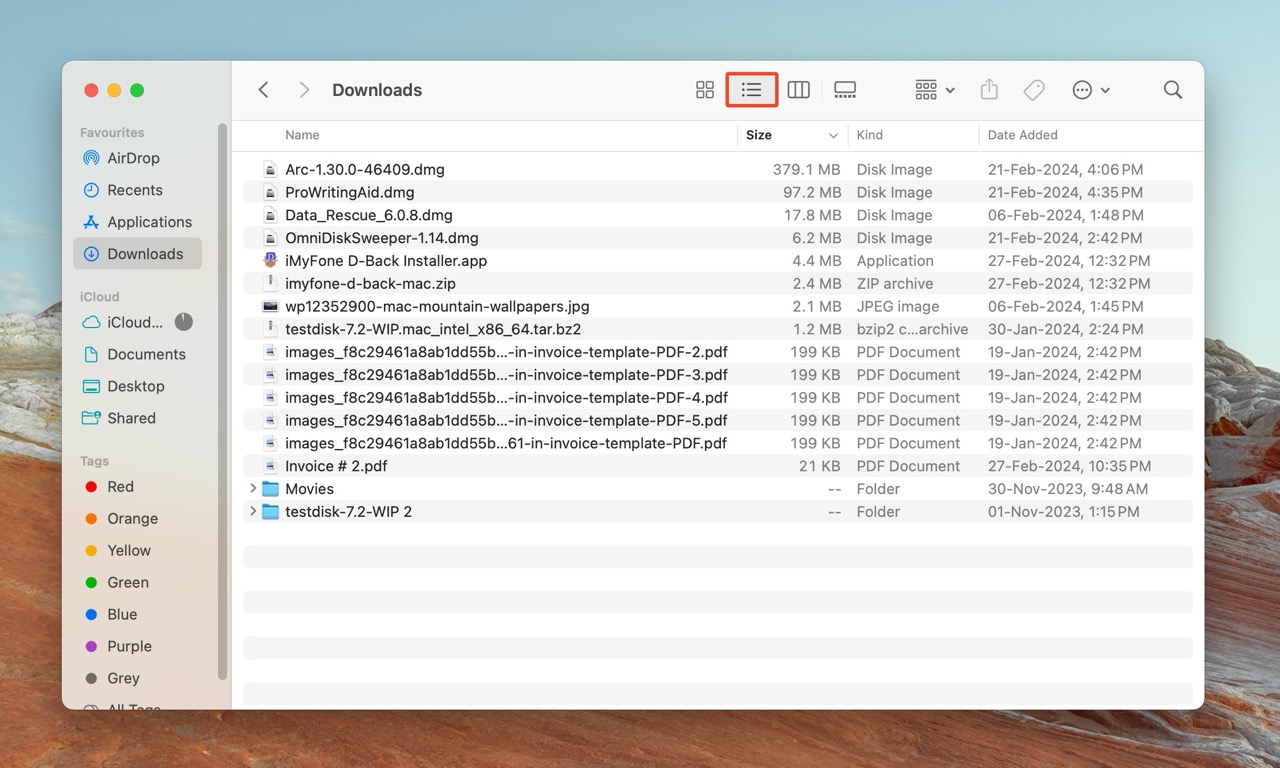
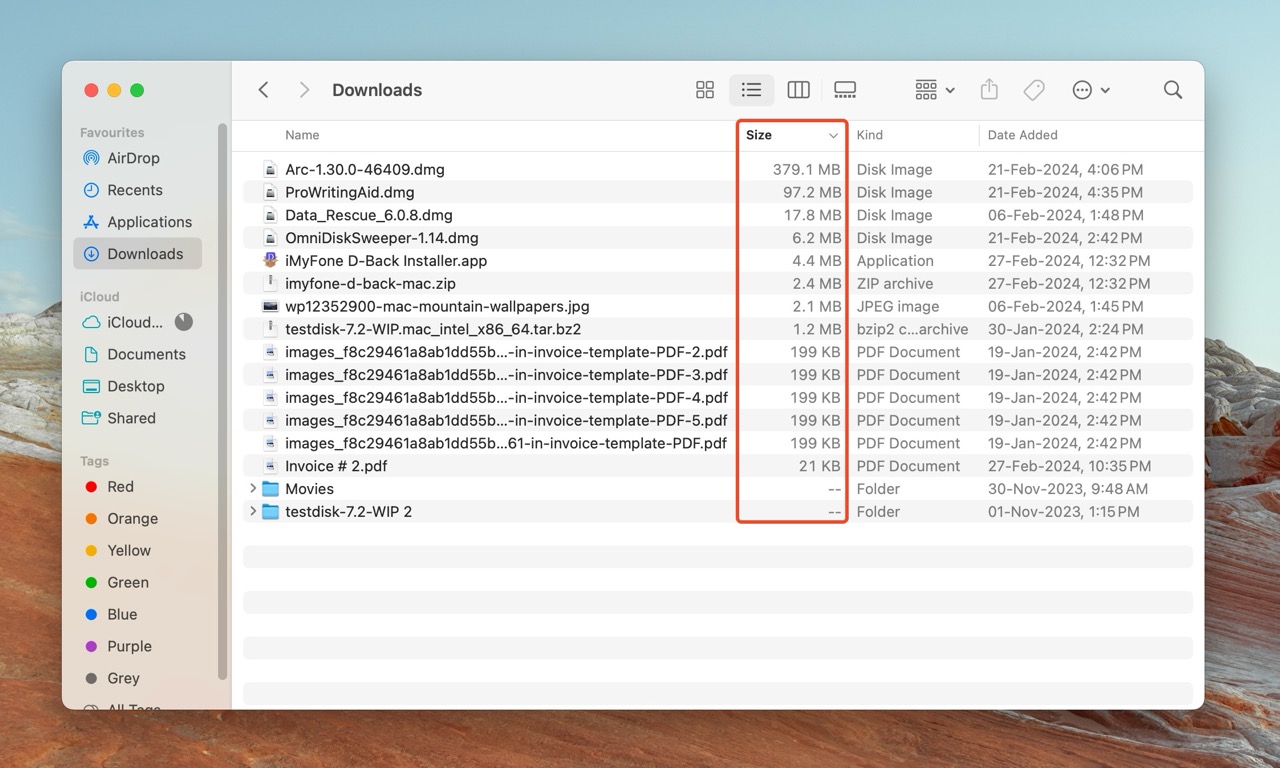
- Open Finder and click on Downloads in the left navigation bar.
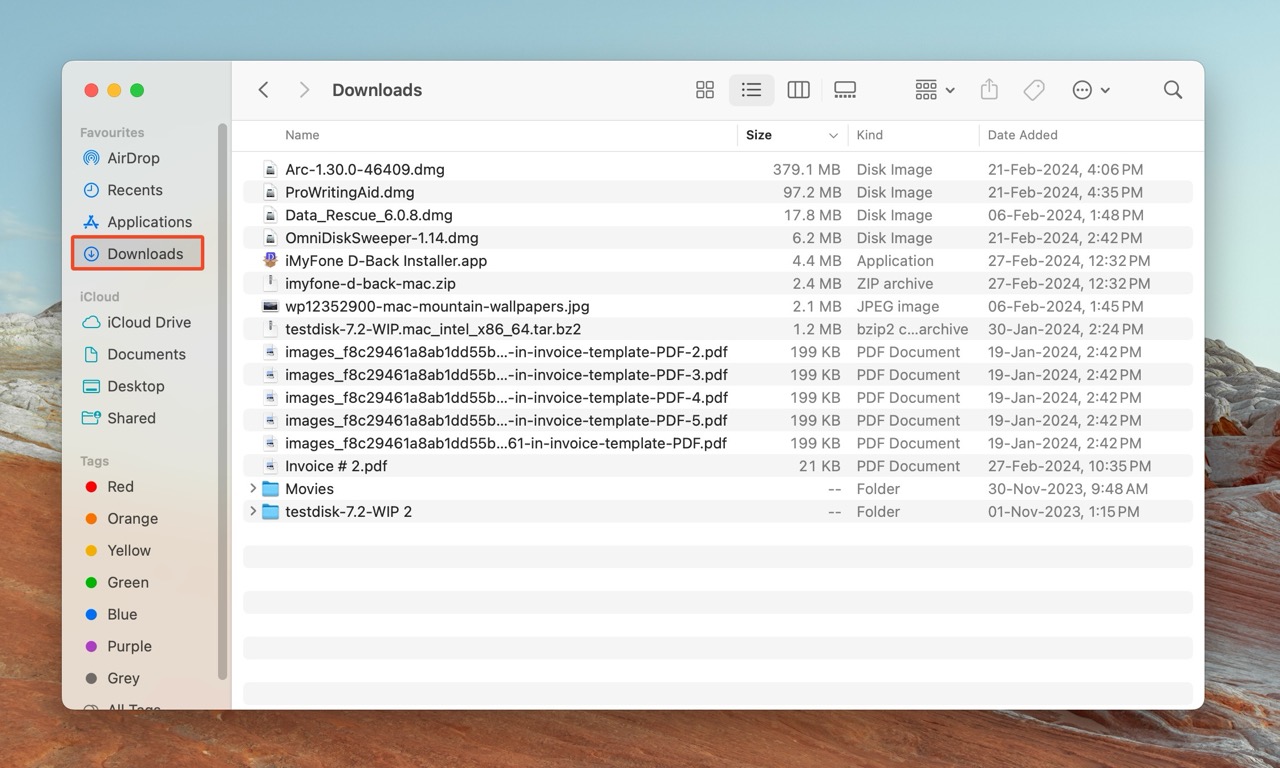
- Switch to List View for more details about each file, and folder.
- Click on the Size sort option and ensure it’s in descending order—so you see larger files first.
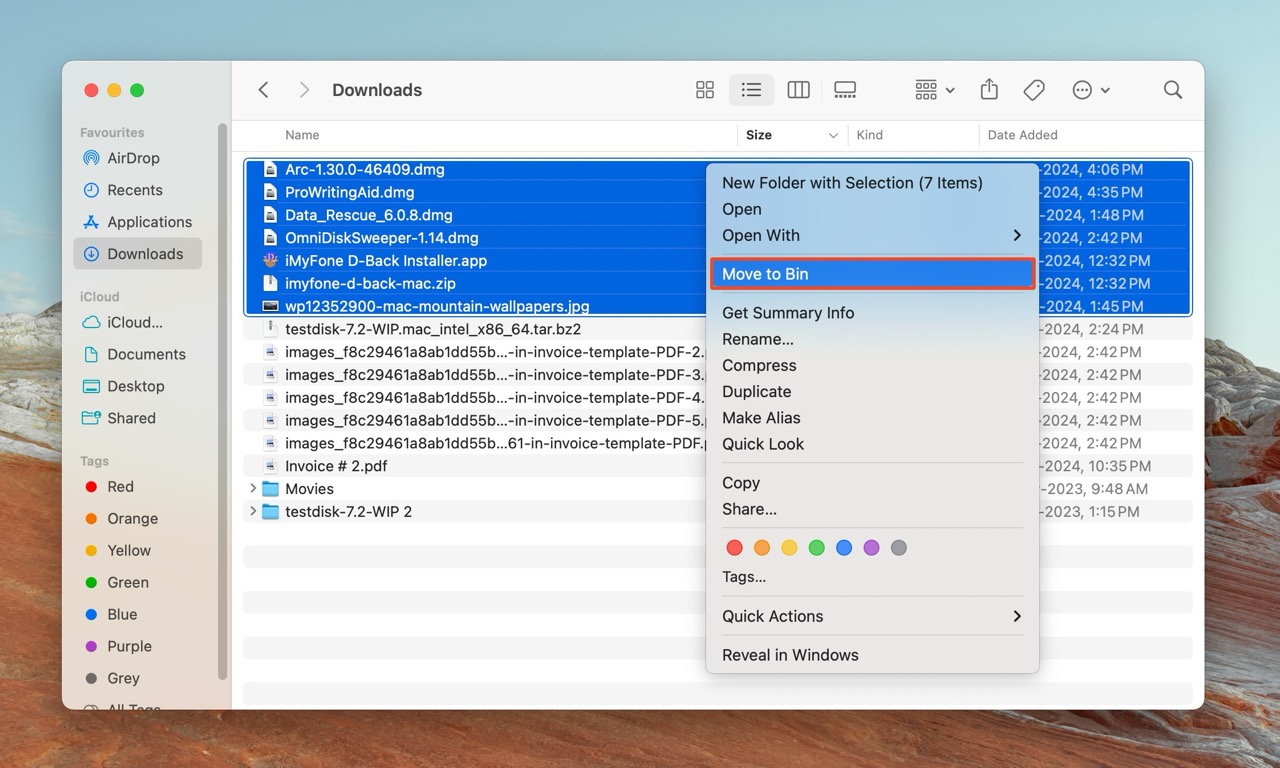
- Hold down the Command key and select the files you wish to delete. Then, right-click and choose Move to Bin.
Method 5: Empty the Trash Bin
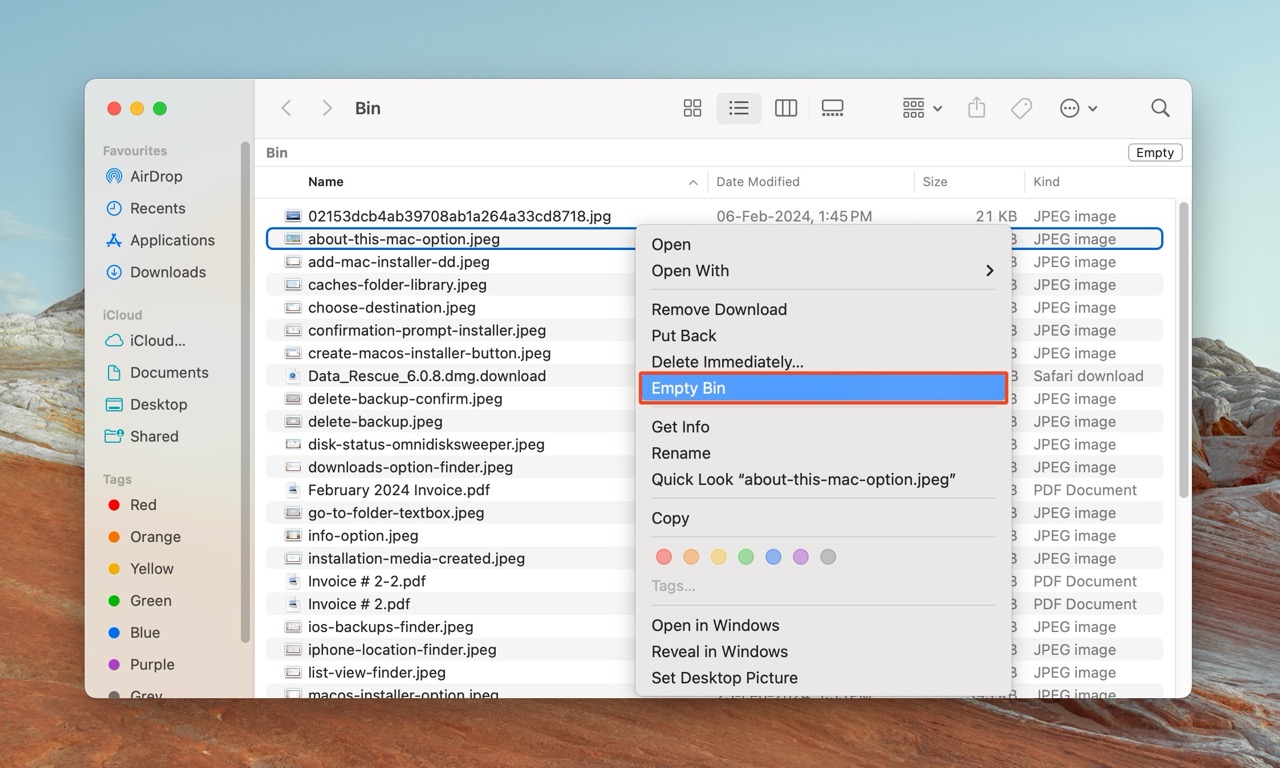
By default, macOS doesn’t empty the Trash/Bin automatically. All deleted files remain there until you restore them, or empty the Bin. Naturally, the Bin may end up taking up GBs of storage space if you don’t clear it out frequently.
Again, clearing out the Trash Bin won’t reduce the size of “System Data,” but it’ll help you reclaim a lot of storage space.
Here’s how to clean up some of your Mac’s System Data by emptying the Bin:
- Click on the trashcan icon on the Dock to open the Bin.
- Right-click anywhere in the Bin, and choose Empty Bin.
Step 3: Optimize Your System Storage
By following a few simple tips, you can prevent System Data from hogging up space on your Mac’s storage disk.
Some of these tips are:
- Whenever you uninstall an app, double-check to see if its cache still exists in the ~/Library/Cache directory. If it does, delete the app’s cache.
- After installing a third-party app, delete the installer, or move it to an external storage drive.
- I recommend periodically cleaning the ~/Library/Logs folder. Over time, unnecessary log files can start occupying a lot of storage space.
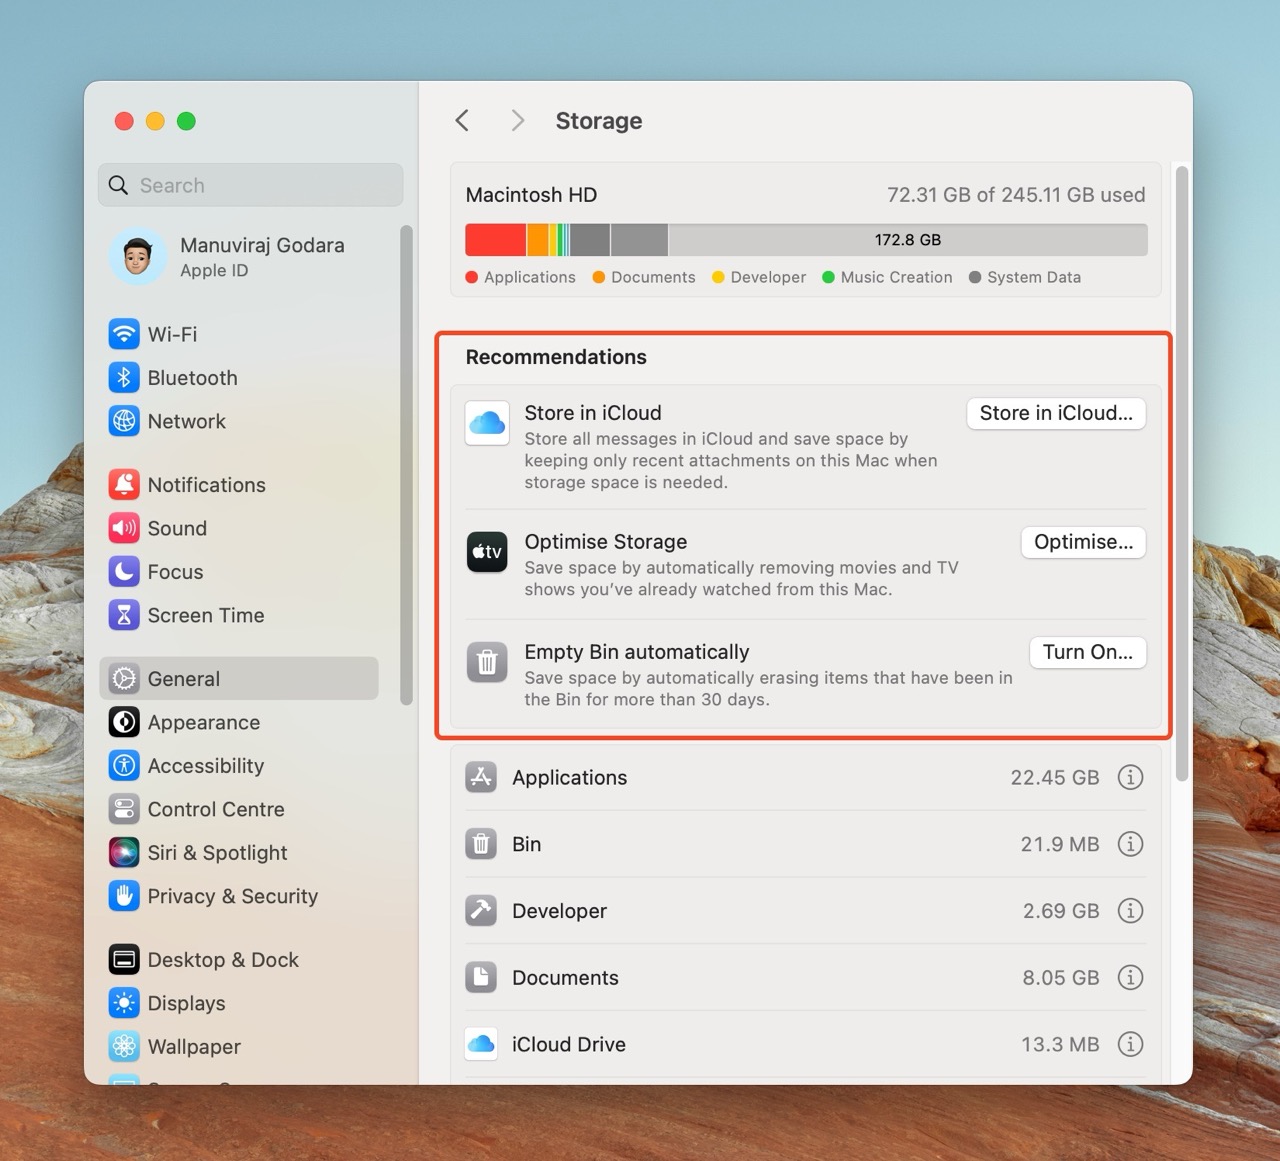
In addition to these tips, macOS’ Storage Information screen recommends and lets you enable some storage saving options. Here’s how:
- Click on the Apple logo in the top-left corner of the screen and click About This Mac.
- Click on More Info.
- Click on Storage Settings under Storage.
- Enable the options under Recommendations according to your preferences. I recommend enabling the Empty Bin automatically option. If you have enough iCloud storage, enable the Store in iCloud option as well.
FAQ
If macOS’ System Data is huge, it’s usually because of these reasons:
- There are numerous applications installed on your Mac. These apps create caches, that are stored in the ~/Library folder, which is a part of System Data.
- Too many old Time Machine, and iOS backups stored on your Mac.
- Orphaned app data from uninstalled apps.
- Files stored in the Bin.
Conclusion
System Data can occupy precious storage space you need for other files and media. Before cleaning it up, analyze what folders and file types are taking up the most space on your drive. You can use Mac’s storage settings window, or third-party storage analyzers to do this.
To remove some of your Mac’s System Data, do the following—delete any old backups and temporary files, clean up app caches from the ~/Library folder, wipe out unneeded downloads, and empty the Bin. A good Mac cleaning software can make the job easier.
Once you’ve done that, it’s a good idea to enable macOS’ storage recommendations in the Storage Settings screen. This will help you manage the System Data on your Mac more efficiently.