
Table of Contents
Having a lot of albums stored on your iPhone can be a mess. If you want to declutter your photo albums, knowing how to delete albums on your device is essential. But, it is important to note that not all albums can be deleted. In this article, we will explain why you can’t remove certain albums and provide step-by-step methods to delete albums on iPhone.
Why You Can’t Delete All Albums on an iPhone?
Before we explore the ways to delete albums on your iPhone, let’s find out why some are off-limits for deletion. During our research, we found out that there are different cases and reasons why users could not delete albums. The main ones include the following:
- 💿 Synced Albums: Albums that sync with other devices, such as your Mac or iCloud, cannot be deleted directly from your iPhone. You’ll need to manage them from the source where they are synchronized. This is because these albums are interconnected with your other devices, and deleting them might affect data consistency.
- 💻 System-generated Albums: Your iPhone generates some albums automatically, like Screenshots or Recently Deleted. These albums are essential for the smooth operation of your device and its features.
- ⭐ Favorites: The Favorites album is a unique one. While you can add photos to this album that you consider your favorites, you cannot delete the entire album itself. It is a built-in feature that is there to help you quickly access your favorite photos.
- 🕤 Recents: The Recents album is a bit special. It is composed of every picture and video saved on your iPhone, representing your entire media collection. This album cannot be deleted because it is a location where all your photos, videos, and all other visual content on your iPhone are stored.
Do Deleting an Album on an iPhone Delete the Pictures Inside?
No, deleting an album on your iPhone does not delete the pictures inside. If you created that album yourself, deleting it only removes the organization and grouping of photos. The photos themselves remain in your device’s photo library. Let’s break it down with a practical example.
Imagine you created an album called Christmas Party 2022 on your iPhone, and it holds over 100 photos and videos from that year’s festive gathering. If you decide to delete the Christmas Party 2022 album, this specific album gets removed from your list of albums, as it was something you created locally.
However, the photos and videos within that album remain intact. They don’t disappear, instead, they continue to reside in your camera roll within the Photos app on your iPhone. It’s as if you’ve taken the label off a folder, but the contents of the folder remain from its original location.
How to Delete Photo Albums on an iPhone
Now that you understand why certain albums cannot be deleted, let’s explore the methods for removing the albums that you can delete. You have several options for managing your photo albums on your iPhone, and we will go over three of them. Each method has its own advantages and considerations.
In addition, we evaluated each method based on simplicity, efficiency, and any additional costs involved. The choice of which method to use depends on your specific needs and preferences. By understanding these methods, you can choose the one that works best for you to effectively manage your photo albums on your device.
Method 1: Using the Photos App
| Method simplicity | Method efficiency | Additional costs |
| 5 out of 5 | 4 out of 5 | 0 out of 5 |
When it comes to simplicity, using the Photos app on your iPhone to delete albums is top-notch. It is the most straightforward process that does not require any additional costs, as this app is built-in, making it easy for you to manage your photo albums. Here’s a step-by-step guide on how to delete an album in the Photos app on your iPhone:
- Open the Photos app on your iPhone.
- Tap on the Albums tab at the bottom of your screen.
- Tap See All at the top right corner of your screen then tap Edit.

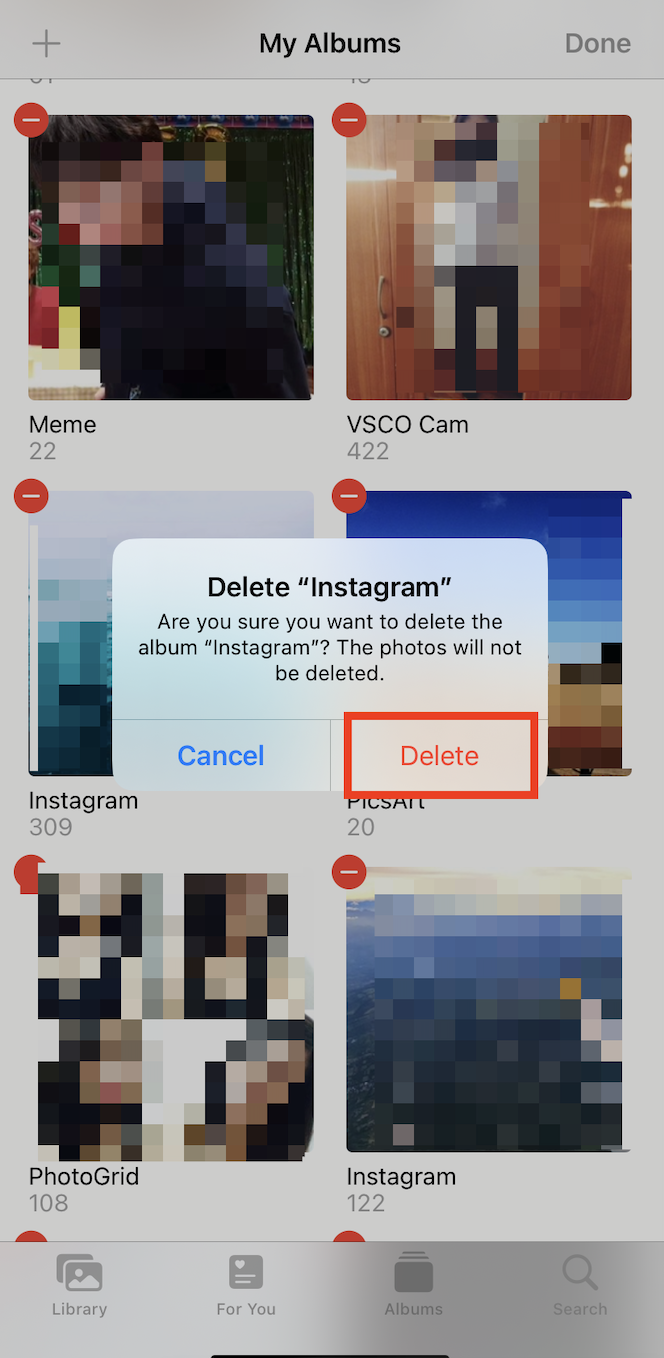
- From the albums that you can only delete, you will see a – icon. Tap that icon to delete that entire album.
- A window will pop up. Tap Delete to confirm.
- To delete multiple albums, just repeat steps 4 to 5.
Method 2: Using iCloud
| Method simplicity | Method efficiency | Additional costs |
| 4 out of 5 | 5 out of 5 | Varying (depends on your iCloud storage plan) |
Deleting your photos using iCloud is another way to free up cloud space. This can be done using other devices, and here’s a step-by-step process on how to delete albums using iCloud on your iPhone:
- Using the browser in your iPhone, go to iCloud.com and sign in to your account. iPhone will detect your Apple ID, so click Continue to proceed.

- From the iCloud window, scroll down and tap Photos.
- Tap the Albums option located at the lower-right corner of the screen, and then tap See All, then click Edit.

- Locate the album that you want to delete.
- You will see a – icon on the albums that you can delete. Tap that icon to delete that album.
- A pop-up window will appear. Tap Delete to confirm deletion. If you are unsure yet of deleting the album, tap Cancel as this action cannot be undone.

If you’re more comfortable using a Mac or PC to access your iCloud, the steps are a little different. See the below guide on how to delete albums in iCloud using a computer:
- Open your browser, go to www.iCloud.com, and sign in using your Apple ID.
- On the homepage of iCloud, click Photos.
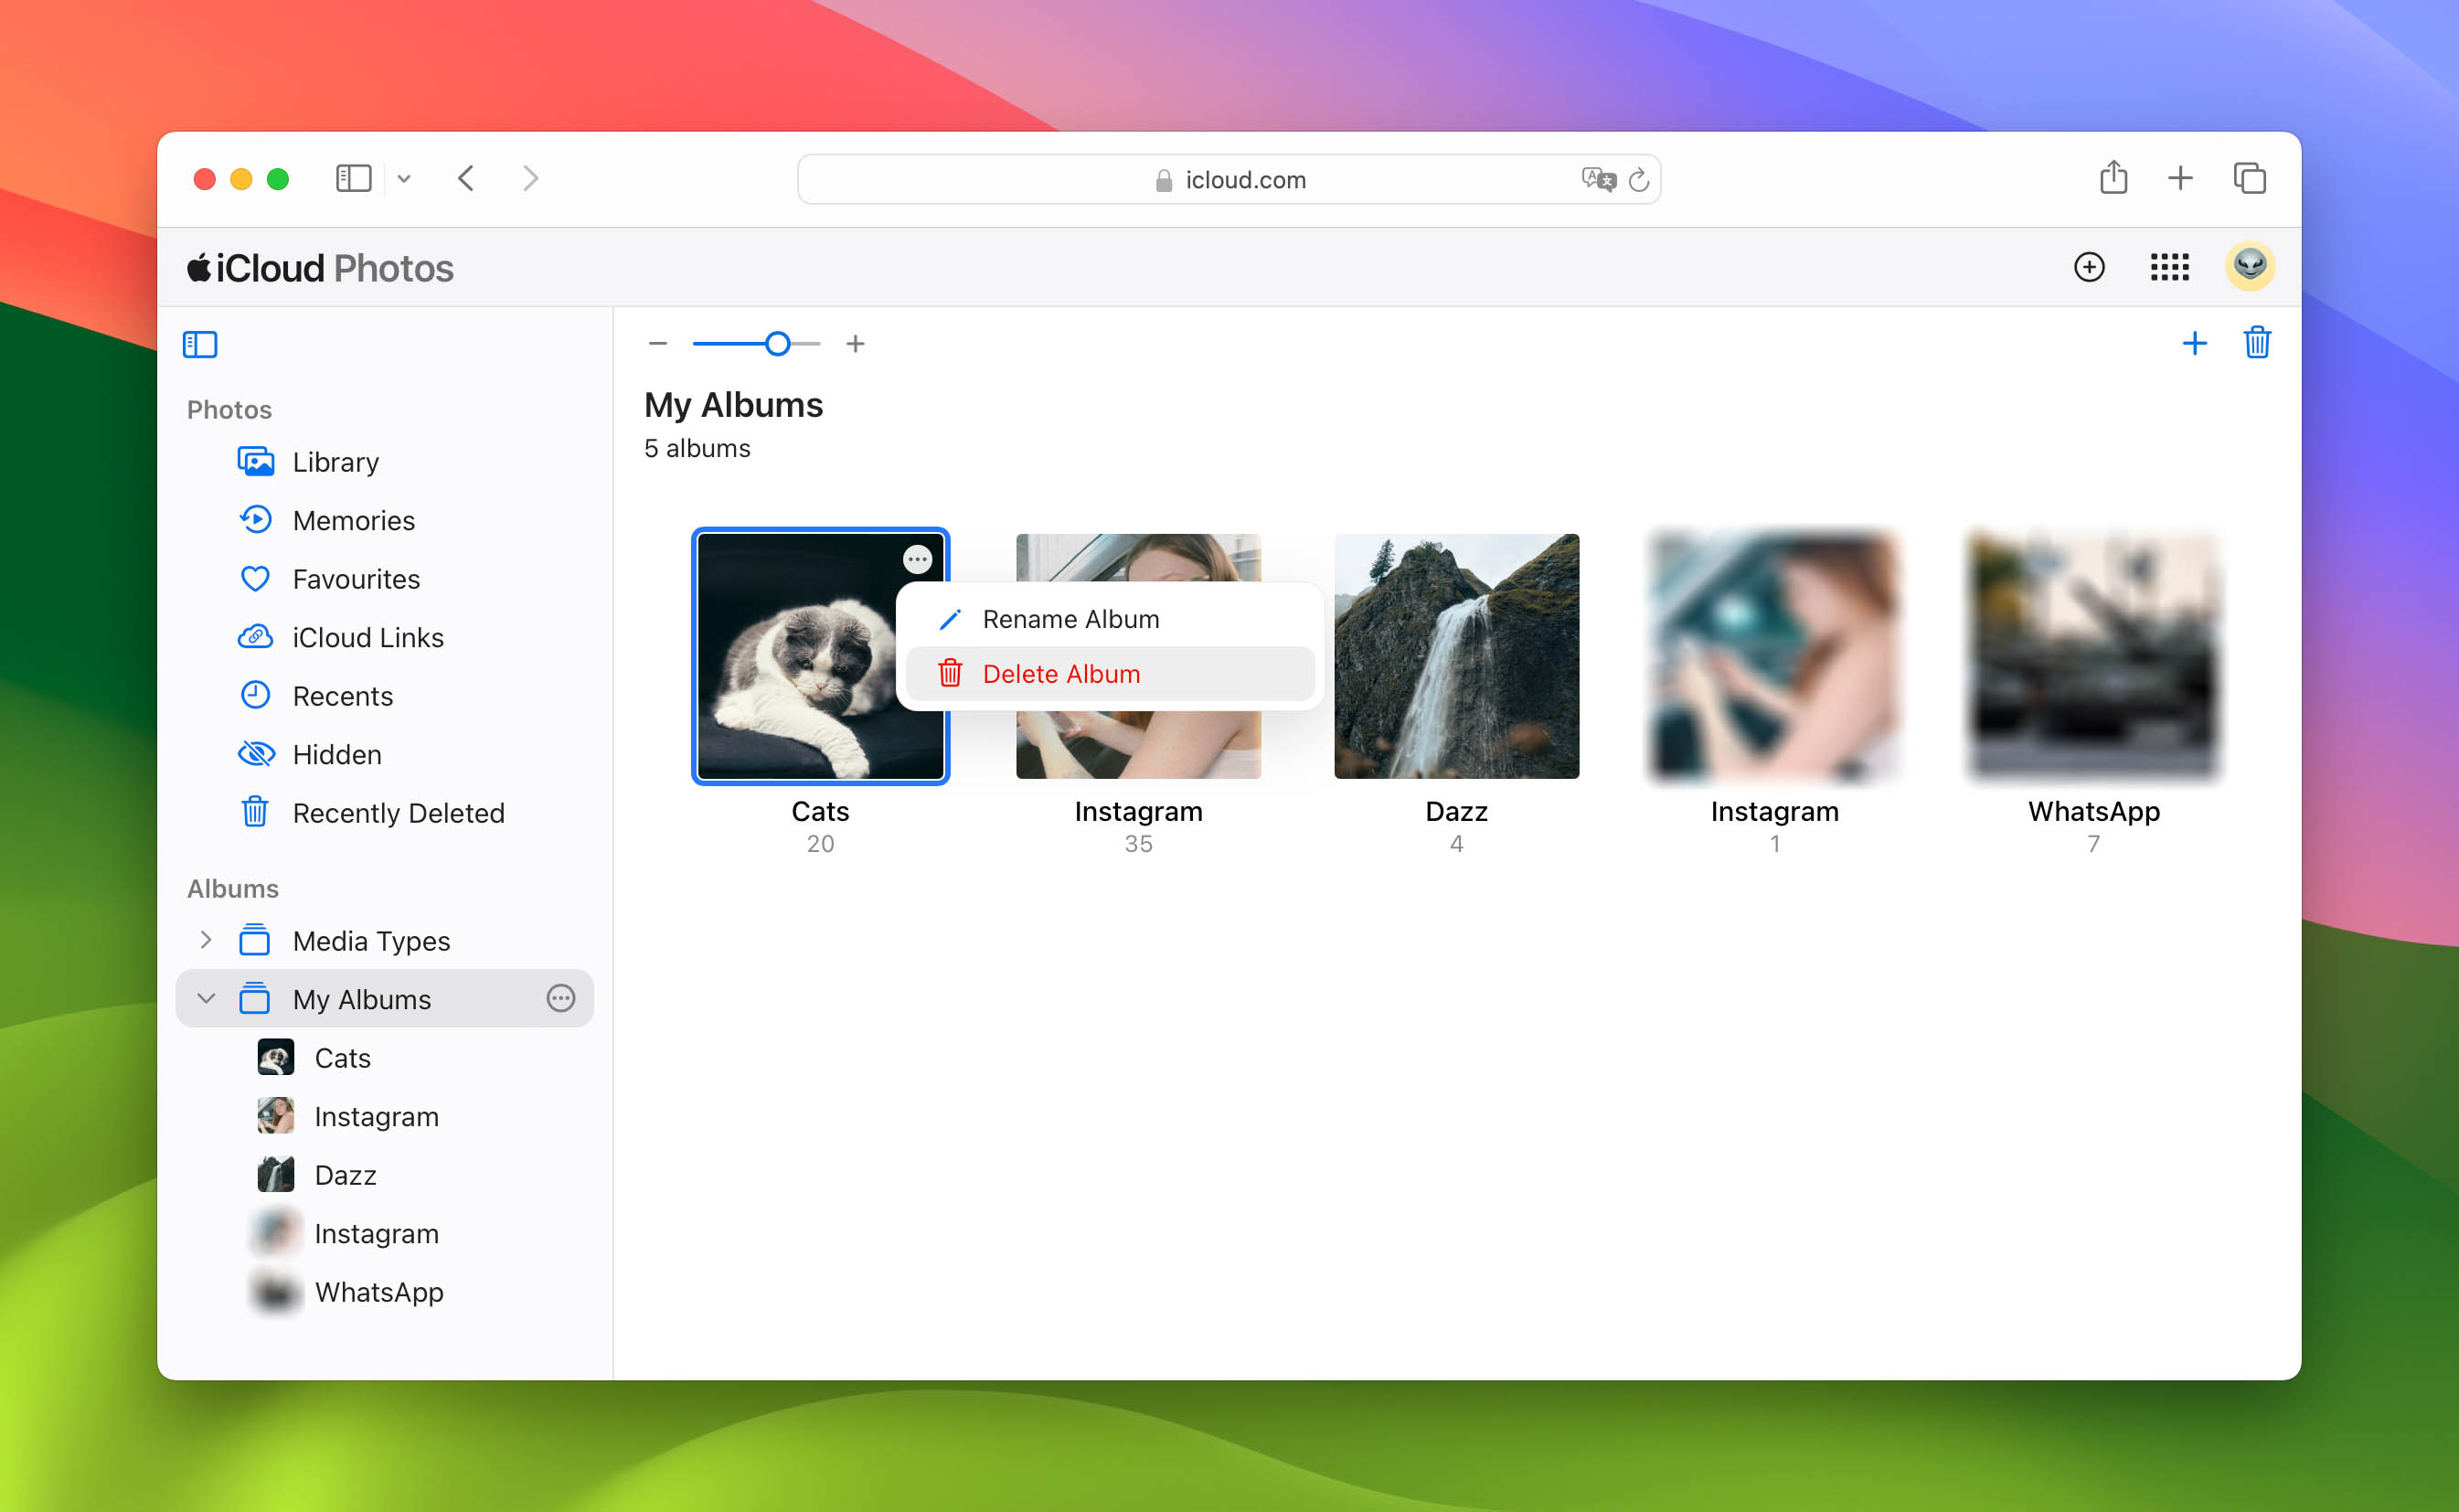
- On the left side panel, click My Albums, and it will show all albums stored on iCloud.
- Hover to an album that you want to delete, click the three dots icon on the top-right of the album, then select Delete Album. Confirm by clicking Delete again. Note that this action cannot be undone.

Method 3: Using Third-Party Tools
| Method simplicity | Method efficiency | Additional costs |
| 4 out of 5 | 4 out of 5 | Varies by App |
If you’re looking for more advanced options to manage your photo albums, third-party tools are worth considering. These apps, such as Slidebox and MyPics, can provide additional functionality and features to help you manage your albums on your iPhone. For example, our team tried Slidebox, it has a smooth user experience design, and it made organizing the photos and albums faster. Here are some common features and advantages you can find:
- Filtering and Sorting: Some third-party apps offer advanced filtering and sorting options, including calendar views, which can make it easier to organize and delete your albums.
- Passcode Protection: Many of these apps allow you to lock them with a passcode, which adds an extra layer of security for your important photos and private videos.
- Batch Import and Deletion: You can bring in numerous photos and videos at once from your Photos app into these third-party tools. After importing, there is a simple way to automatically delete them, streamlining your photo album management process. Additionally, these apps often provide a clear view of which photos you’ve already imported.
- Custom Album Organization: These tools enable you to create your own albums and group several albums into sets for better organization. You can arrange them by date or name according to your preferences.
It is important to note that the specific steps for deleting albums using third-party tools will vary depending on the app you choose. To get the most out of these tools and understand how to delete albums within them, refer to the app’s instructions and help guides for guidance.
FAQs
If you don’t want to use or look at Shared Albums on your iPhone, here’s how to turn them off:
- Go to Settings on your iPhone.
- Tap on Photos.
- Turn off Shared Albums.
- Tap OK.
Remember that when you turn off Shared Albums, it will remove all shared photos from your iPhone. This includes albums you made and shared with others, as well as albums that were shared with you.
Deleting empty albums is easy to do. Just follow these steps to delete empty albums on an iPhone:
- Go to your Photos app.
- Navigate to Albums.
- Tap See All, then tap Edit.
- Locate the empty albums that you wish to get rid of.
- Tap the minus icon at the corner of that album.
- Tap Delete to confirm.
- If you wish to delete multiple empty albums, just repeat steps 4 to 6.
Conclusion
Knowing how to remove albums from Photos on iPhone helps you manage your photo library efficiently. By following the provided methods, you can declutter your device and free up valuable storage space. Keep in mind that while you can delete most albums, some, like system-generated albums, cannot be removed. Always exercise caution when deleting albums to ensure you don’t lose any important photos.