Table of Contents
Whether you’re a casual clicker or a photography enthusiast, encountering a blurry photo can be disheartening.
Can You Fix a Blurry iPhone Photo?
Blurriness can often cast a shadow on what could have been a perfect photo. The question naturally arises: can you fix blurry iPhone photos? The answer, in many cases, is “Yes,” but with a few important caveats.
The success of fixing a blurry iPhone photo largely depends on the degree of blurriness and the root cause of the pixelated image. Understanding what led to the blurriness is essential for selecting the right approach.
Factors That Can Lead to Blurry Photos on an iPhone
No matter your iPhone model, whether it’s the latest iPhone 15 or a still relevant model like the iPhone 11, there are various factors that can lead to blurry photos on your device.
Each of these factors requires a specific approach to address the issue effectively. Here’s a table explaining some of them:
| Factor | Description |
| 🫨 Camera Shake | If you aren’t using a tripod or are in motion, unsteady hands or abrupt movements while taking a shot can result in a camera shake. This is one of the most common causes of blurriness and fuzzy pictures. |
| 🔅 Low Light | Insufficient lighting conditions can force the camera to use slower shutter speeds, increasing the likelihood of blurred images. This can happen when there is no natural source of light, and artificial alternatives don’t light the subject well enough. Low light conditions also cause grainy images with low clarity. |
| 📹 Focus Issues and Depth of Field | Problems with focusing can occur when you have objects at varying distances. If the subject is not in proper focus, it can lead to blurry photos. The depth of field, camera angle, and subject’s position with the background can adversely affect your image if not properly taken into account. |
| 🔎 Digital Zoom | Utilizing digital zoom instead of optical zoom can reduce photo quality and contribute to blurriness. As you zoom in more and more into your subject, the effects of camera shake get amplified. The image’s quality also reduces as it is limited by your iPhone camera’s sensor. |
| 😶🌫️ Dirty Lens | A dirty or smudged lens can obscure the camera’s view and cause focusing issues. Having a clean camera lens or buying a protective cover to protect your iPhone camera from smudges and scratches can help you combat hazy images. |
| b>⚙️ Hardware and Software Issues | Technical problems or software glitches within the iPhone’s camera system can be a source of unexpected blurriness. If you suspect a hardware defect and your device is under active warranty, we recommend going to an Apple service center to get it checked or replaced. Otherwise, a simple software update could help fix your camera’s issues with blurred photos. |
How to Fix Blurry Photos on iPhone
Now that you know some of the potential causes of unwanted blurriness in your photos, we’ll discuss some methods to fix blurry pictures on your iOS device.
In this section, we’ve compiled four methods that will allow you to enhance and sharpen your blurry images for free.
Method 1: Sharpen Blurry Picture In Photos App
| Ease of Use | Effectiveness | Additional Costs | Overall Rating |
| 4/5 | 3/5 | None | 3.5/5 |
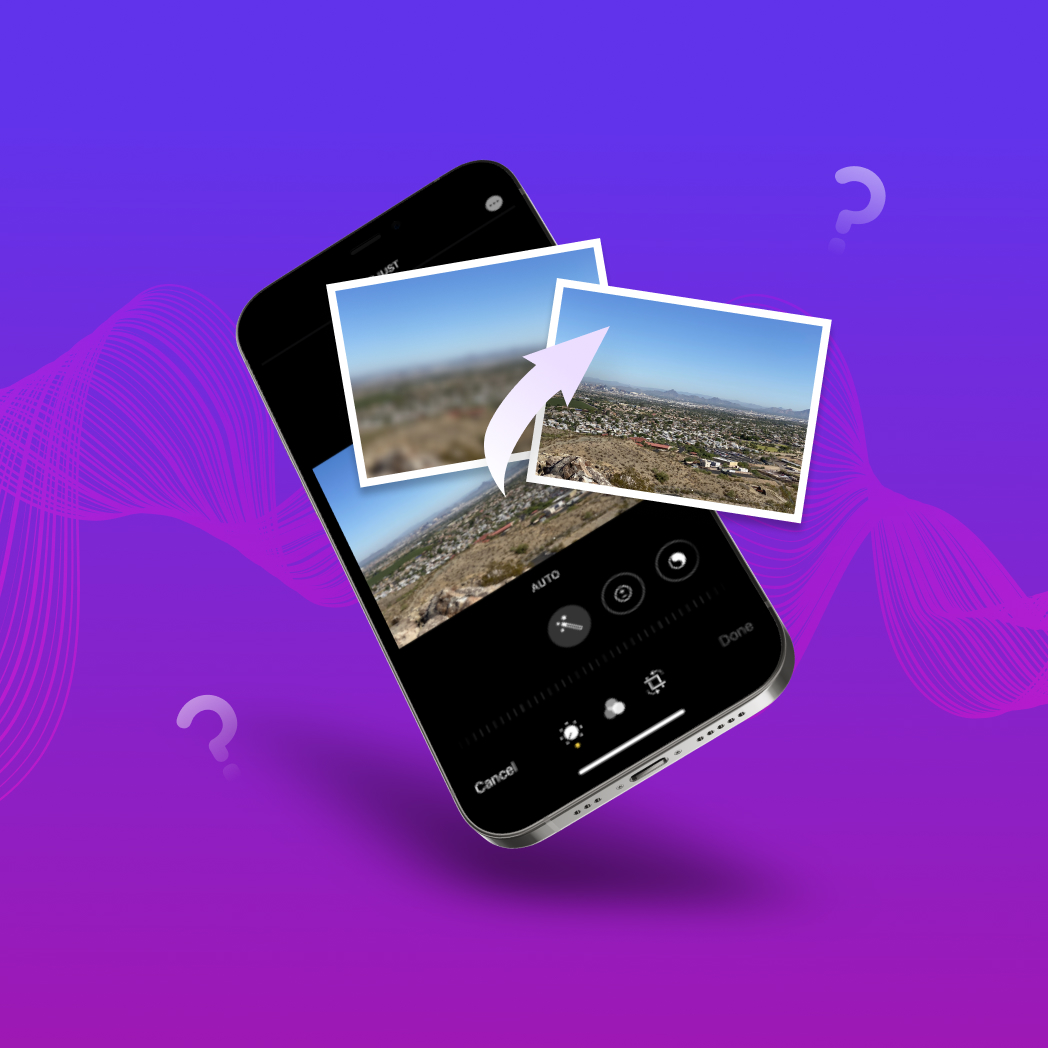
Using the “Adjust” tool within the Photos app, you have the power to fine-tune various aspects of your photos, including exposure, brightness, contrast, and sharpness. This versatile built-in tool enables you to make a picture clearer on an iPhone with a particular focus on sharpness.
By making adjustments in the sharpness settings, you can refine the clarity and detail of your photo, effectively reducing blurriness and bringing your image back into focus.
Here’s a brief step-by-step guide on how to sharpen a blurry picture using the “Adjust” tool in the Photos app:
- Open the Photos app on your iPhone and select the blurry photo you want to enhance.

- Tap the “Edit” button in the upper right corner. In the editing toolbar at the bottom, tap the “Adjust” icon (represented by a dial). You’ll see various adjustment options, including Exposure, Brilliance, Highlights, Shadows, Contrast, Brightness, and Sharpness.
- To sharpen the image, slide the “Sharpness” adjustment to the right. As you move the slider, you’ll notice the photo becoming sharper and more defined.

- Make subtle adjustments to find the right balance and ensure the photo looks clear without appearing overly processed.
- After you’ve fine-tuned the sharpness and made any other desired adjustments, tap the “Done” button in the lower right corner. This will confirm your changes.
- You’ll be prompted to save a copy of the edited photo. To do this, tap “Save as a Copy.” This ensures that your original photo remains intact, and the edited version is saved as a separate image in your Photos library.
Method 2: Use Photo Editing Apps
| Ease of Use | Effectiveness | Additional Costs | Overall Rating |
| 3/5 | 4/5 | Moderate | 3/5 |
Third-party photo editing apps can be incredibly useful when it comes to unblurring photos on your iPhone. These apps provide an array of advanced features and tools that can help enhance your photos and unblur an image on an iPhone.
Here are a few popular third-party photo editing apps, along with a glimpse of their capabilities:
- Snapseed: Snapseed is a versatile photo editing app developed by Google. It offers an array of tools to improve photo quality, including sharpening features, exposure adjustments, and filters. You can fine-tune sharpness to eliminate blur and enhance details with precision.
- Adobe Lightroom: Adobe Lightroom is a powerhouse in the world of photo editing. The iOS app provides advanced features for reducing blurriness and improving image quality. You can adjust sharpness, clarity, and even apply selective edits to specific areas of your photo if they’re blurred and fuzzy.
- VSCO: VSCO is known for its stylish filters, but it also offers fine-tuning tools. With VSCO, you can adjust sharpness and clarity to rescue blurry photos. The app’s intuitive interface makes it a favorite among both amateur and professional photographers.
- Fotor: Fotor is an all-in-one photo editing app that includes a suite of tools for enhancing photos. You can sharpen images, adjust exposure, and fine-tune various settings to reduce blurriness and bring out details.
- PhotoApp: PhotoApp is a user-friendly editing app that simplifies the process of fixing blurry photos. It includes a sharpening tool, among other features, to enhance photo quality with ease.
Method 3: Fix Blurry Pictures Online
| Ease of Use | Effectiveness | Additional Costs | Overall Rating |
| 4/5 | 4/5 | Low | 4.5/5 |
If you’re looking for a convenient way to unblur your iPhone photos without the need for installing software, there are several online tools that can help. These web-based platforms utilize a mix of classical and AI-based algorithms to sharpen and enhance your blurry pictures. Here are a few notable online tools that you can use to fix blurry pictures:
- Picwish:

Picwish is an easy-to-use online tool that offers both classical and AI-enhanced solutions for fixing blurry photos. Upload your image, and Picwish’s algorithms work to enhance sharpness and clarity, improving the overall quality of your photo. - Fotor:
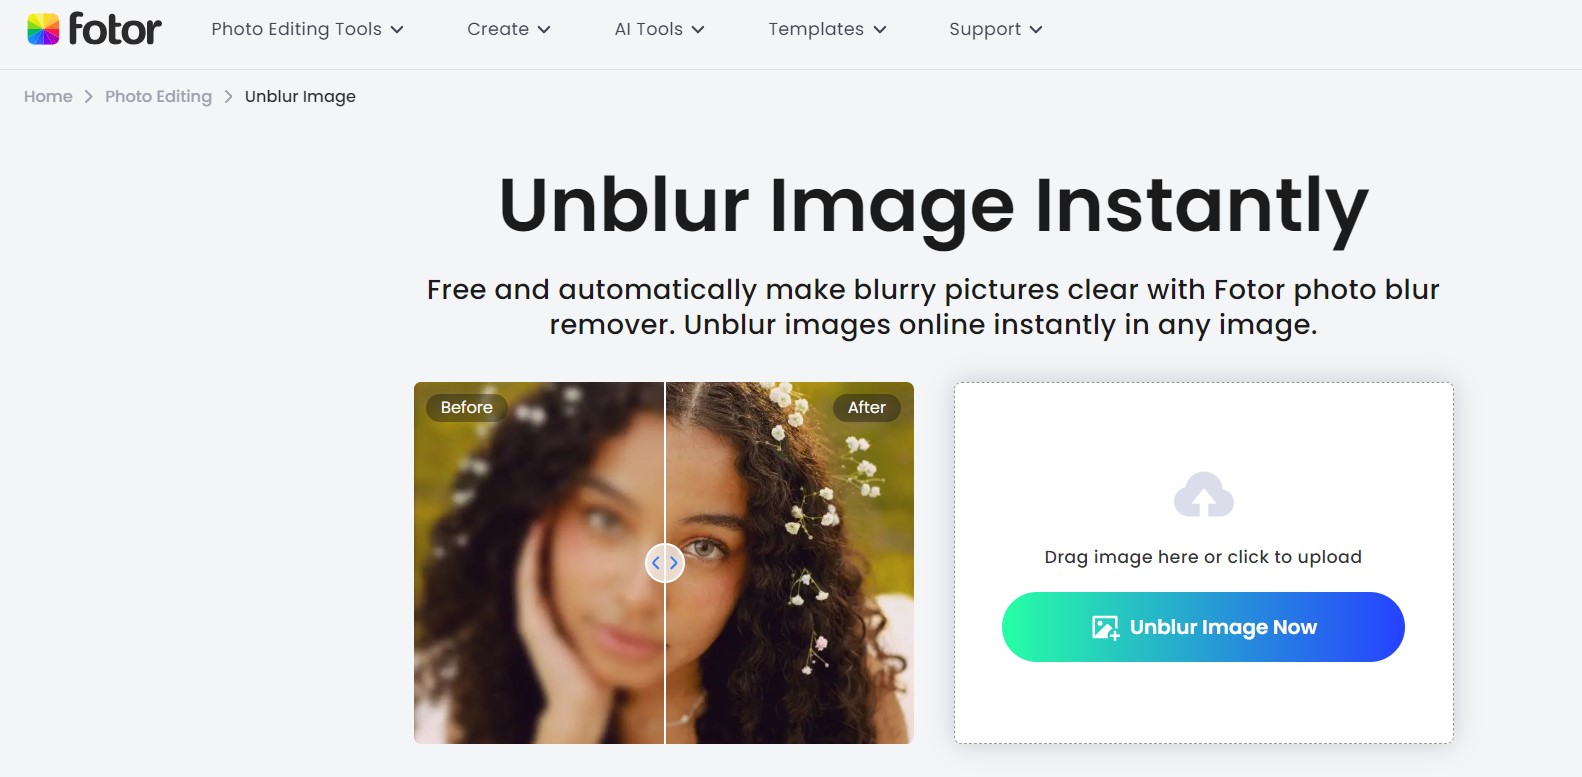
Fotor, known for its versatile online photo editing platform, provides an online solution for unblurring images. Simply upload your blurry photo, and Fotor’s tools will help refine the image, reducing blurriness and enhancing details. - VanceAI:

VanceAI is another web-based platform that combines AI technology with traditional image processing methods. You can upload your blurry photos, and VanceAI’s algorithms will sharpen them to produce clearer, more vibrant images.
Method 4: Unblur Photo Using Mac Tools
| Ease of Use | Effectiveness | Additional Costs | Overall Rating |
| 4/5 | 3/5 | None | 3.5/5 |
Mac users who need to unblur a photo can utilize some built-in tools that can help enhance image quality. Here are two Mac tools you can use to unblur photos:
Using Preview:
- Open the blurry photo in the Preview app. You can do this by right-clicking on the image file and selecting “Open with Preview.”
- In the Preview app, click on “Tools” in the top menu bar. Now choose “Adjust Color.”
- This will open a panel with various adjustment options. You can modify settings such as exposure, contrast, and sharpness. To specifically enhance sharpness, slide the “Sharpness” slider to the right until you achieve the desired level of clarity.
- Once you’re satisfied with the changes, save the edited photo by clicking “File” and selecting “Save.”
Using Photos:
- Open the Photos app on your Mac.
- Locate and open the blurry photo you want to fix. Then click on “Edit” in the top-right corner of the Photos window.
- In the editing mode, you’ll see various adjustment options on the right side. To enhance sharpness, click on “Adjust.”
- In the Adjust pane, click the triangle next to Sharpen to open three more sliders. Drag the various “Sharpness” sliders to the right to improve the clarity of your image till you’re satisfied.
- Finally, click “Done” to save the edited photo.
Best Practices for Dealing with Blurry Photos on iPhone
Blurry photos can be minimized by keeping some useful tips in mind while clicking pictures. We’ve compiled a list of handy tips and best practices to follow for effectively dealing with blurry photos and ensuring sharp images. Here are some of them:
- 🔄 Reboot the iPhone to Fix Temporary Glitches: Sometimes, minor technical hiccups can cause blurriness. Restarting your iPhone is a simple yet effective way to resolve these issues and improve photo quality for blur-free images.
- 🔍 Inspect Camera Lens: A clean camera lens is vital for taking clear shots. Ensure your camera lens is clean and free from smudges or dirt that can obstruct the view and contribute to blurriness. You can also put a scratch guard on your iPhone’s camera for added protection.
- 📸 Use Burst Mode for Moving Objects: When capturing fast-moving subjects, you can switch to burst mode by holding down the shutter button. This takes a series of continuous shots, which you can then choose from. This increases the chances of getting a clear image without blur.
- 🎯 Use Manual Focus: You can take control of your camera’s focus by tapping on the screen to select the focal point. This is especially useful when you want to emphasize a specific subject in the frame and change the focus manually.
- 📢 Consider Making Steady Shots: Reducing camera shake is crucial to reduce blur. You should use both hands to hold your iPhone steady while clicking pictures. Alternatively, you can invest in a tripod or stabilization accessories compatible with your iPhone to ensure sharp photos.
- 💡Use Appropriate Lighting: Adequate lighting can make a world of difference in your photos. Always choose well-lit settings or use external lighting sources to enhance the quality of your photos, especially in low-light conditions. You can also make use of your camera’s flash in dark environments to light up the shot.
FAQ
Sudden blurriness in iPhone photos can result from various factors, including camera shake due to unsteady hands, low light conditions, focusing issues, and depth of field limitations. Hardware and software problems can also contribute to unexpected blurriness. Identifying the specific cause of blur is essential for effective correction.
You can unblur photos on your iPhone for free using built-in tools like the “Adjust” feature in the Photos app, which allows you to modify settings such as sharpness and exposure. Additionally, there are free third-party apps available on the App Store that offer advanced editing capabilities for unblurring photos.
To unblur a screenshot on your iPhone, you can follow the same methods used for unblurring regular photos. Use the “Adjust” tool in the Photos app to modify sharpness, brightness, and contrast. Alternatively, employ third-party photo editing apps for more advanced correction.
Unblurring a portrait picture on an iPhone involves the same methods as fixing any other type of photo. Use the “Adjust” tool in the Photos app or consider third-party editing apps for more advanced adjustments.
Conclusion
Having blurry photos can be disheartening. Fortunately, fixing blurry pictures on your iPhone is not only possible but also relatively simple. The key takeaway is that the success of your efforts depends on the degree of blurriness and the specific cause of the problem.
Using the tried and tested methods in this article, you can restore the clarity and vibrancy of your photos. Regardless of your iOS version, whether it’s the latest iOS 17 or an earlier version like iOS 14, you now have a range of options to transform your blurred images into sharp, visually stunning memories.