
Table of Contents
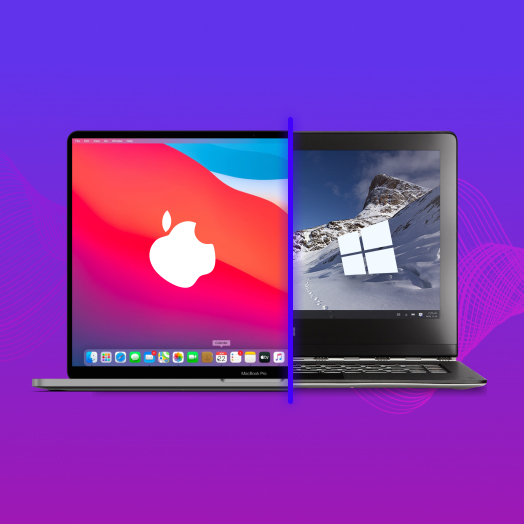
Macs are known for being easy to use. But if you’ve been using Windows for the longest time, moving to a Mac can be a bit difficult and can take some time to get used to. The good news is that you can make your Mac look and work like Windows 10. It’s not hard to do, and it can make your Mac feel more familiar and less intimidating.
Can You Make a Mac Look Like Windows?
The short answer is yes, you can make a Mac look like Windows 10. However, there are some good and bad points to consider when doing this. Before performing this procedure, here are some pros and cons of making your Mac resemble Windows.
✅ Pros:
- It can reduce the learning curve and make the switch less daunting for Windows users.
- You can keep doing things the way you’re used to from Windows, so you can be more efficient in your workflow.
- Some Windows-only software or specialized applications might be easier to run on your Mac when it looks and feels like Windows.
⛔ Cons:
- You might miss out on some cool things that only macOS can do, such as ecosystem integration and exclusive macOS software tools.
- Sometimes, the tools you use to make your Mac look like Windows might not work well with macOS updates.
- Using extra apps for customization can cause more work and potential security risks.
- It might discourage users from exploring unique macOS capabilities and features, limiting proficiency with the platform.
- It might be challenging to find comprehensive support and updates for the tools and apps used to achieve the Windows-like look, making maintenance more difficult.
Now, let’s explore how you can customize your Mac to bring some key Windows features and functionalities to your macOS environment.
Comprehensive Taskbar
The Windows Taskbar is another user interface feature that many individuals will miss when migrating to a Mac. It presents the open applications differently than the Mac’s Dock and can be hard to leave behind.
New Mac users who miss the Taskbar have two options that bring a lot of its functionality to your Apple computer. Both uBar and ActiveDock provide Taskbar emulation that enables Windows users to feel more comfortable with their Mac.
uBar

With uBar, you can customize the macOS Dock or replace it altogether with a Windows 10 taskbar.
Similar to the Windows 10 Taskbar, all opened apps will be displayed. Hovering over an app will show a small preview.
ActiveDock

ActiveDock offers users another option to replace the Windows Taskbar on a Mac. This app uses the Mac’s Dock and allows you to customize its appearance and define how owned apps should function.
ActiveDock enables you to add a start menu and allows previews for all open tabs. It attempts to provide a more familiar Taskbar experience while building on the capabilities of macOS.
App Window Management Made Easy
Windows 10 has a unique feature known as window snapping. You can drag a window to any screen corner, and it will fill the given space. By default, macOS doesn’t have such an option. The closest that Mac comes to that functionality is the Split View.
A more practical alternative is to add BetterSnapTool to your system. This $3 app offers you many windows-like functionalities.

With it, you can define how windows should resize and what happens when you middle or right-click on the traffic light button.
You can also assign hotkeys for shortcuts. With this feature, you can set up the same shortcuts you were using on your Windows 10 machine.
If you want to explore other options, another alternative is to add Magnet to your system. Magnet is a highly efficient app window management tool that allows you to quickly and easily arrange multiple windows on your screen. With a simple drag to the edge of the display, you can resize any app to occupy half of the screen, and dragging windows to the corners allows you to snap them into quarters. You can even create thirds or sixths on ultra-wide monitors by sliding on the bottom edge.
In addition, Magnet offers customizable keyboard shortcuts for all commands, making it even faster to arrange your windows. The app is compatible with up to six external displays and works on all macOS versions since 10.13 High Sierra, with optimization for macOS 14 Sonoma.

It also includes a menu bar icon for easy operation and comes with various customization options. Overall, Magnet greatly enhances workspace efficiency by eliminating the need for constant app switching.
Seamless App Switching
Windows uses the Alt and Tab keystroke combination to switch between all open apps on your machine.
When pressed, all opened applications appear in the foreground and a selection pane moves across them allowing you to select a pane by landing on it.
After using a Windows system for many years, muscle memory kicks in and makes it extremely difficult to use new keystrokes to switch between applications.
The Witch add-on for macOS brings lets you switch apps in the same way as you did on Windows.

The app’s customization options let you assign whatever shortcuts you please. It also allows you to change the switcher’s layout—jump between apps using a menu bar button, spotlight themed design, or set it up however you like to work.
Another tool that you can try is called Hyperswitch. This tool enhances the app-switching experience on your computer. It offers a more visual and efficient way to switch between open applications. With HyperSwitch, you can preview open apps and switch between them quickly, making multitasking and window management smoother and more intuitive. It’s a handy tool for Mac users who want to work faster and improve their productivity.
Swift File Lookups And Management
Though Mac’s Finder and the File Explorer on Windows have plenty of similarities, there are differences in functionality which may take time to get used to. Some examples include:
- Pressing Enter when a file is highlighted opens it on Windows, whereas on macOS, you get the option to rename the file;
- The cut option is missing when you right-click on a file on your Mac;
- Copying and pasting a file makes use of different keystrokes on Windows and Mac computers.
To gain more Microsoft-like functionality, you can use the XtraFinder add-on. This application provides all the cutting and pasting options familiar to Windows users as well as new features like a limitless clipboard, dual-panel view, and better file searching capabilities.

Another option is to use the TotalFinder tool.

TotalFinder enhances the functionality of Finder, providing a better experience for users. It works just like the normal Finder but adds features such as tabs, dual panel, and colored labels.
Despite these additions, TotalFinder aims to keep the same general design as the original Finder. It is important to note that TotalFinder is a plugin, not a replacement for Finder. When launched, it injects code into the current instance of Finder running in memory. While there is a minor risk of compatibility issues with future Finder updates, the TotalFinder team is diligent in spotting and resolving any problems.
Users are encouraged to update to the latest version and report any issues for support, with the option of easily uninstalling TotalFinder and returning to the unmodified Finder if needed.
Bonus: Windows Keyboard on a Macintosh
A major challenge when migrating from Windows to Mac is the difference in default keyboards. Due to the familiarity with the keyboard layout and the fact that Windows keyboards are less expensive, many new Apple users prefer to use a Windows-style device.
Some of the most obvious differences are the Windows key which is missing on a Mac and the Alt key which replaces Mac’s Option key. Switching keyboard layouts can result in the loss of productivity as users struggle to learn the new keys positions.
Fortunately, you can use a Windows keyboard with your Mac. With just a few clicks you can set up a wired or Bluetooth Windows-style keyboard on your Mac and start enjoying the functionality of your familiar input device.
Reassigning keys is one way to replicate the Windows 10 environment on your macOS system. You can assign keys however you like on your Mac, for instance using the Control key instead of Command to make it more Windows-like.
The good news is that macOS allows key management without requiring any additional tools or drivers. To do so, refer to the steps mentioned below:
- Open system preferences, then click on the keyboard. Within the keyboard tab, you will find an option called Modifier Keys; click on it.
- Use the drop-down menu to select the keyboard.
- Select ⌥ for the Command key.
- Select ⌘ for the option key.
- Press OK and exit the window.

In this way, you can modify your keyboard to obtain the same functionality you had with your Windows system.
Aside from this, you can use Karabiner-Elements as an alternative. This tool can change your keyboard keys, add special rules, and even make new key combinations. It’s good for media controls, works with different keyboards, and handles international keys. It’s useful for customizing your keyboard the way you like to match your Windows experience.
FAQs
Here are the steps on how to sort folders to the top in Finder on a Mac.
Open Finder, click on its menu.
Select Preferences (or press Command+).
Select the Advanced tab and a checklist will appear.
Find the option labeled Keep folders on top when sorting by name and select it.
It can be advantageous to preview files before opening them and can save a lot of time. For instance, if you have a few documents open, you might want to preview them instead of checking each separately to find the one you’re looking for.
macOS doesn’t offer native window previews in the Dock, but you can use third-party apps like HyperDock, uBar, or ActiveDock to enable file previews by hovering over them.
By default, clicking the red X on a Mac app’s window doesn’t quit the app but leaves it running in the background. To make it behave like Windows, here’s how:
- Go to System Preferences
- Under the General section, and uncheck Restore windows when quitting and re-opening apps. This will that all instances of a closed app get halted.
Alternatively, you can use the RedQuits application to ensure apps terminate when the red X is clicked. Once the app is installed, uncheck the option that says Quit only when one window is left for that app. Now apps will terminate when the Red X is clicked.
Conclusion
Over the past decade, many users have shifted from Windows to Macintosh systems. There are many reasons to make the switch, including enhanced security, an extended lifespan for the machine, prompt software updates, and better resale value.
One of the main factors that steer some individuals away from a Mac is their reluctance to learn the new system and software. That should no longer be a concern as you can replicate many of the features of a Windows computer on a Mac with the addition of a few apps and some minor configuration changes. There is no excuse for even the most experienced Windows user to not try a Mac.