

Table of Contents
Whether you’ve accidentally erased the hard drive on your Mac or something else has led to such an outcome, it’s possible your situation is not hopeless yet. If not much time has passed since the problem happened and the drive wasn’t physically damaged, there are a few proven data recovery methods that can help to solve your issue and bring back the lost data.
What Happens If You Accidentally Erase Hard Drive on Mac?
The only way to delete a whole partition or disk on your Mac is via Disk Utility. If you’re not careful enough, just one click can remove a huge amount of data from your computer (or even all of it).
But what exactly happens with the data once you erase a hard drive on a Mac? It depends on the security settings of your Mac, but in general, the deleted files will still be present (even though you can’t see their physical presence) on the hard drive until they get overwritten with new data.
The recovery results in such a situation depend greatly on the data erasure settings on your Mac. There are four such settings:
- Fastest
- Fast
- Secure
- Most Secure
Fortunately, it’s possible to recover deleted files on Macs even in situations when you delete whole partitions or disks.
| Case | Solutions |
| I deleted the hard drive volume by accident, but my system volume is untouched | #1. Use a data recovery tool like Disk Drill #2. Recover from a DMG file with Disk Utility |
| I accidentally erased an external hard drive on Mac | #1. Use a data recovery tool like Disk Drill #2. Recover from a DMG file with Disk Utility |
| I accidentally erased Macintosh HD | #1. Reinstall the operating system and recover from a Time Machine backup #2. Run Disk Drill in Recovery Mode to find and recover the lost files |
How to Recover Files from Accidentally Erased Hard Drive on Mac
Using a data recovery tool is one of the easiest and most effective ways of restoring data from a deleted drive on a Mac. However, this data recovery method has a limitation since it can be used only when your computer’s system partition is unaffected unless your Mac is Intel-based and without a T2 chip. In short, as long as your device doesn’t contain an M1, M2, M3, or T2 chip, an effective data retrieval program will be able to scan your system disk while in recovery mode.
While there are a few good data recovery tools out there on the market, not all of them are capable of handling this data loss scenario. Therefore, when it comes to restoring files from an erased hard drive or a deleted HDD volume, our recommendation is Disk Drill since it is powerful enough to recover files of various sizes and can restore whole partitions.
Follow these steps to restore erased hard drive on a Mac using Disk Drill:
- Navigate to the official Cleverfiles website and download the newest version of Disk Drill, then install it on your Mac device.
- Make sure the erased hard drive is connected to your computer, and then launch the app. From there, select the affected hard drive from the list of available storage devices and click the “Search for lost data” button on the right side of the window.

- Disk Drill will begin thoroughly scanning your device. How long this takes depends on a variety of factors, such as the overall size of the drive, how fragmented it is, what kind of shape it’s in, and more. Once the scan is done, click the “Review found items” button at the top-right corner to proceed.

- When you get to the results screen, there’s a good chance you’ll be faced with a large number of recoverable files. You can narrow down this list by selecting a category on the panel to the left or utilizing the search feature at the top-right corner. Keep in mind that the search feature lets you search by file names as well as file extensions. After locating your files, select them by ticking the checkbox next to their file names, then hit “Recover” in the lower-left corner to continue to the next step.
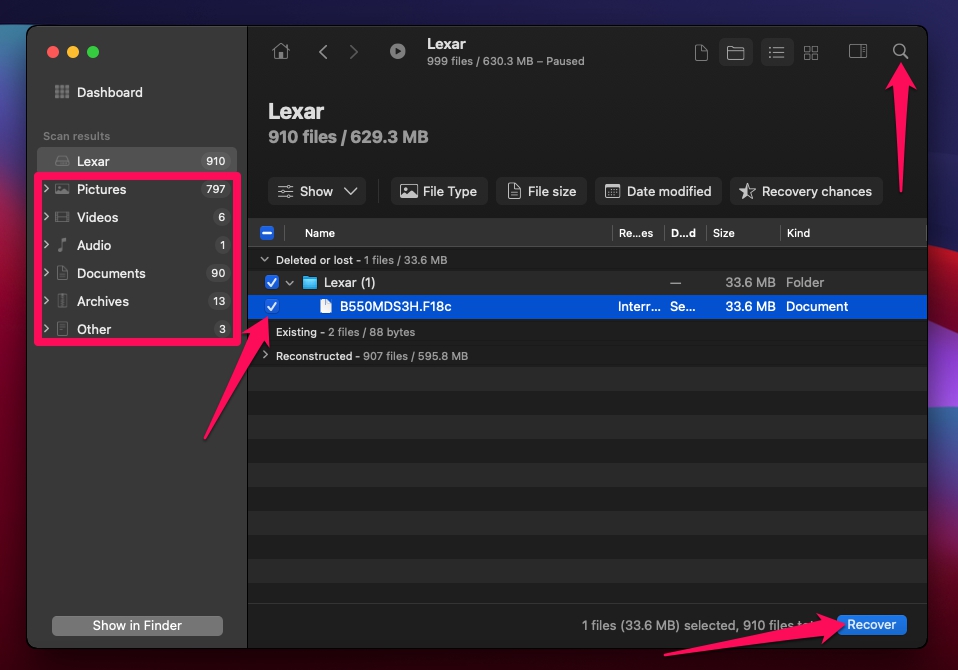
- Next, a small pop-up will appear where you’ll have to decide on the destination location of the files you’re about to recover. It’s worth noting that you should always select a storage device that’s different than the one you’re trying to restore files from. This minimizes the risk of overwriting data. Once you’re ready, click the “Next” button to proceed to file recovery.


How to Restore Accidentally Erased Hard Drive on Mac in Disk Utility
If you’ve accidentally erased the whole disk or a partition on your Mac and have previously made a backup of it in the form of a DMG file, you can easily restore the drive from that disk image. Overall, the process is hassle-free. And you won’t need to download any third-party apps to your Mac since everything will be done through a native macOS application called Disk Utility.
Follow these steps to restore an accidentally erased drive on a Mac from a disk image using Disk Utility:
- Launch Disk Utility on your Mac (click Finder and go to Applications > Utilities).
- Look through the available devices on the sidebar on the left and click the one that you wish to recover.
- Click the Restore button.

- Click the arrows near Restore from to select the volume from which you wish to recover the drive. Or click the Image button if you want to use a DMG file instead.
- Click Restore to start the recovery process.


How to Recover Erased Macintosh HD With a System on It
When you erase the whole Macintosh HD system volume, you delete not just the files that you used to store on your Mac but also the operating system itself. In such a case, you have two options: launch a data recovery tool like Disk Drill in Recovery Mode to try to restore the deleted files or reinstall your macOS and then recover the data from a Time Machine backup.
Option A: Launch Disk Drill in Recovery Mode
There is a chance that the files that went missing after you erased Macintosh HD on your computer haven’t yet gotten overwritten by other data. If that’s the case, you’re in luck since you should be able to bring back the lost data by running a Disk Drill scan in Recovery Mode on your Mac.
Here’s what you should do:
- Boot your Mac in Recovery Mode (for Intel-based Macs, turn on your Mac by pressing the power button and holding the Command + R keys.
- Click Utilities from the menu at the top and select Terminal.

- Type in the following command in the Terminal window and hit Return:
sh <(curl http://www.cleverfiles.com/bootmode/boot.xml)
- Once Disk Drill is downloaded, the app will automatically open.
- Choose your system disk from the list of devices and click Search for lost data to initiate the scan.

- Select the files you wish to restore and click the Recover button.
- Choose a preferred destination for the restored files and click OK (it’s recommended to use a drive different from the one where the files used to be located before deletion).


Option B: Reinstall macOS and Recover Data Using Time Machine
Here are detailed step-by-step instructions to help you reinstall the operating system on your Mac and then recover the missing data from a Time Machine backup.
Step #1. Reinstall Your MacOS
There are two ways to reinstall the operating system on your Mac: either directly from the Recovery Mode menu or from a bootable USB macOS installer drive. While the first option is quicker, the latter is best for situations when you want to install a newer version of macOS (macOS 14 Sonoma, for instance) or when internet recovery doesn’t work on your Mac.
If you choose to reinstall the current version of your Mac’s operating system, here’s what you should do:
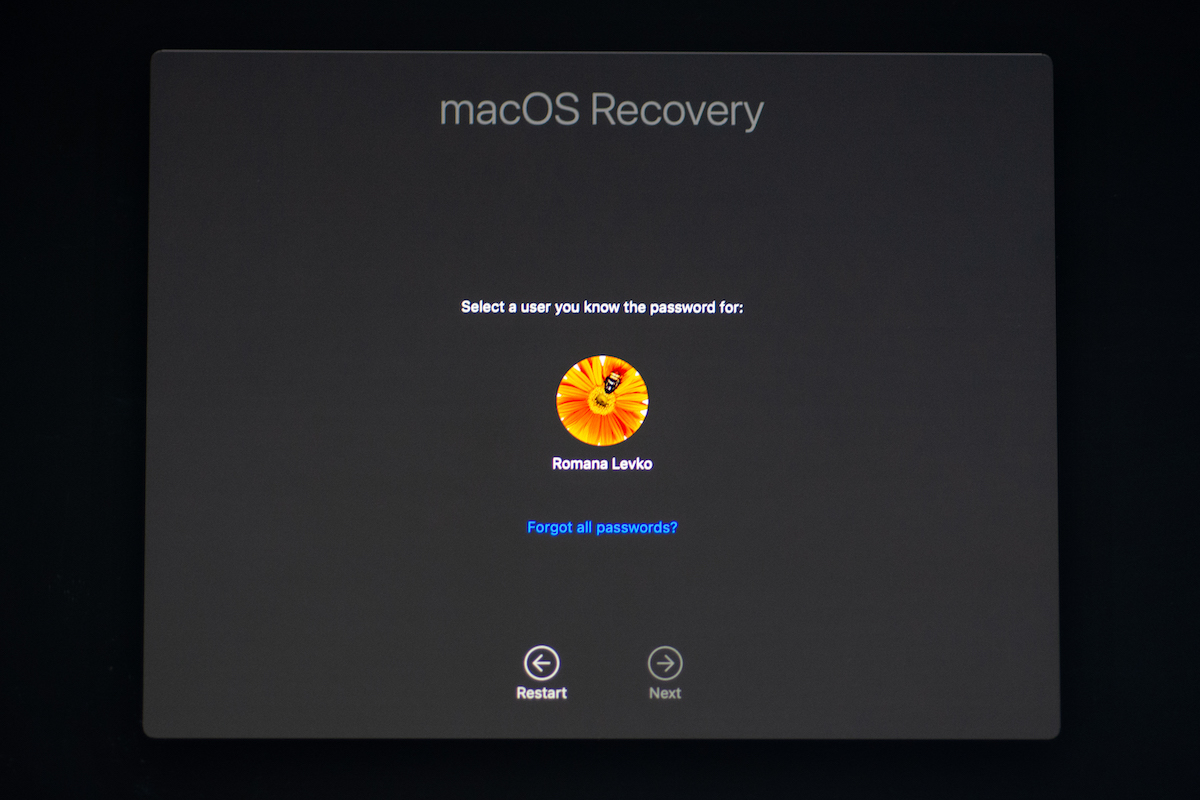
- Boot your computer in Recovery Mode (for Intel-based Macs, turn on your Mac by pressing the power button and holding the Command + R keys; for M1 Macs, press and hold the power button until the Startup Options window appears).
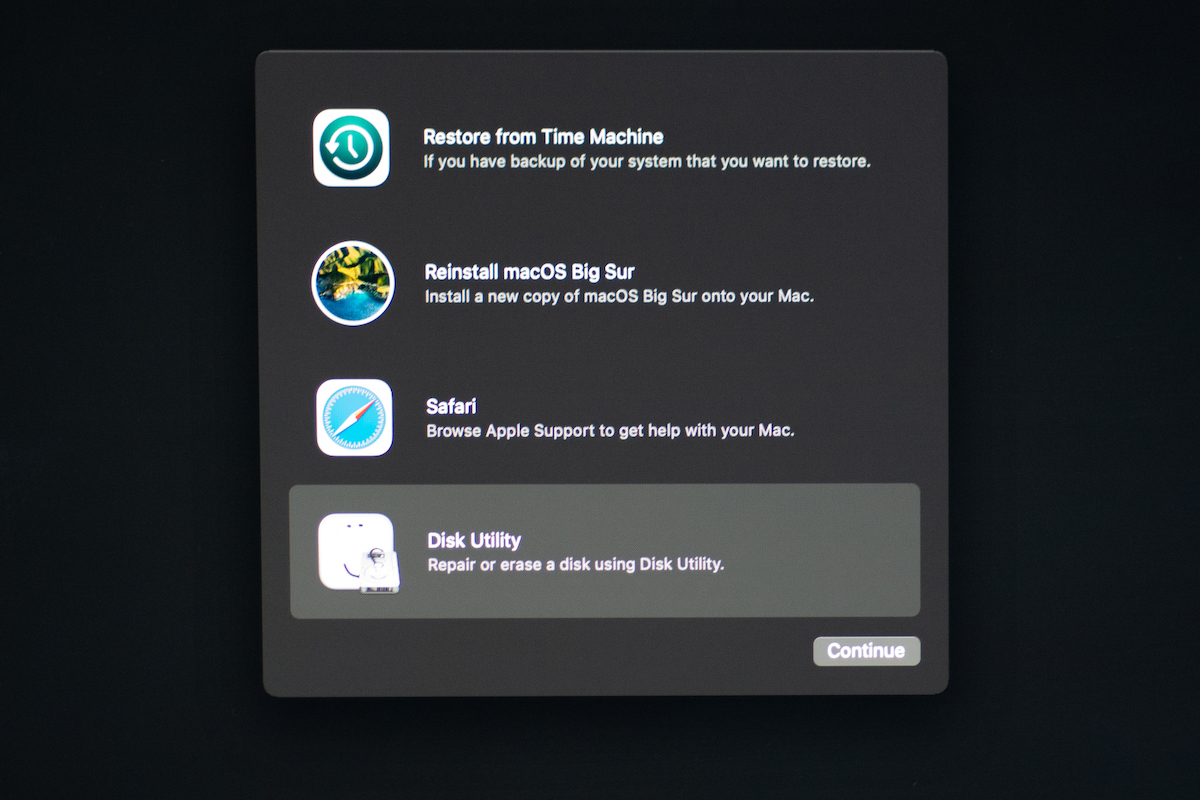
- Next, select the “Disk Utility” option.
- After that, highlight your system volume from the left-side panel, then click the “Partition” button near the top of the window.

- Change the settings to 1 partition and click Apply.
- Close the Disk Utility window to get back to the recovery mode options screen.
- Highlight the “Reinstall macOS” option and click the “Continue” button in the bottom-right corner. From there, follow the instructions provided until the macOS is successfully reinstalled.


To reinstall the operating system on your Mac using a bootable installer, the first thing that you should do is create the bootable USB macOS installer. Once you’ve prepared it, you’ll need to follow these instructions to reinstall macOS on your computer:
- Connect the USB installer to your Mac.
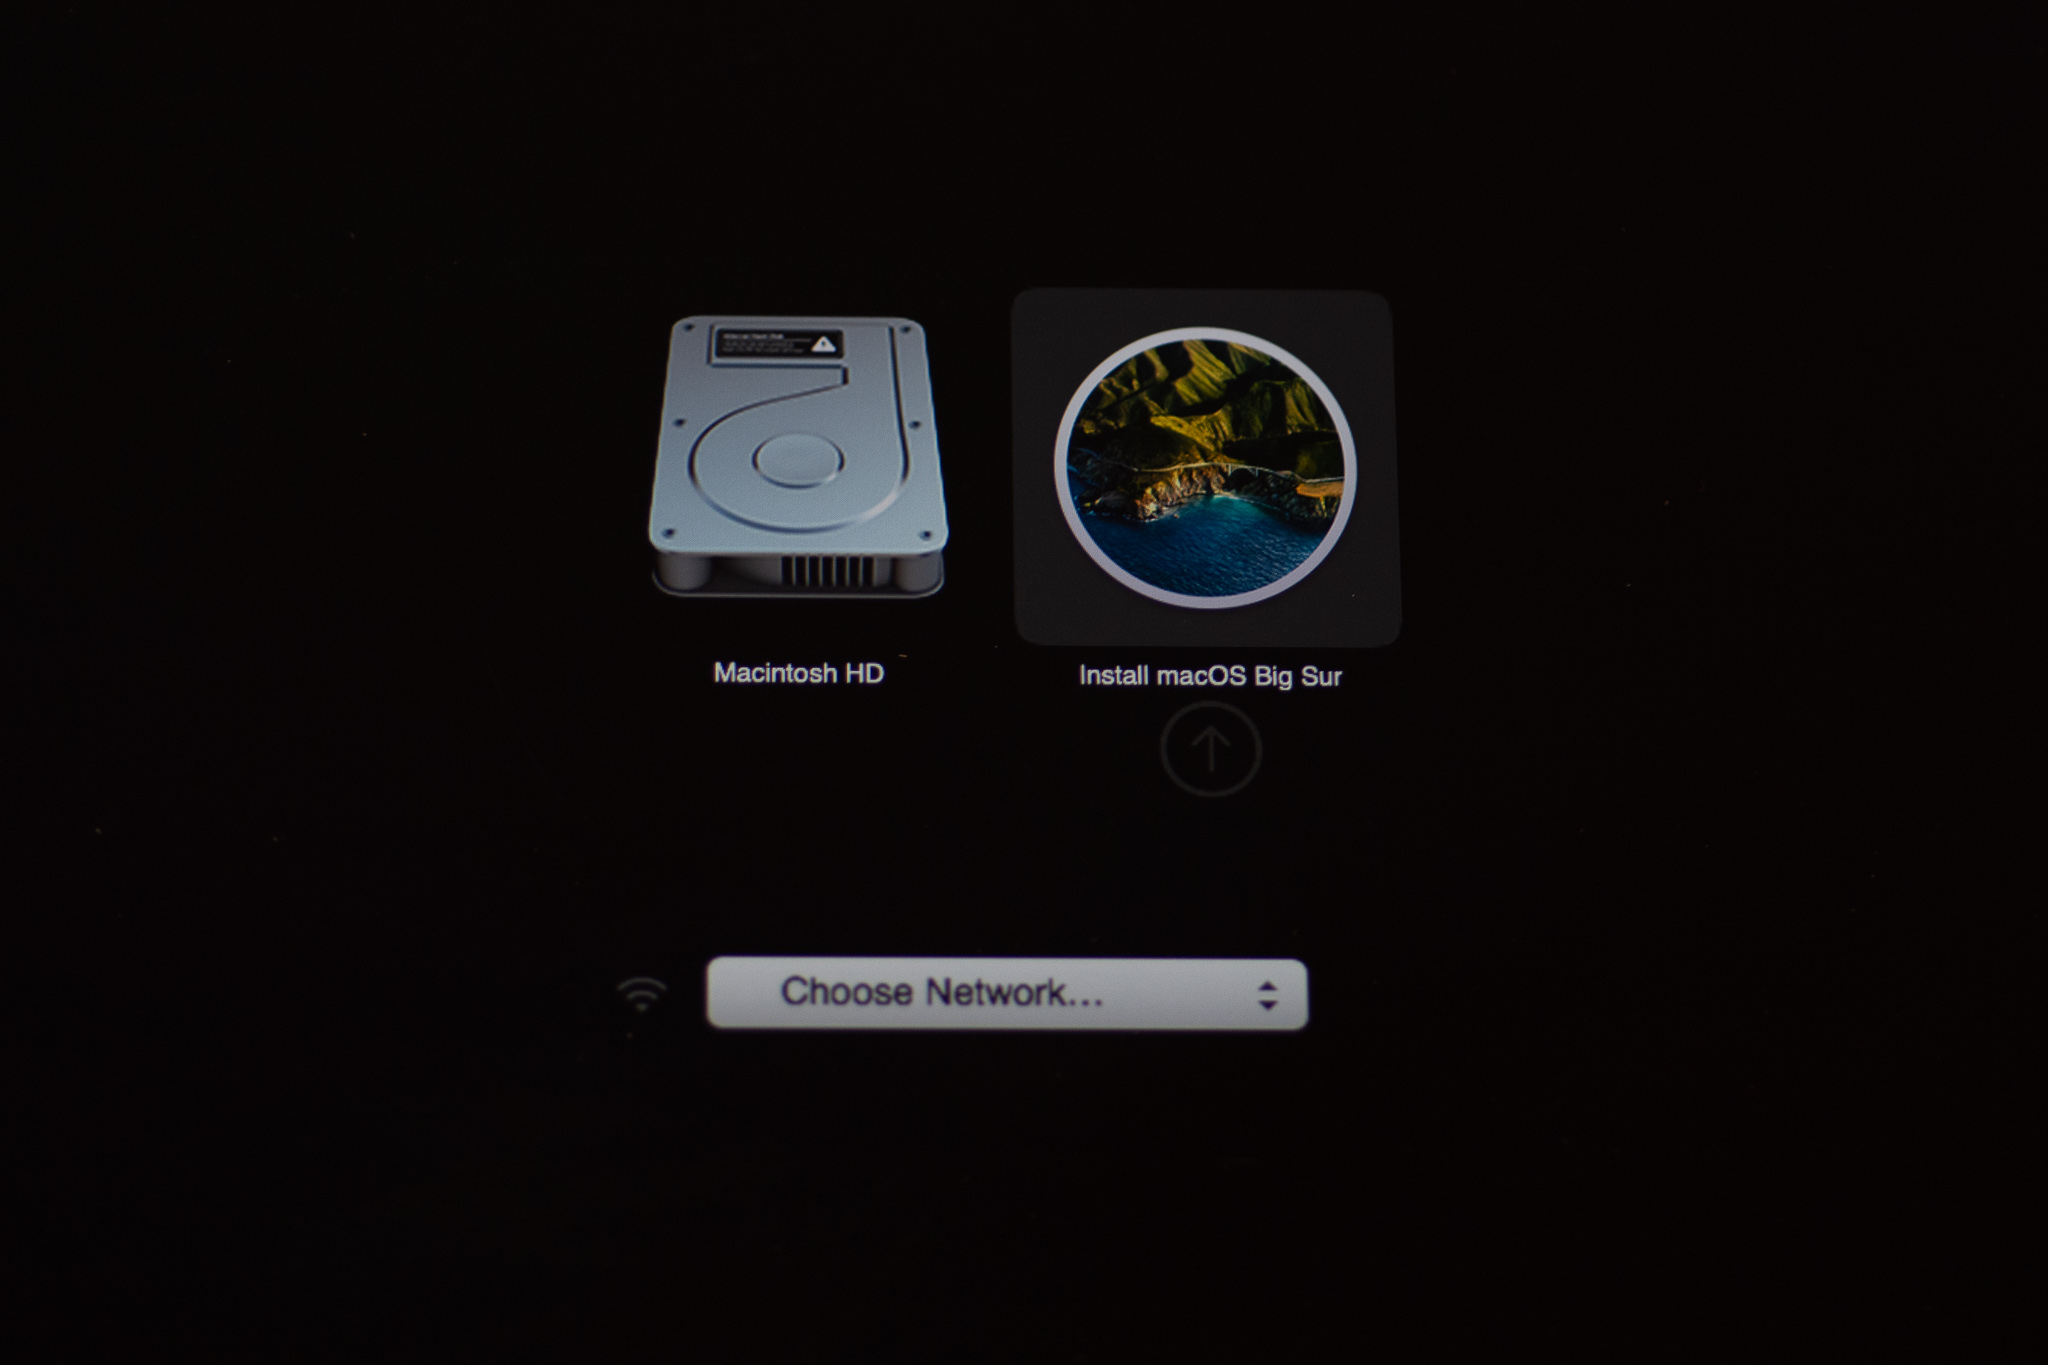
- Power on your Mac (for Intel-based Macs, press and hold the Option/Alt key until the Startup Manager screen appears; for M1/M2 Macs, press and hold the power button).
- Click the volume with the name of your bootable USB drive and hit Return.
- Choose Install macOS and click Continue to start the process.

Step #2. Recover Your Files Using Time Machine
Once you’ve reinstalled the operating system on your Mac and have successfully launched it, you can bring back all the data that was lost because of the deletion with the help of a tool called Time Machine.
So, to restore your entire Mac to the way it was before deletion, follow these instructions:
- Connect the drive with the needed Time Machine backup version to your Mac.
- Boot your computer in Recovery Mode (for Intel-based Macs, turn on your Mac by pressing the power button and holding the Command + R keys; for M1 Macs, press and hold the power button until the Startup Options window appears).
- From the macOS Utilities window, select Restore from Time Machine and click the Continue button.

- Follow the onscreen instructions to finish the recovery process and then restart your Mac.

If you don’t want to restore all of the folders from your Time Machine backup but only specific ones, here’s what you should do:
- Connect the drive with the needed Time Machine backup version to your Mac.
- Click the Time Machine icon at the menu at the top of your screen.
- Select Browse Time Machine Backups from the drop-down menu.

- Use the timeline on the left or the up and down arrows to choose the right backup version.
- Choose the files or folder that you want to recover.
- Click the Restore button to put the data back to the original location.


Time Machine can also be helpful in case you erased or deleted an external hard drive on your Mac and used to back it up with this application.
Several Tips to Prevent Data Loss In the Future
There’s nothing fun in having to deal with recovering data from a deleted or erased hard drive on your Mac. Here are a few tips that you might find helpful in preventing such an issue from happening again in the future:
- ✨ Make sure macOS is up-to-date (if not, run the update)
- ❌ Be more careful when using Disk Utility on your Mac
- 💽 Regularly backup your computer
- ⚙️ Monitor the S.M.A.R.T. status of your internal and external hard drives
- 🦠 Install antivirus software on your Mac
FAQs
Yes, it is possible to recover a hard drive after it’s been erased. After all, once you delete a hard drive, the data within it isn’t permanently wiped. Instead, it’s removed from the directory index and rendered inaccessible to the macOS, giving the illusion that the files are gone for good. But they actually stay on the hard drive until overwritten by new data. With that said, there are methods you can implement in order to restore these files, and the best way to go about it is to use an effective data recovery program.
Here’s what you should do to reinstall macOS on your computer after its startup disk has been erased:
- Create a USB macOS bootable installer and plug it into your Mac.
- Power on your Mac (for Intel-based Macs, press and hold the Option/Alt key until the Startup Manager screen appears; for M1 Macs, press and hold the power button).
- Choose your bootable USB drive to boot from it and hit Return.
- Choose Install macOS and click Continue.
Conclusion
We know how overwhelming it can be to deal with such a data loss situation. But even though erasing an entire hard drive on your Mac might sound like something impossible to fix, there are effective and simple data recovery methods for you to try.
As long as you act quickly and don’t do any more damage than there has already been done, you should be able to successfully bring back your missing data.