Table of Contents
Are you trying to declutter your iPhone to free up storage space, but find it impossible to do so because your photos reappear soon after you delete them? You’re not the first person to have experienced this issue, and this article is designed to be the ultimate guide when your iPhone won’t delete photos.
We’ll first explain the possible reasons why iPhone photos won’t delete. Once we’ve demystified the “why,” we’ll move on to the “how-to,” providing you with several tried-and-tested solutions that work across a range of iPhone models—from the iPhone 11 and older to the latest iPhone 15.
Why Photos Won’t Delete from iPhone?
The annoying issue with photos that won’t delete from iPhone is far more common than it might seem. In fact, many users have raised their concerns and sought solutions in various online forums like this Apple discussion, or this thread here, or yet another one here.
While the problem can technically arise from a myriad of causes, the main culprits are either issues with synchronization or a lack of free space on your device’s memory. Below is a table to help you understand these issues more clearly:
| Reasons | Description |
| iPhone memory is full | When you try to delete photos, they are not immediately removed but are instead moved to a “Recently Deleted” album. If your iPhone storage is almost full, iOS may not be able to perform even this simple operation. The solution is to free up some storage space by emptying the Recently Deleted folder. |
| iCloud synchronization issues | If iCloud Photos is enabled, the photos you delete from your iPhone might reappear due to synchronization issues. Turning off iCloud Photos or adjusting the settings could solve the problem. Make sure you’re running the latest iOS version to minimize this issue. |
| Finder or iTunes sync issues | Finder or iTunes could be automatically trying to recover the photos you’ve deleted during each synchronization process. This is counterintuitive when you’re trying to free up space. To solve this, you may need to adjust or disable the photo synchronization settings in Finder or iTunes. |
| iOS glitches | Sometimes, it’s not you; it’s your iPhone—or more specifically, the operating system. Glitches in iOS 13, 14, 15, or 16 could also make it so that your pictures won’t delete from iPhone. A software update or reset might be the fix you need. |
In practice, you may have to try a combination of these methods to finally see those persistent images disappear for good. But don’t worry: tackling these issues is generally straightforward and won’t consume much of your time. Let’s get started!
How to Delete Photos That Won’t Delete from iPhone
Now that we’ve gone over the potential reasons why photos won’t delete from your iPhone, you’re ready to see the solutions. We’ve evaluated each solution based on three critical criteria: its simplicity, efficiency, and the time it takes to implement. Feel free to use our ratings to help you decide which method to try first.
Method 1: Restart Your iPhone
| Method simplicity | Method efficiency | Time to implement |
| Very Easy | Moderate | Fairly Quick |
Sometimes, the most straightforward solution can be the most effective, which is why restarting your iPhone should be the go-to solutions when photos won’t delete from your iPhone.
This method is very easy to execute, taking little time or effort, but its efficiency is only moderate. While it can resolve minor glitches or temporary software hiccups that may be hindering your ability to delete photos, it doesn’t tackle the root causes of more complicated issues like iCloud synchronization errors or storage problems.
Still, it’s a great starting point, and here’s all that you need to do:
- For iPhone X, 11, 12, 13 or later: Press and hold either volume button and the side button, slide to turn off, wait 30 seconds, and press the side button until the Apple logo appears.
- For iPhone 6, 7, 8 or SE (2nd or 3rd generation): Press and hold the side button, slide to turn off, wait 30 seconds, and press the side button until the Apple logo appears.
- For iPhone SE (1st generation), 5 or earlier: Press and hold the top button, slide to turn off, wait 30 seconds, and press the top button until the Apple logo appears.
Once your phone restarts, try deleting the problematic photos again to see if the issue has been resolved.
Method 2: Empty the Recently Deleted Album
| Method simplicity | Method efficiency | Time to implement |
| Very Easy | Significant | Very Quick |
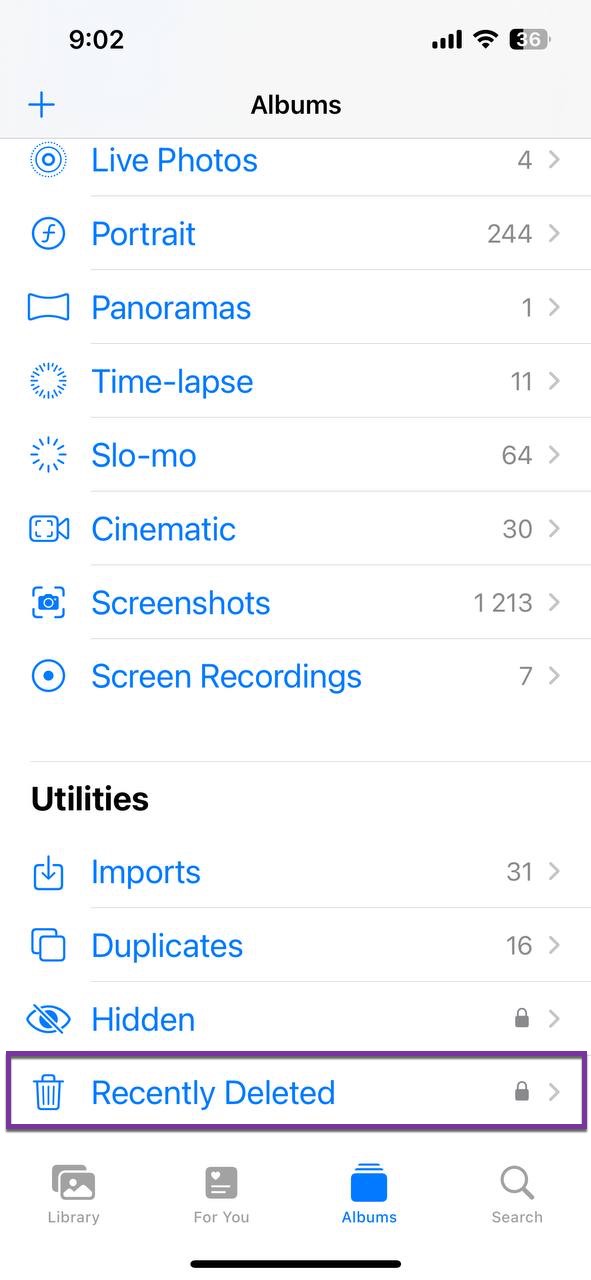
When you delete a photo on your iPhone, it doesn’t get removed immediately but instead moves to a “Recently Deleted” album, where it stays for up to 30 days. If this album is full, you might encounter issues when trying to delete new photos.
Fortunately, you can very easily and quickly empty the Recently Deleted album to solve the source of the problem. Here’s how:
- Open the Photos application on your iPhone.
- Navigate to the Albums tab.
- Scroll down and select the Recently Deleted album at the bottom.

- Tap Select, then tap the three horizontal dots in the bottom-right corner, and finally tap the Delete All option.

- Confirm your decision to permanently delete all photos.
Now that you’ve emptied the Recently Deleted album, you should be able to organize photos on iPhone without any problems—at least if a lack of storage space was the culprit behind your photo deletion issues in the first place.
Method 3: Free Up iPhone’s Memory
As explained earlier in this artifice, insufficient storage space can make it impossible to delete photos. A straightforward fix is to clear the cache of applications that consume a lot of space or to get rid of apps you no longer use. Below, I’ve broken down these methods.
Clear the Cache
| Method simplicity | Method efficiency | Time to implement |
| Fairly Easy | Significant | Fairly Quick |
Apps like Facebook, Telegram, and Safari gobble up more space than you’d expect because they store various temporary files to speed things up. Over time, these can accumulate and eat into your storage space, making it difficult to delete photos or do anything else that requires additional memory. Clearing the cache for these applications can free up this vital storage space.
The first cache you should clean is the one created by Safari because it’s the only cache that can be conveniently emptied directly from the Settings app:
- Open the Settings application on your iPhone.
- Navigate to the Safari category.

- Scroll down and tap the Clear History and Website Data option.

- Confirm your decision to clear Safari cache.
Other caches, such as those created by Facebook and Telegram have to be cleared from within the respective apps’ settings. For a comprehensive guide on how to clear Facebook’s cache, you can refer to this Facebook help note. As for Telegram, the company provides a detailed explanation on managing cache on its blog.
Get Rid of Unnecessary Apps
| Method simplicity | Method efficiency | Time to implement |
| Very Easy | Significant | Moderate to Very Quick |
One quick way to free up storage on your iPhone is by getting rid of apps you no longer use. The time it takes to implement this method will largely depend on how many apps you decide to say goodbye to by either uninstalling or offloading them by following these steps:
- Uninstall: Press and hold the app icon, click “Remove App,” and then select “Delete App.”

- Offload: Go to Settings > General > iPhone Storage. Tap on the app you want to offload and then tap “Offload App.”

Both methods will free up space, but offloading will save your app’s data for when you reinstall it later, allowing you to pick up right where you left off without losing any progress or settings. This is particularly useful for apps you need only once in a while but don’t want to reinstall and set up every time.
Method 4: Disable iCloud Photos Synchronization
| Method simplicity | Method efficiency | Time to implement |
| Moderate | Significant | Significant |
The iCloud service is excellent for ensuring your photos are available across all your devices, but sometimes this very feature can be the villain in the story where your photos won’t delete from iPhone. Why? Because all kinds of synchronization issues can make it so that photos won’t delete off iPhone.
Unfortunately, Disabling iCloud Photos is not a quick fix if you have the Optimize iPhone Storage feature turned on. This setting stores full-resolution photos and videos in iCloud and keeps only smaller, space-saving versions on your device. Before you disable iCloud Photos, you’ll need to download the original, full-resolution versions of all the photos and videos you want to keep. Depending on your internet speed and the number of files, this process can be time-consuming.
If you’re willing to wait, then this is what you need to do:
- Open the Settings app, tap your name and navigate to iCloud > Photos.
- Select the Download and Keep Originals option.

- Keep your device connected to Wi-Fi and plugged into a charger until the download is complete.
- Toggle off the Sync this iPhone option.
Now, there’s no risk of iCloud randomly downloading photos that you’ve previously deleted, preventing the issue where the deleted photo comes back.
Method 5: Disable Finder or iTunes Synchronization
| Method simplicity | Method efficiency | Time to implement |
| Fairly Difficult | Moderate | Moderate |
If you’re a Mac or PC user who’s used iTunes or Finder to manage your iPhone, the reason why photos won’t delete from your iPhone may have everything to do with the phone-to-computer synchronization process, which can force your iPhone to redownload deleted photos from a backup.
We’re mentioning this method at the end of the article because it’s more complicated than any of the previously described methods since it can’t be performed directly on your iPhone. Still, it’s definitely something you should try if you’ve exhausted all other options.
To disable iPhone synchronization in Finder:
- Connect your iPhone to your Mac using a cable.
- Locate your iPhone in the Finder sidebar on the left.
- Select your iPhone and navigate to the General tab.
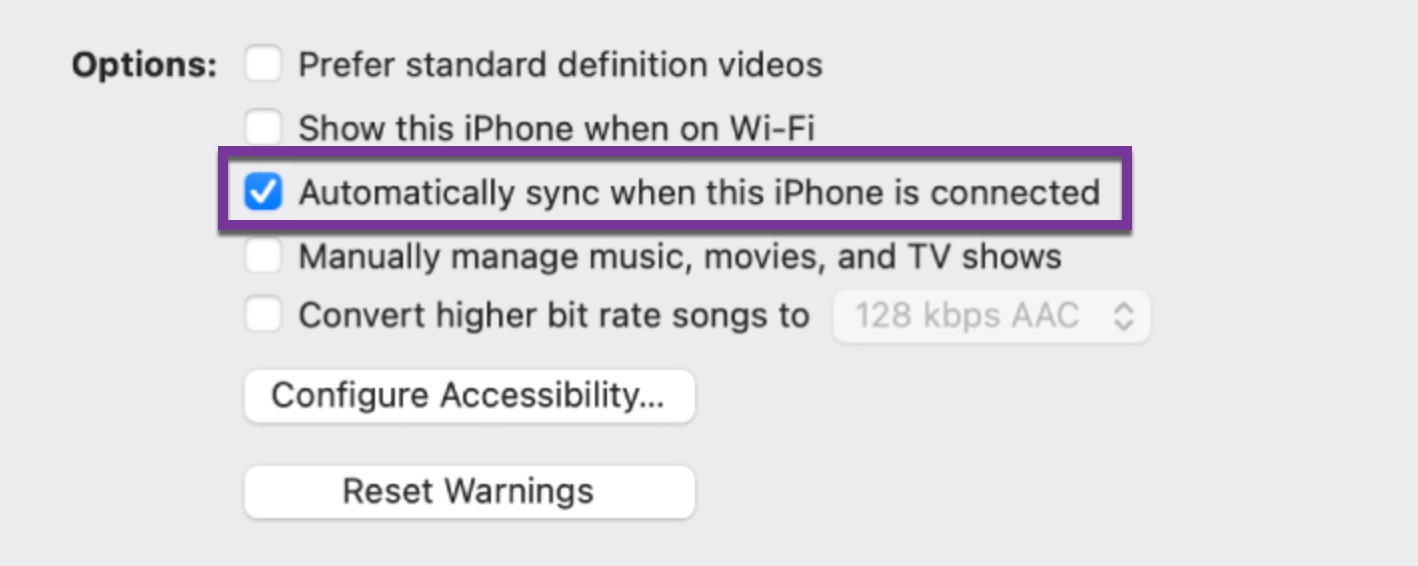
- Disable the Automatically sync when this iPhone is connected option.

- Click on the Apply button at the bottom-right to save the changes.
To disable iPhone synchronization in iTunes:
- Connect your iPhone to your Mac using a cable.
- Launch iTunes and select your iPhone.
- Navigate to the Summary section.
- Uncheck the box next to Automatically sync when this iPhone is connected.

- Click Apply at the bottom to implement these changes.
With this done, your device won’t automatically start syncing every time it’s connected to the computer, thereby preventing accidental photo restoration.
FAQ
Conclusion
Struggling with pictures that won’t delete from your iPhone can be extremely frustrating, especially when you need to free up storage space. Fortunately, there are multiple methods available to tackle this issue, and we’ve described (and rated) the most effective ones in this article. With a bit of patience and persistence, you should be able to get your iPhone to behave as it should.


